oh nothing its just if you were updating other packs i knew why my pack was being ignored. Which i totally get cause i uploaded it on a thursday.[DOUBLEPOST=1405745041][/DOUBLEPOST]And you were the only 3rd party member on when he said that it was updated so i assumed you
[1.6.4]Crash Landing [Hardcore, HQM] version 1.1.x BETA STABLE
- Thread starter Iskandar
- Start date
-
The FTB Forum is now read-only, and is here as an archive. To participate in our community discussions, please join our Discord! https://ftb.team/discord
You are using an out of date browser. It may not display this or other websites correctly.
You should upgrade or use an alternative browser.
You should upgrade or use an alternative browser.
oh nothing its just if you were updating other packs i knew why my pack was being ignored. Which i totally get cause i uploaded it on a thursday.[DOUBLEPOST=1405745041][/DOUBLEPOST]And you were the only 3rd party member on when he said that it was updated so i assumed you
Packs usually submitted after Wednesday night will not make that week's cycle. We are working to improve that soon.
Am I going crazy, or did the rate of mob spawning get a massive nerf between 1.1.0 and 1.1.1? In 1.1.0, the night would be filled with mobs that would make a b-line for your position (good if you have a trap set up). In 1.1.1, hardly any mobs spawn even in the darkest of nights, and the mobs that do spawn meander about and don't care much about you.
What changed? I have been comparing the two versions configs, but I don't know which mods have control over vanilla spawn rates. The lack of zombie flesh and bones made it impossible 'for me' to survive this harsh map. Was enjoying 1.1.0 though!
What changed? I have been comparing the two versions configs, but I don't know which mods have control over vanilla spawn rates. The lack of zombie flesh and bones made it impossible 'for me' to survive this harsh map. Was enjoying 1.1.0 though!
Am I going crazy, or did the rate of mob spawning get a massive nerf between 1.1.0 and 1.1.1? In 1.1.0, the night would be filled with mobs that would make a b-line for your position (good if you have a trap set up). In 1.1.1, hardly any mobs spawn even in the darkest of nights, and the mobs that do spawn meander about and don't care much about you.
What changed? I have been comparing the two versions configs, but I don't know which mods have control over vanilla spawn rates. The lack of zombie flesh and bones made it impossible 'for me' to survive this harsh map. Was enjoying 1.1.0 though!
The mod that made it have tons of mobs without over doing it is Zombie Awareness mod. It's disabled in 1.1.1.
Is it just disabled or completely removed from the pack?The mod that made it have tons of mobs without over doing it is Zombie Awareness mod. It's disabled in 1.1.1.
Is it just disabled or completely removed from the pack?
disabled. you can just remove the .disabled on the file Zombie Awareness v1.91 Mod for MC v1.6.4.zip under mods folder
Despite some people having lag problems with zombie awareness, (i personaly didn't encounter any). I think the mod is "needed" for the pack, you make a mistake or forget to get back at night: you are swarmed; but if clever and cautious enough lots of loots to establish yourself and drink on this hot hostile planet.
So, I've just been offered, and gladly accepted, to become a listed 3rd party pack. Which means that fairly soon you won't need to enter a pack code to find my pack. Which means rather little for those already playing, but is a good thing for all the new people finding the pack!

So, I've just been offered, and gladly accepted, to become a listed 3rd party pack. Which means that fairly soon you won't need to enter a pack code to find my pack. Which means rather little for those already playing, but is a good thing for all the new people finding the pack!
Congrats!! People will surely enjoy playing this pack

Congrats! This pack is really deserving the popularity it is getting.So, I've just been offered, and gladly accepted, to become a listed 3rd party pack. Which means that fairly soon you won't need to enter a pack code to find my pack. Which means rather little for those already playing, but is a good thing for all the new people finding the pack!
@Iskandar This is a fun and challenging pack! It's a really great and flavorful alternative to skyblock and survival island. Thanks for the hard work.
@tetshio Yep, zombie awareness was the difference. I didn't know that it affected(?) skeleton and zombie spawn rates. Thanks for the heads up!
@Kylie I agree completely that this map really does need a steady supply of bones / rotten flesh (at least at first). Particularly the flesh for water. With that one mod disabled, it went from fun hardcore challenge to crazy descending spiral of death hardcore challenge. The margin of error seemed just too small, but perhaps I just suck at managing my time.
Yeah, I've been somewhat lazy with that lately. I'll try to fix that for next week.Packs usually submitted after Wednesday night will not make that week's cycle. We are working to improve that soon.
Guide to an Efficient Start in Crash Landing 1.1.1
(or How to stop mDiyo from dying all the time") )
)
This is an attempt of a detailed walkthrough to make (hopefully) the first couple days in Crash Landing a bit easier. Some of it will look familiar, especially Tetshio and Landstryder have excellent YouTube series out there. If in doubt, anything shown here is their idea.
Also, you have to enable the Zombie Awareness mod before the first night. Unless your computer can't handle it, you do want to have plenty of mobs around for their resources.
Day 1: The Basics.
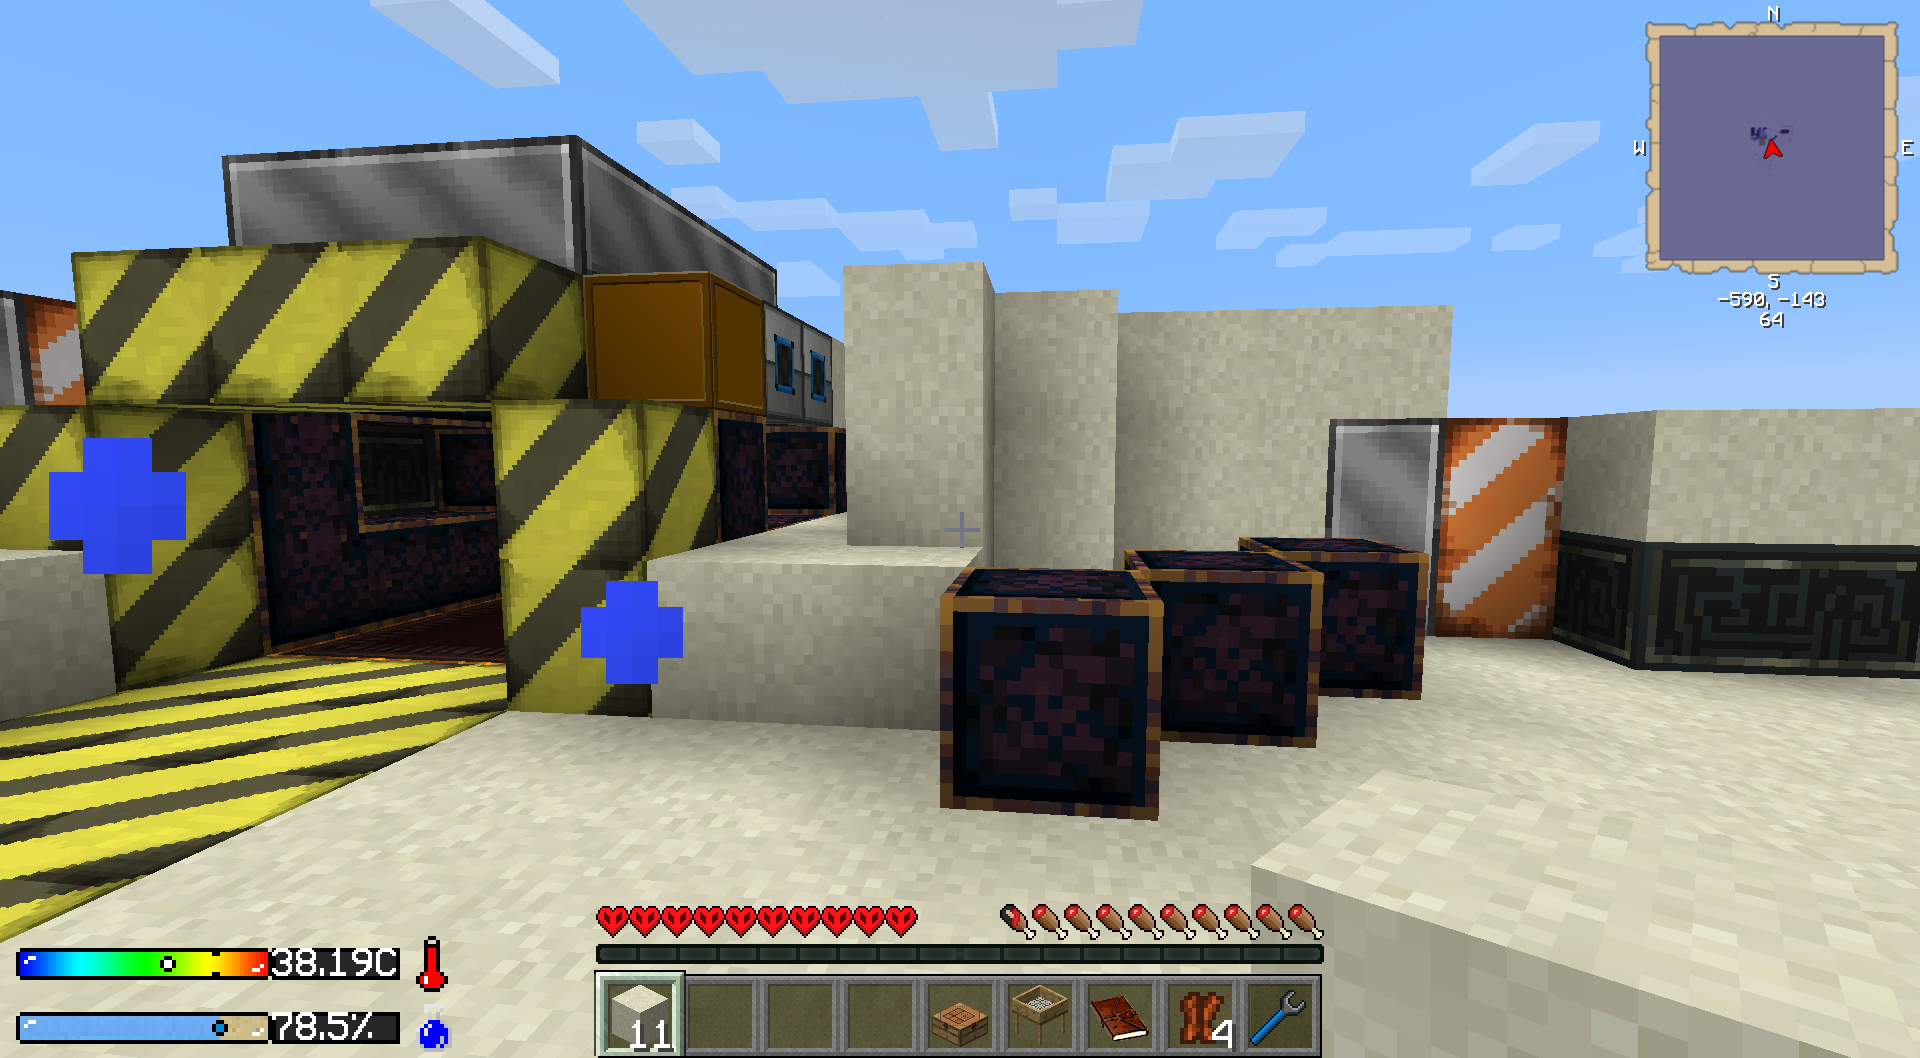
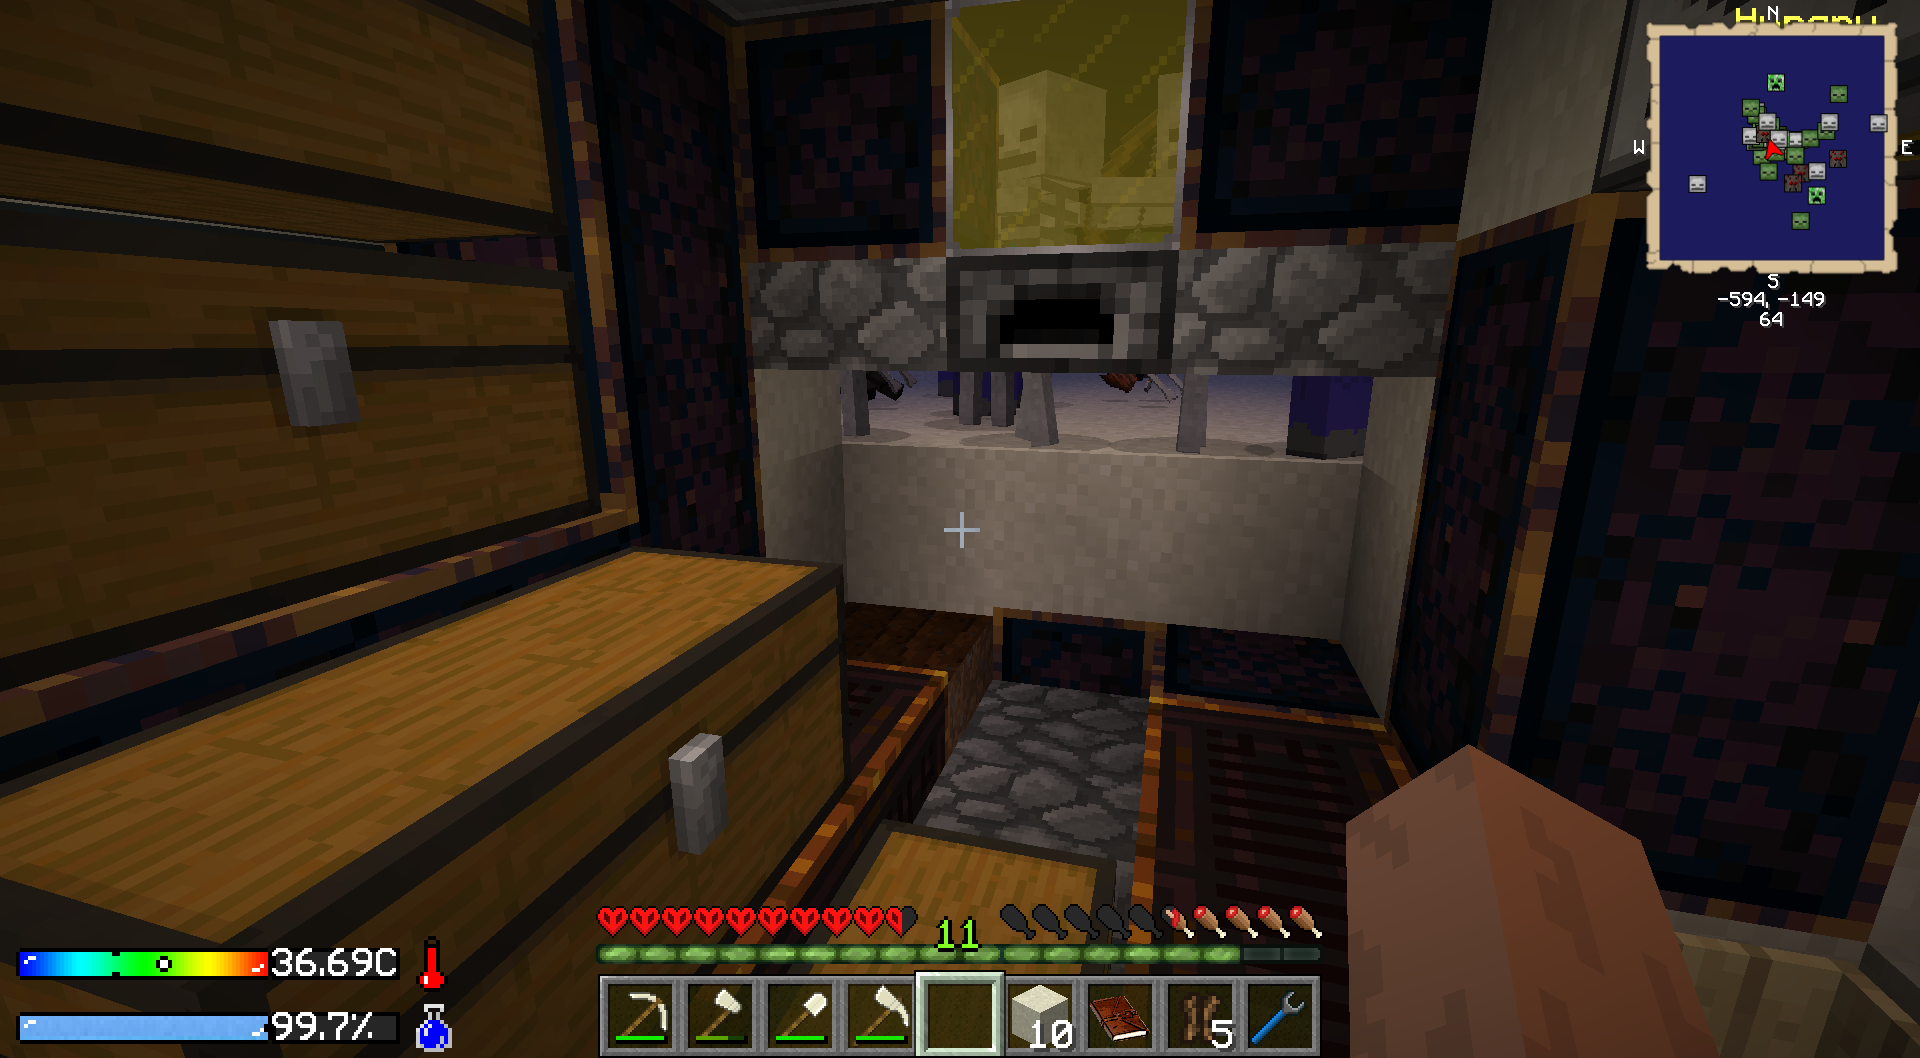
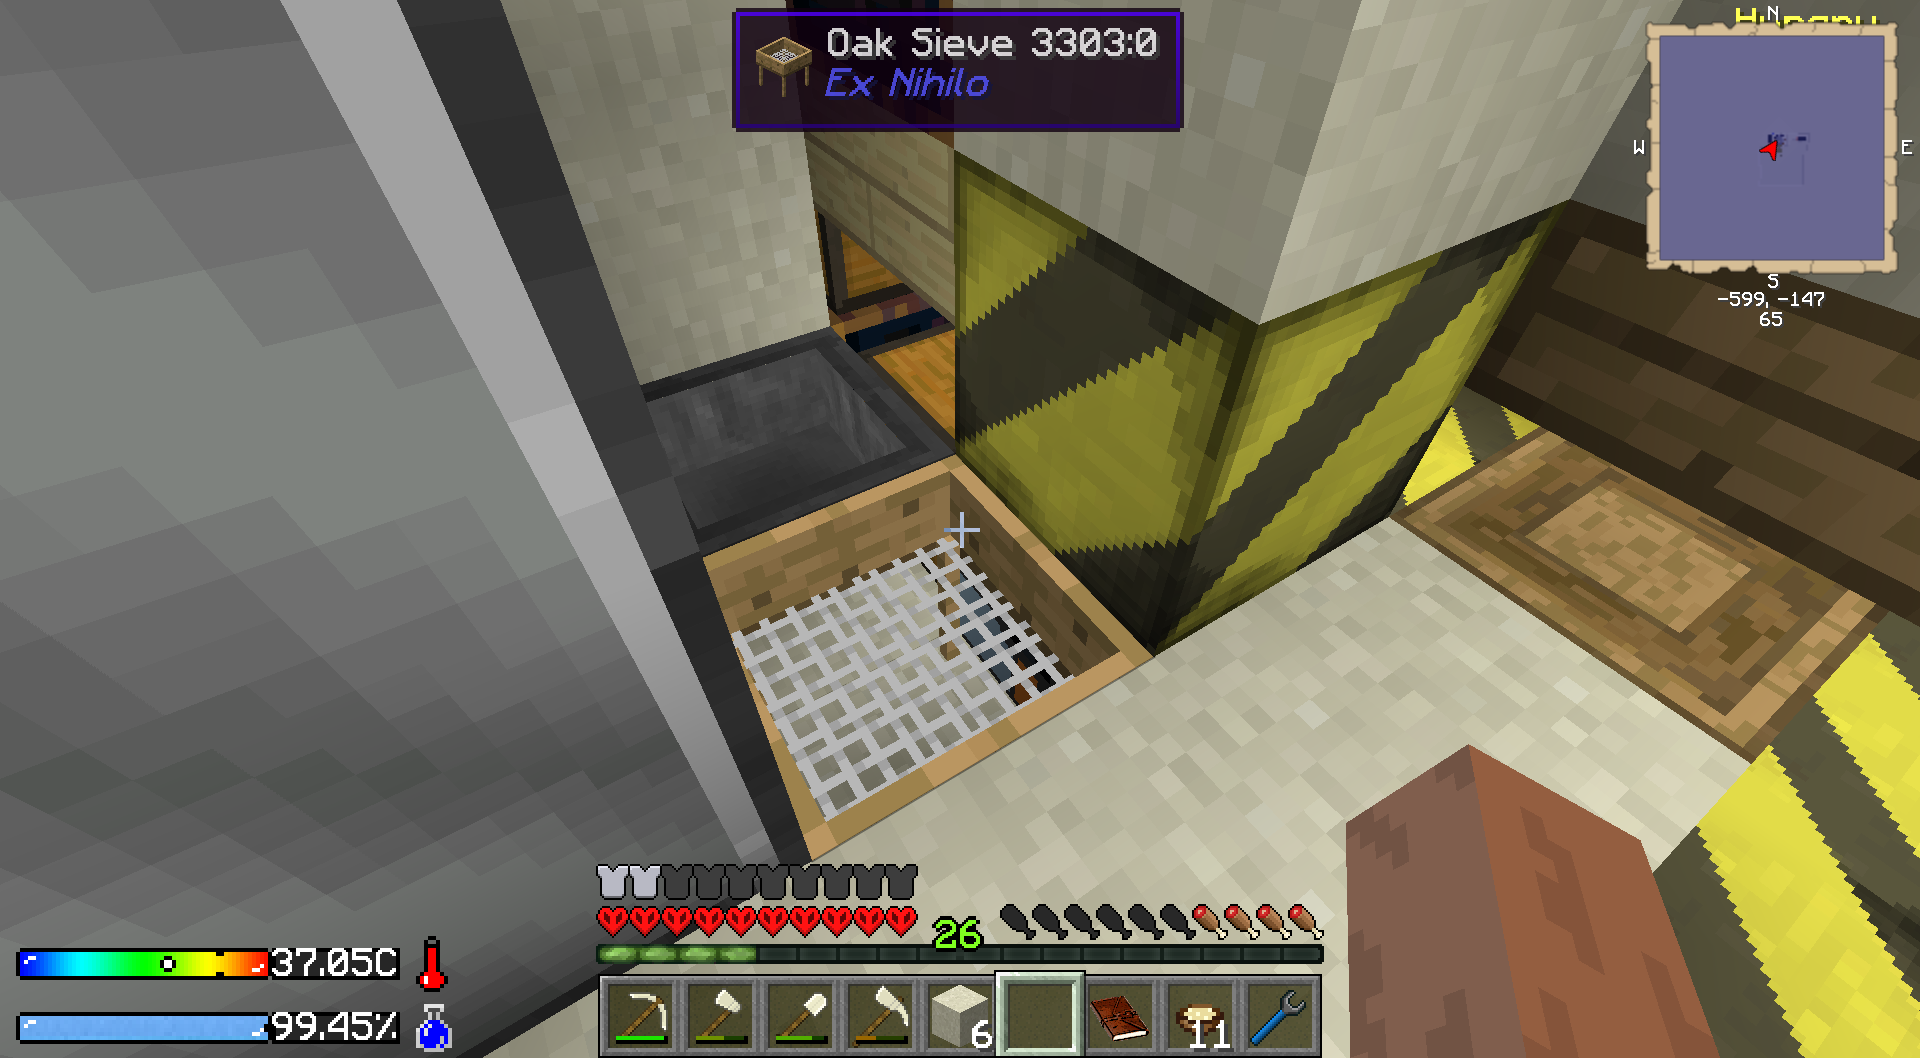
1. Get the following items from the chest: Crescent Hammer, food, quest book, QDS, Workbench, Sieve and an energy cell into the inventory.
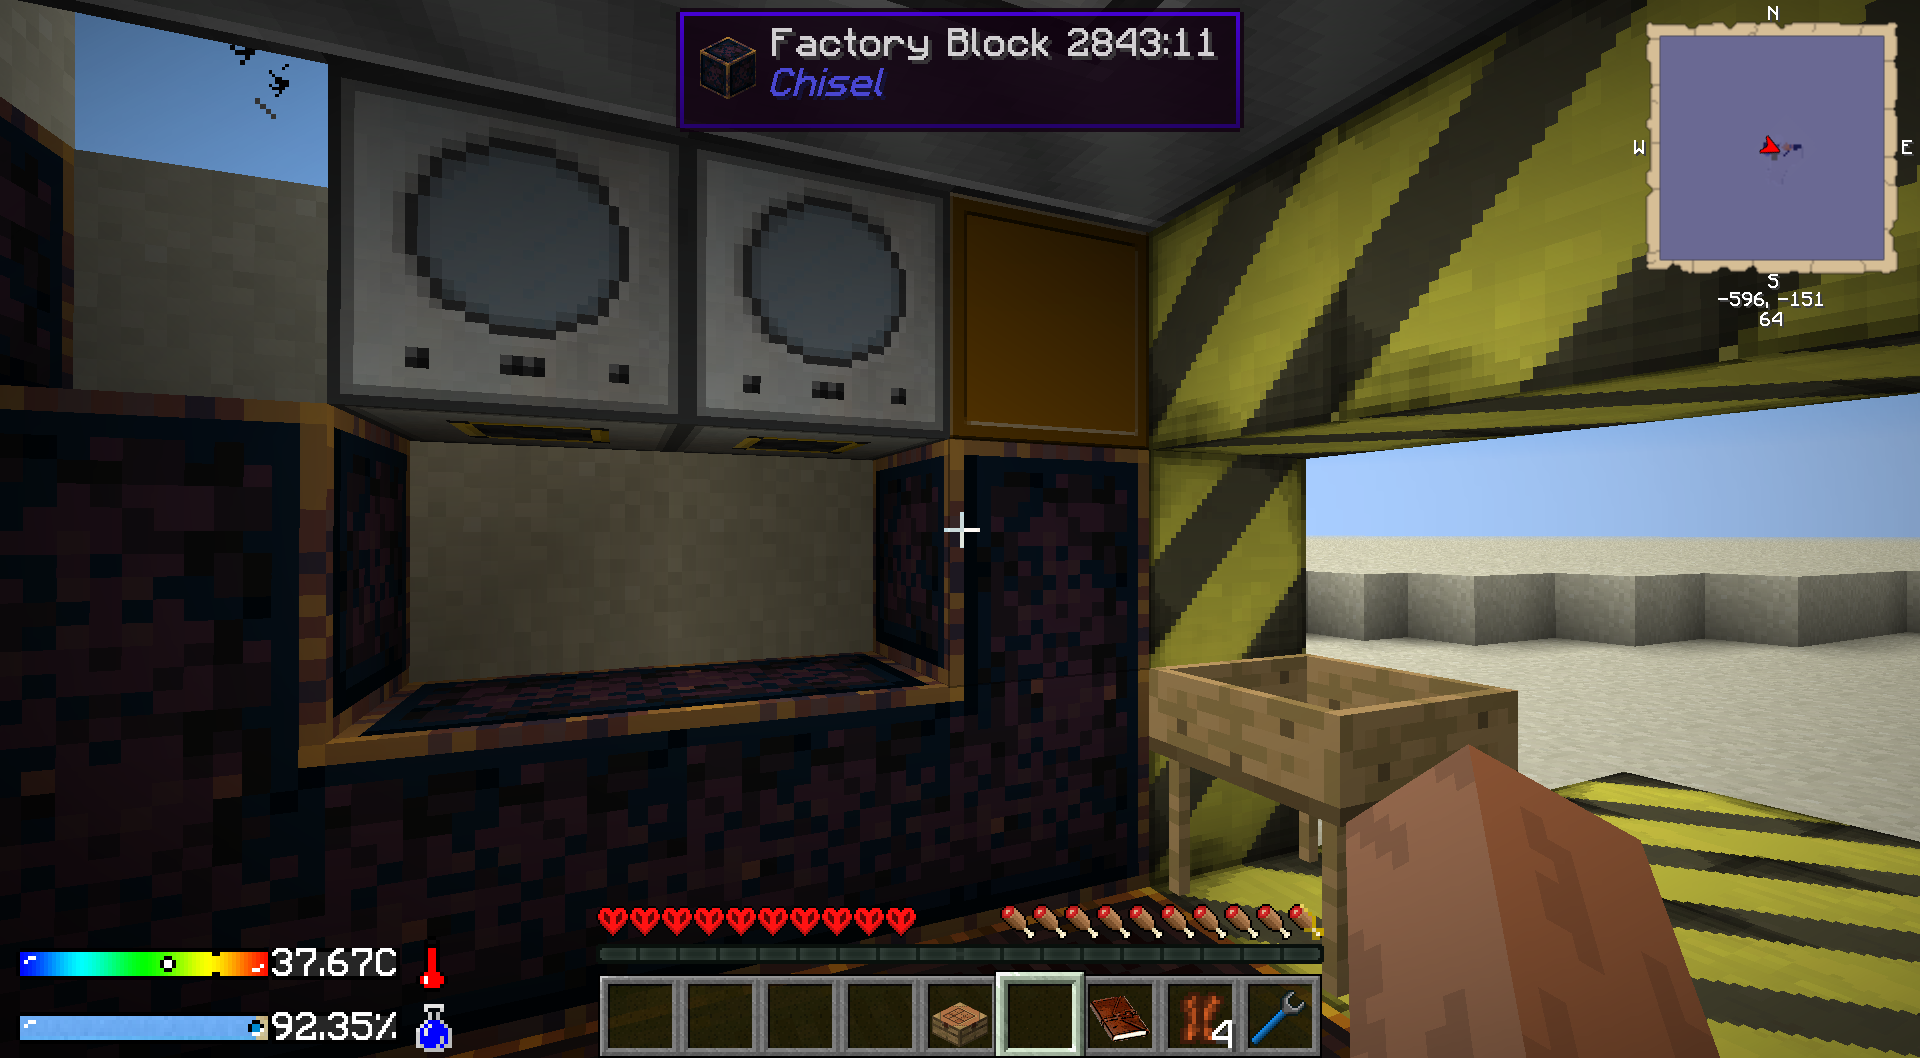
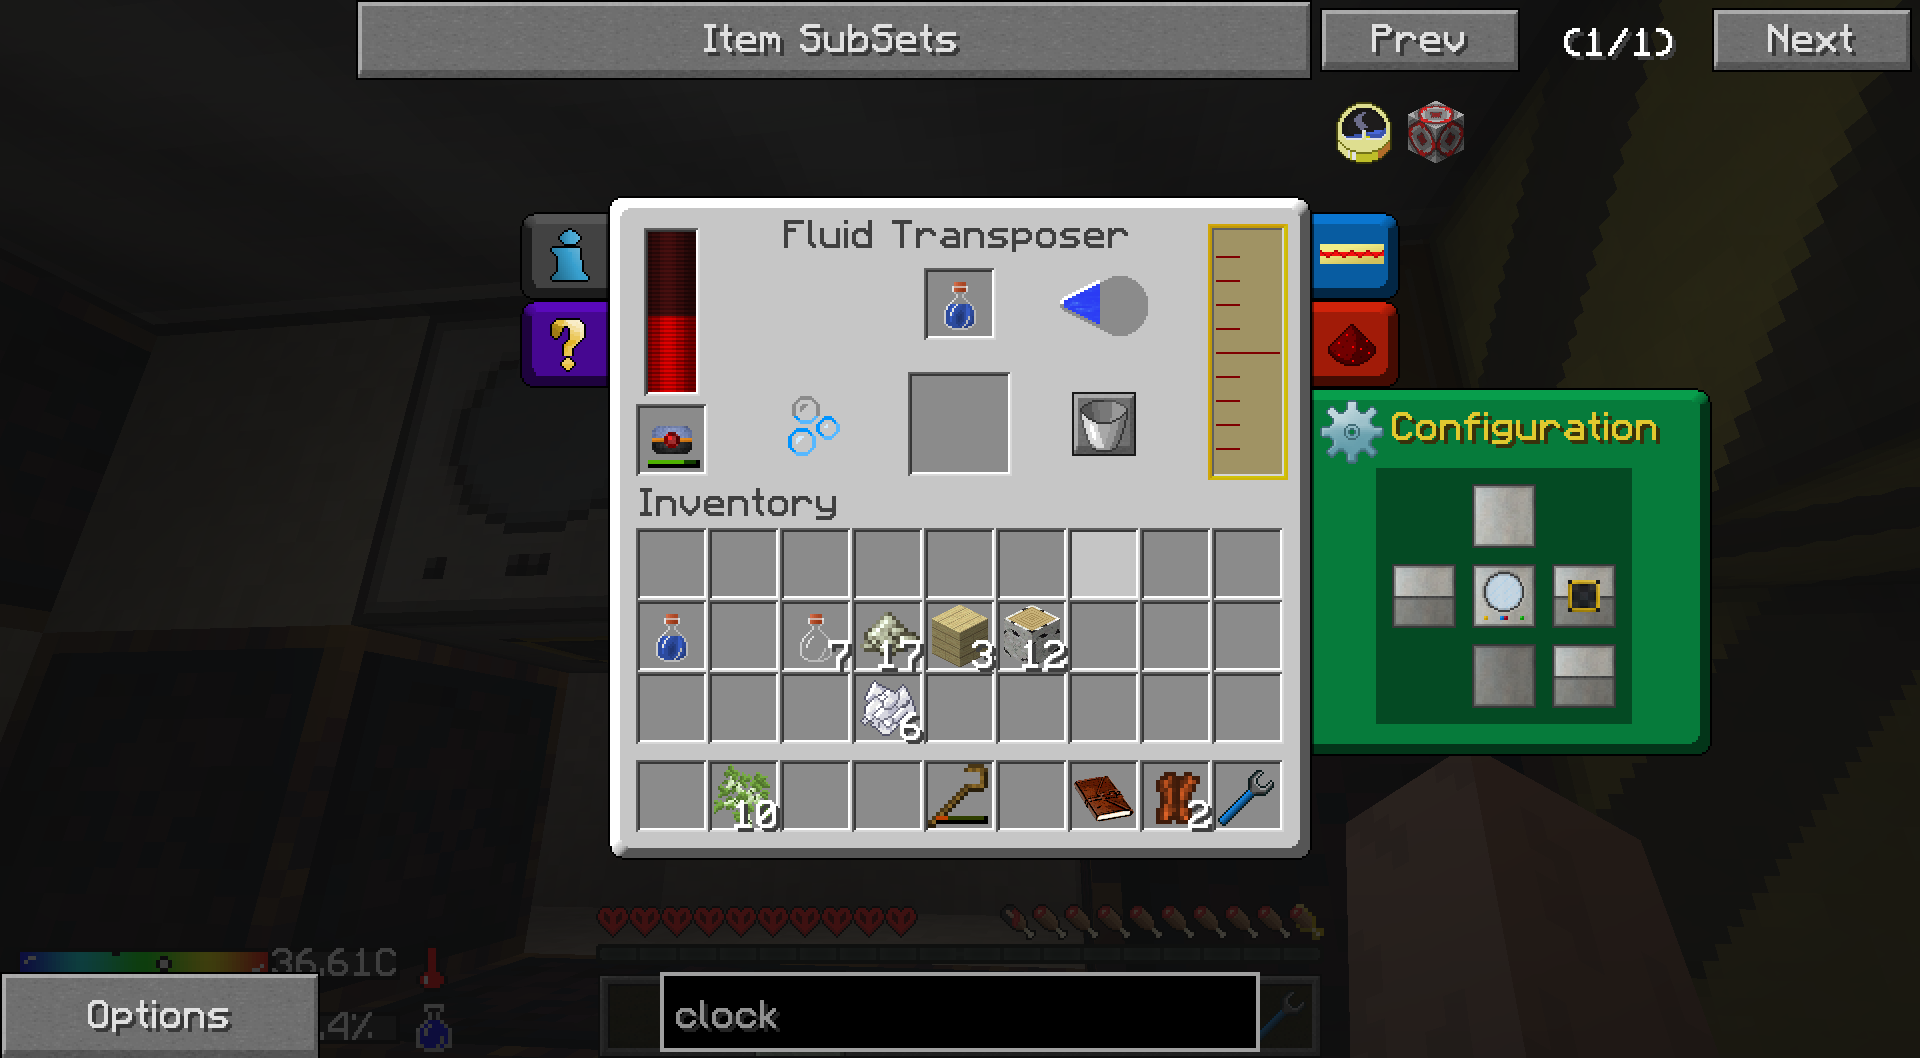
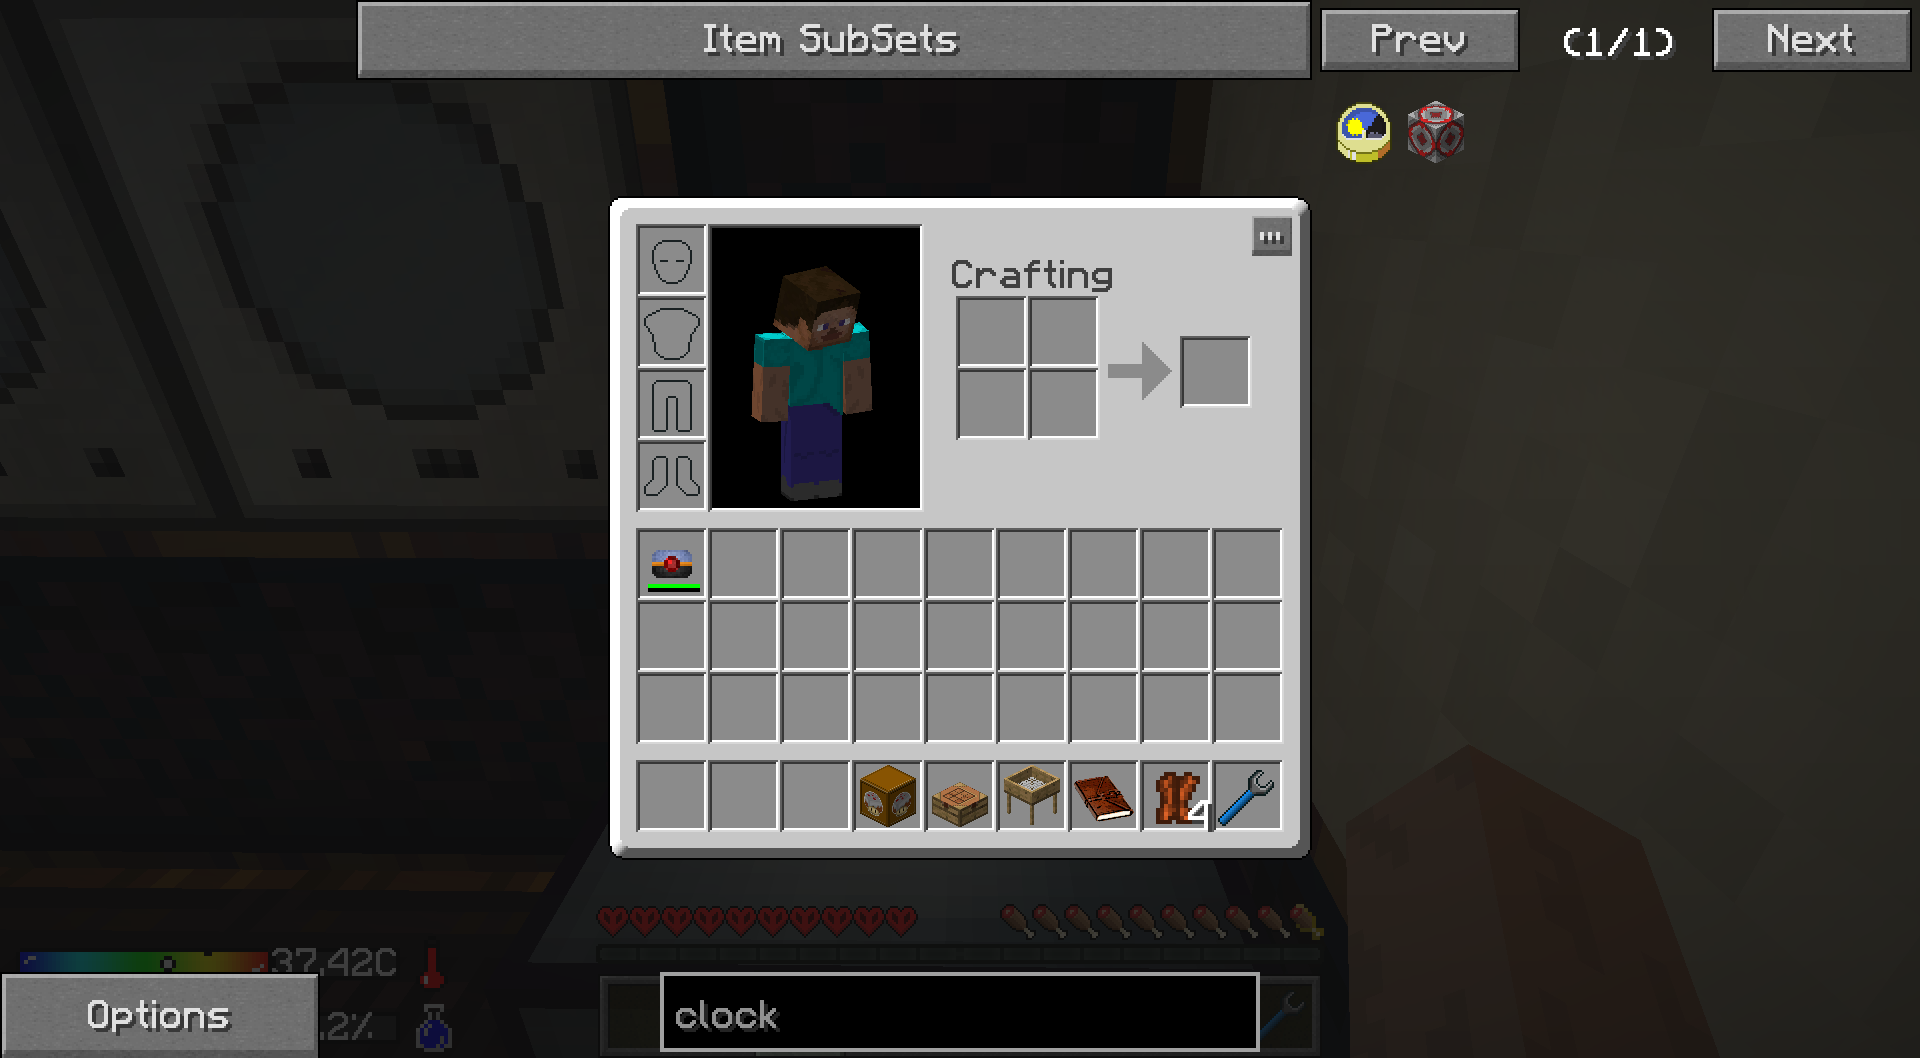 2. Use the wrench to get the Fluid Transposers, turn around and use them to close the opening in the wall. Put the QDS to one of the sides as well. Throw the energy cell into the transposer next to the QDS.
 3. Most important thing first: Control the fires. You normally lose 0.15% Hydration during the day and 0.10% during the night. If you are near a fire, it goes up to 0.25%. You would run out of water really fast, if you work near an open fire.
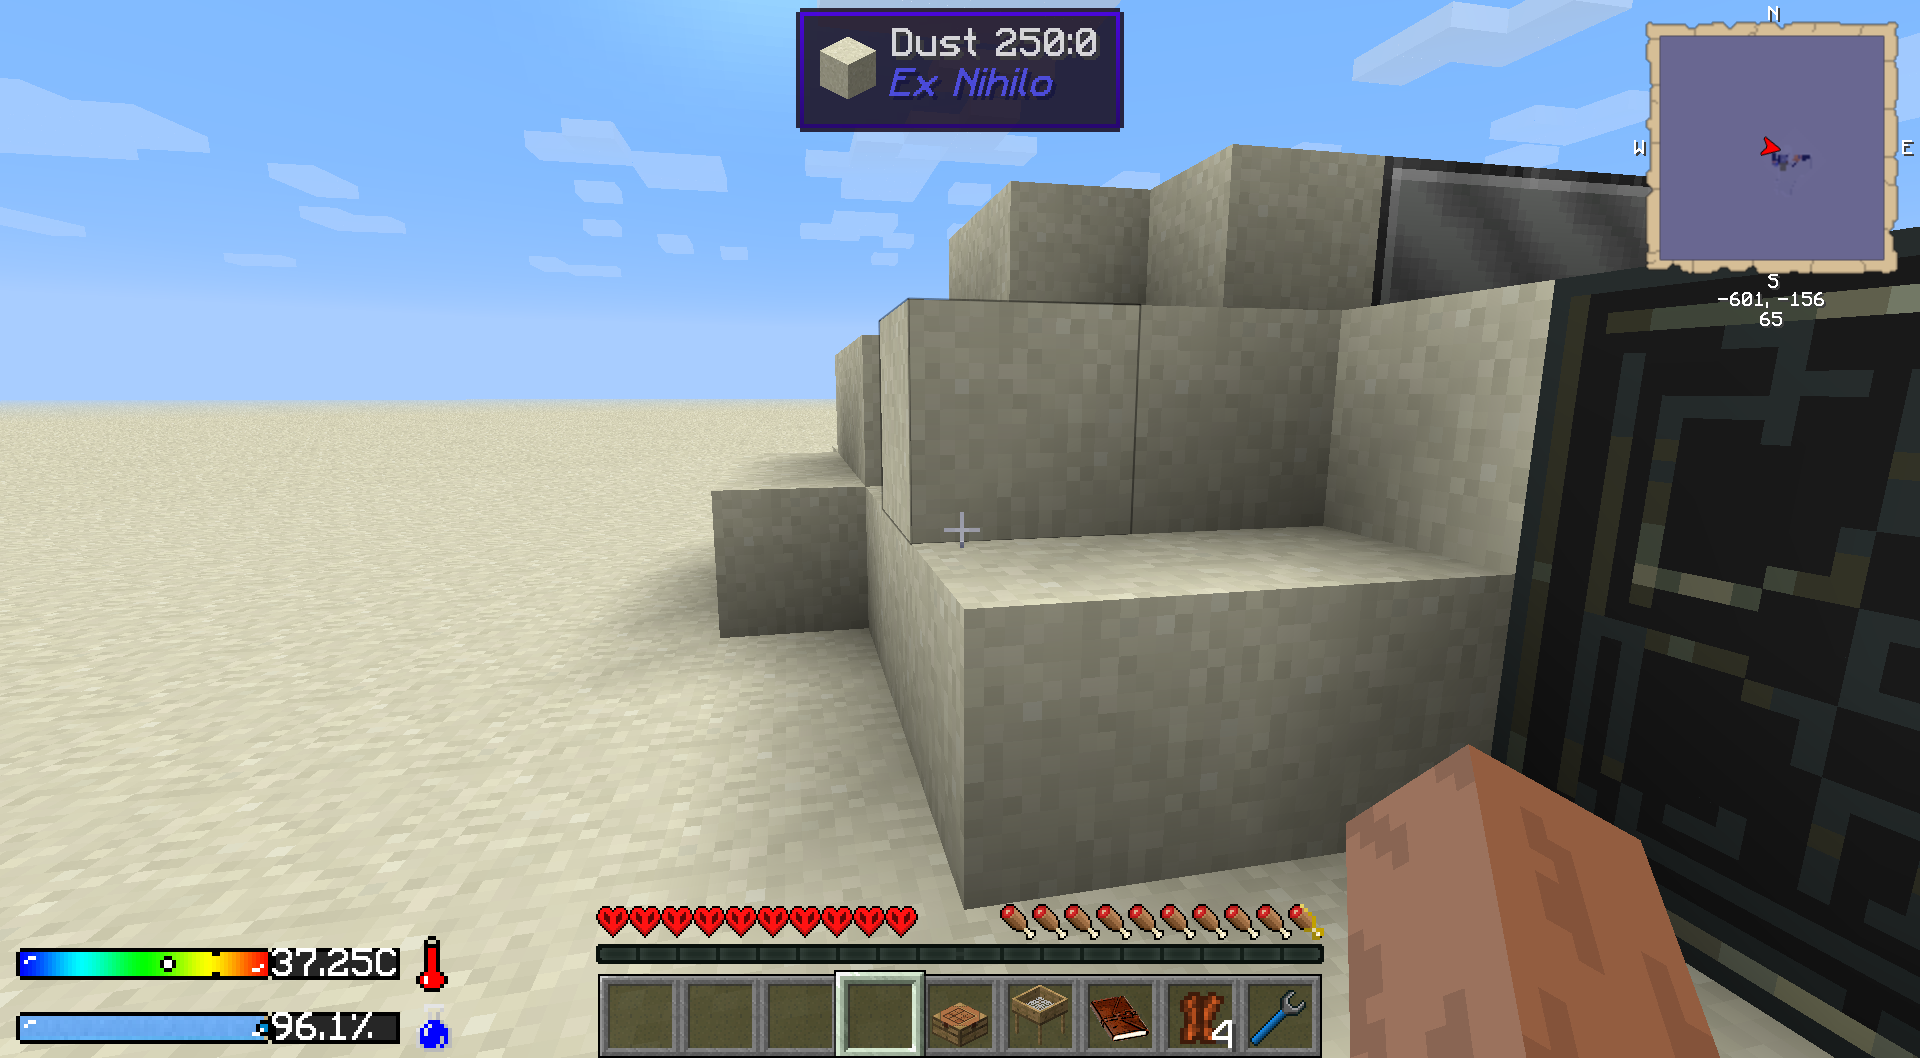
Dig up the dust behind the wreck and along it's side. Place it where the fires are. (Make sure you DON'T place one directly, where the Pyrothium source is.) Everything two high, so that no skellies or zombies can climb up.
Keep an eye on the Hydration level. When it drops down to 75%, drink a Cold Water Bottle. When both are empty, fill up the Camel Pack and equip it.
 4. Turn in "Gathering Supplies", "The Hard Route" and "The Very Basics". Select the quest "Sapping the Saplings" and bind it to the QDS.
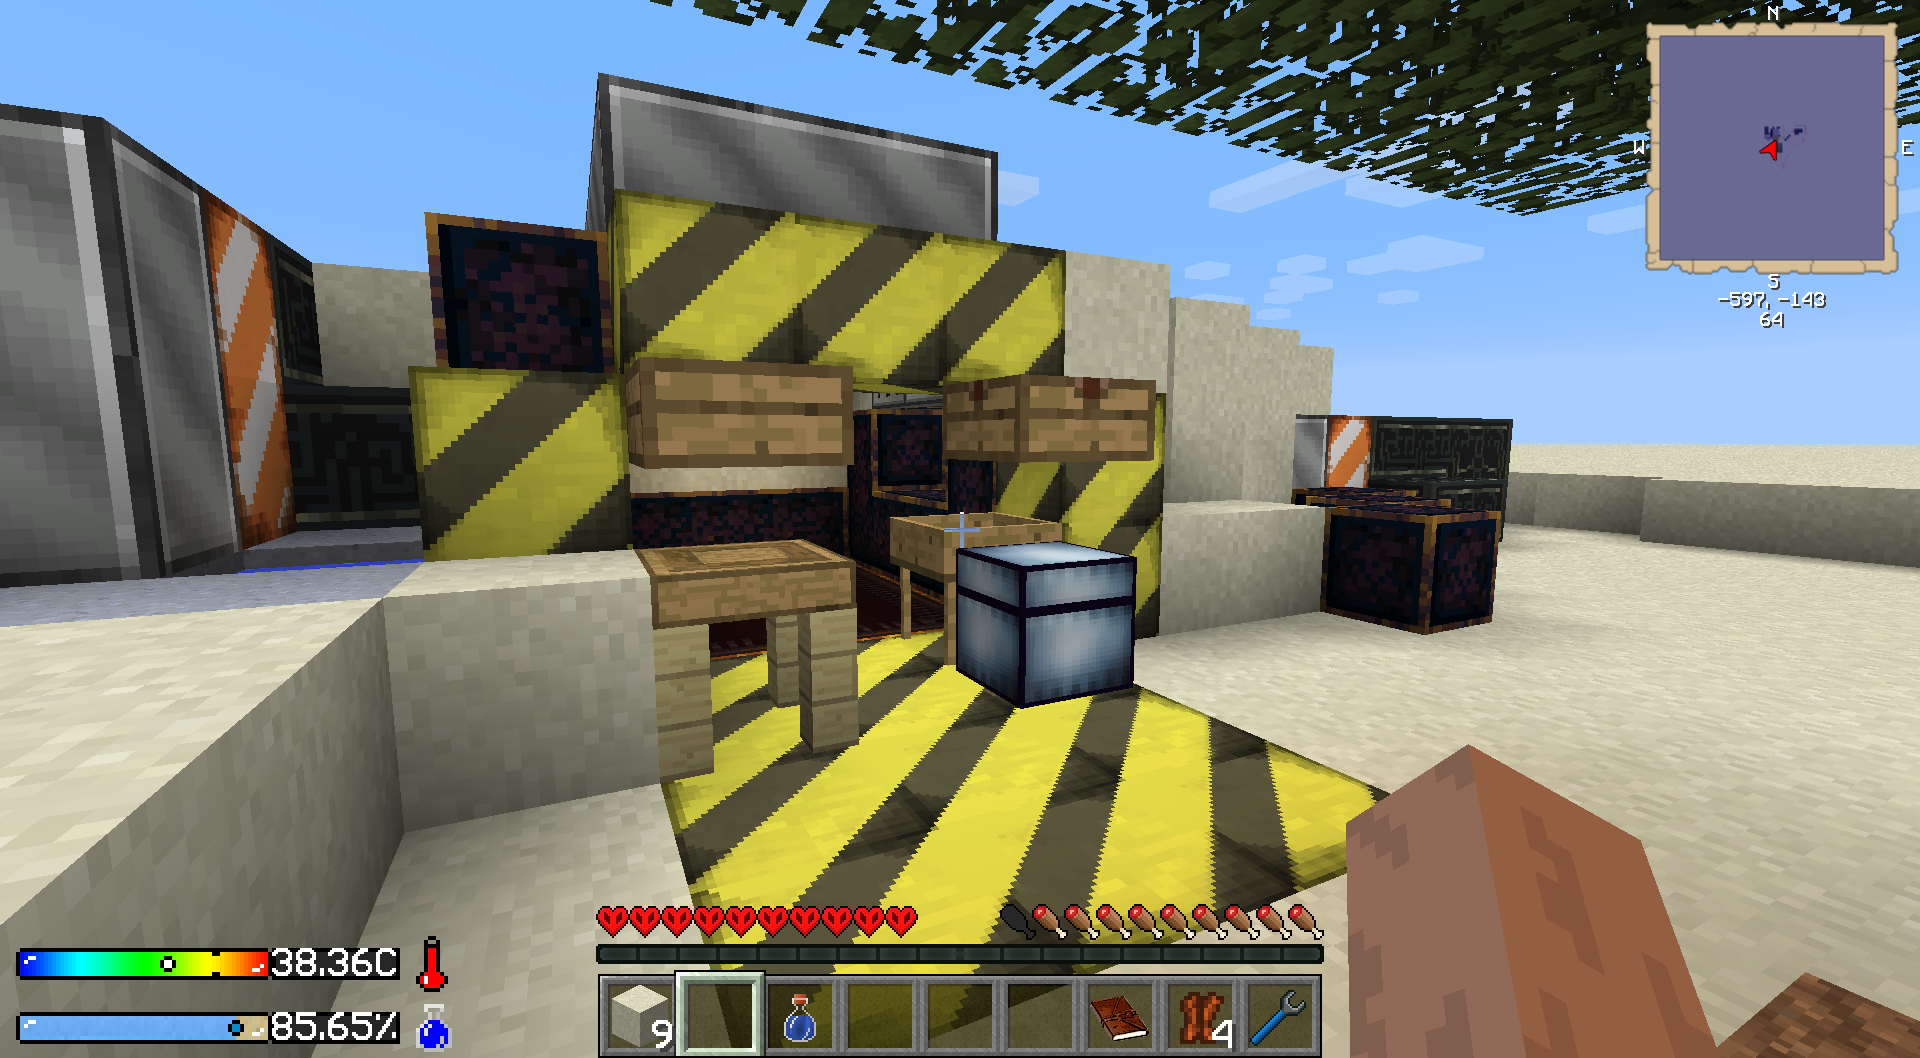
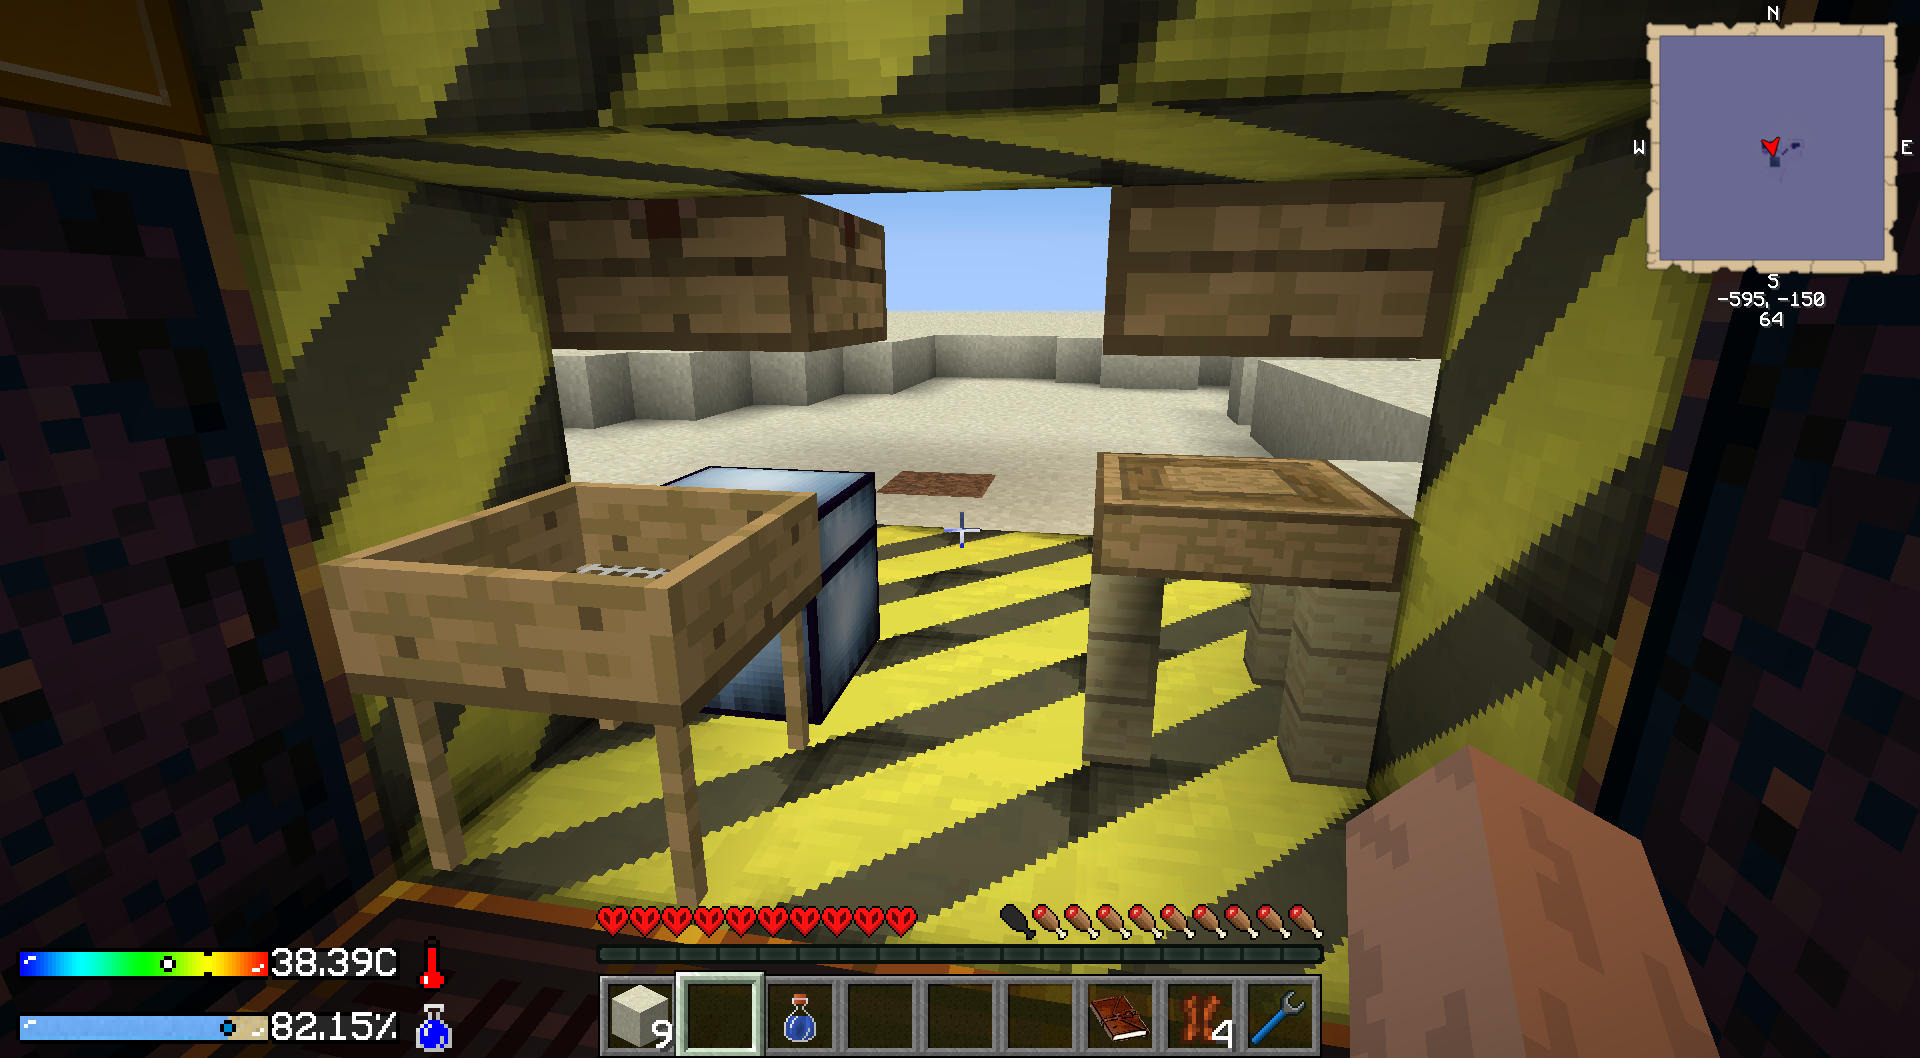
5. Pick up the chest, use the chest and the crafting station to secure one side of the entrance. Place the Sieve inside near the entrance.
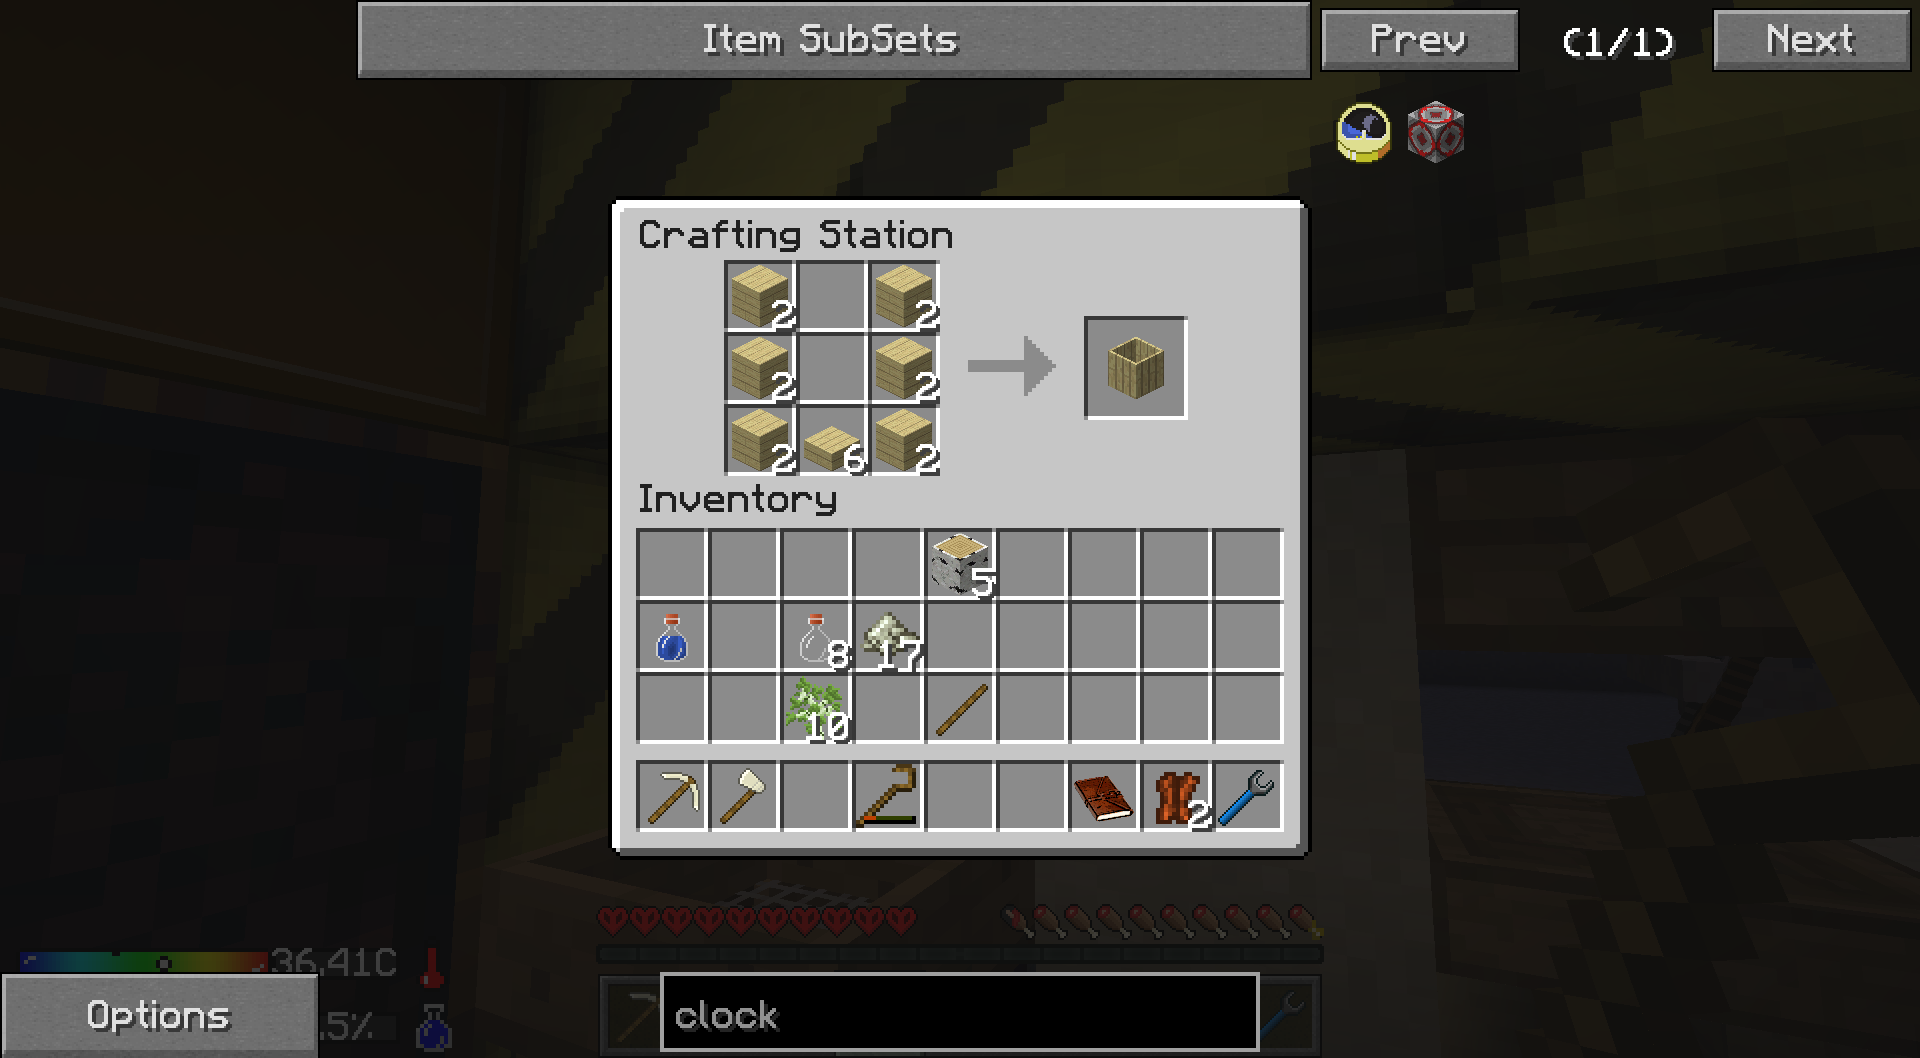
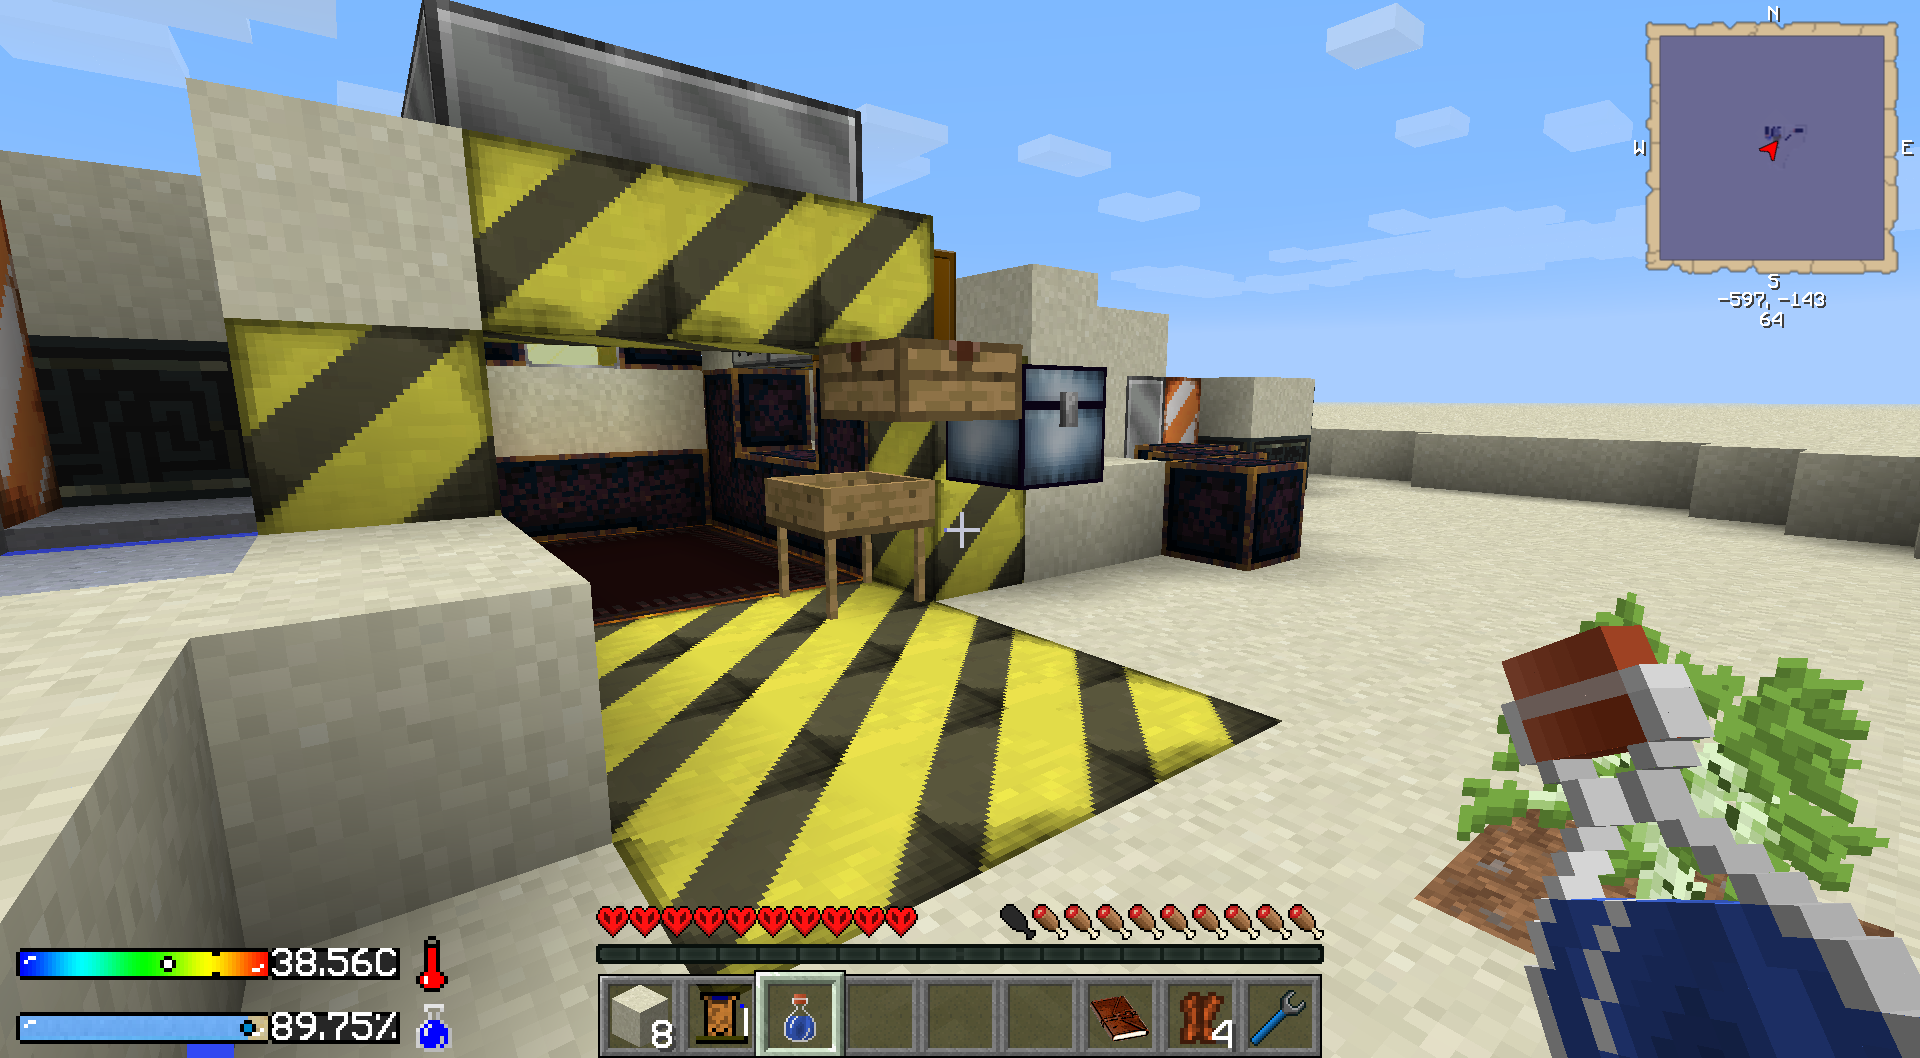 6. Use the dirt and birch sapling, grow it with bonemeal and punch 3 logs of wood. Turn the logs into plank, half of the planks into 12 stick, make a crook, two Empty Patterns and a crafting table. Use that to craft a Stencil Table and a Tool Station. Turn the Tool Station into a slab and use that to secure the other side of the entrance.
 7. With the shack secure, collect more wood until you run out of bonemeal (probably needs another crook) and re-plant the sapling.
8. Collect about a stack of dust, then start sifting. There should still be daylight left, keep an eye on the sapling in case it grows into a tree naturally. If you got really unlucky and didn't get enough wood, use the first few bonemeal to grow another tree. We need 8 spare saplings and at least 9 logs for the night. If you got lucky, you also got a silkworm already.
9. Keep sifting the rest of the stack, make a chest and dump all dusts in there. You should have at least 4 bonemeal now and some salt. Stones and iron are bonus, we'll need it later.
10. Make sure, you bound "Sapping the Saplings" to the QDS. When you are sure about it, check it again.
Refill your Camel Pack, set up the Fluid Transposer to output the liquid into the QDS (ONLY the liquid, we want the bottle back) and then throw a bottle of water in there.
 11. Time for some Crafting. Turn 6 logs into planks, 12 of the planks into 24 sticks, 20 sticks into 5 Empty Patterns. Craft a pattern and a log (you do still have at least one left?!) into a Part Builder, the Part Builder into a slab and I normally just put that one at the ceiling. The remaining 4 patterns go into the Stencil Table for a pickaxe head, shovel head, hatchet head and a binding. Pickaxe head and binding into the Part Builder, make the head from bonemeal, the binding from one of the sticks, then the shovel head and hatchet into the part builder, make the hatchet with the remaining bonemeal. Then make the actual tools, just a pickaxe and a hatchet for now.
Turn 3 planks into slabs and you should have exactly 12 planks left to make two barrels. Place them down, fill them up.
 12. While you are waiting for the dirt to compost, kill a few skellies and zombies. We need a Rotten Flesh and a few bones would be nice, too. Just watch your hunger bar, it's easy to go too crazy here. Be also careful when trying to pick up the drops, especially zombies hit fast and hard.
Combine the dirt with an empty bottle, two salt with a Rotten Flesh and then it's time to turn in some quests: "Desperate Times", Sapping the Saplings" and "Drinking Mud". Some food as rewards and a couple water bottles, both needed to survive the next day.
13. Turn the bones (which you hopefully got from the skellies) in bonemeal, make a hatchet head and two shovel heads and then craft a shovel. If you still have wood left, then also a Mattock.
And that's it for the night! Turn the remaining wood into chests if you want, refill the Camel Pack and clean out your inventory for the next day.
Day 2: A Slab Furnace
1. First run a circle around your shack and collect all drops. Also kill all the spiders you see, even if you have to go out of your way a bit. You want to get a spider eye, but more importantly they are a PITA to find for a kill quest (which has a Machine Frame as reward!).
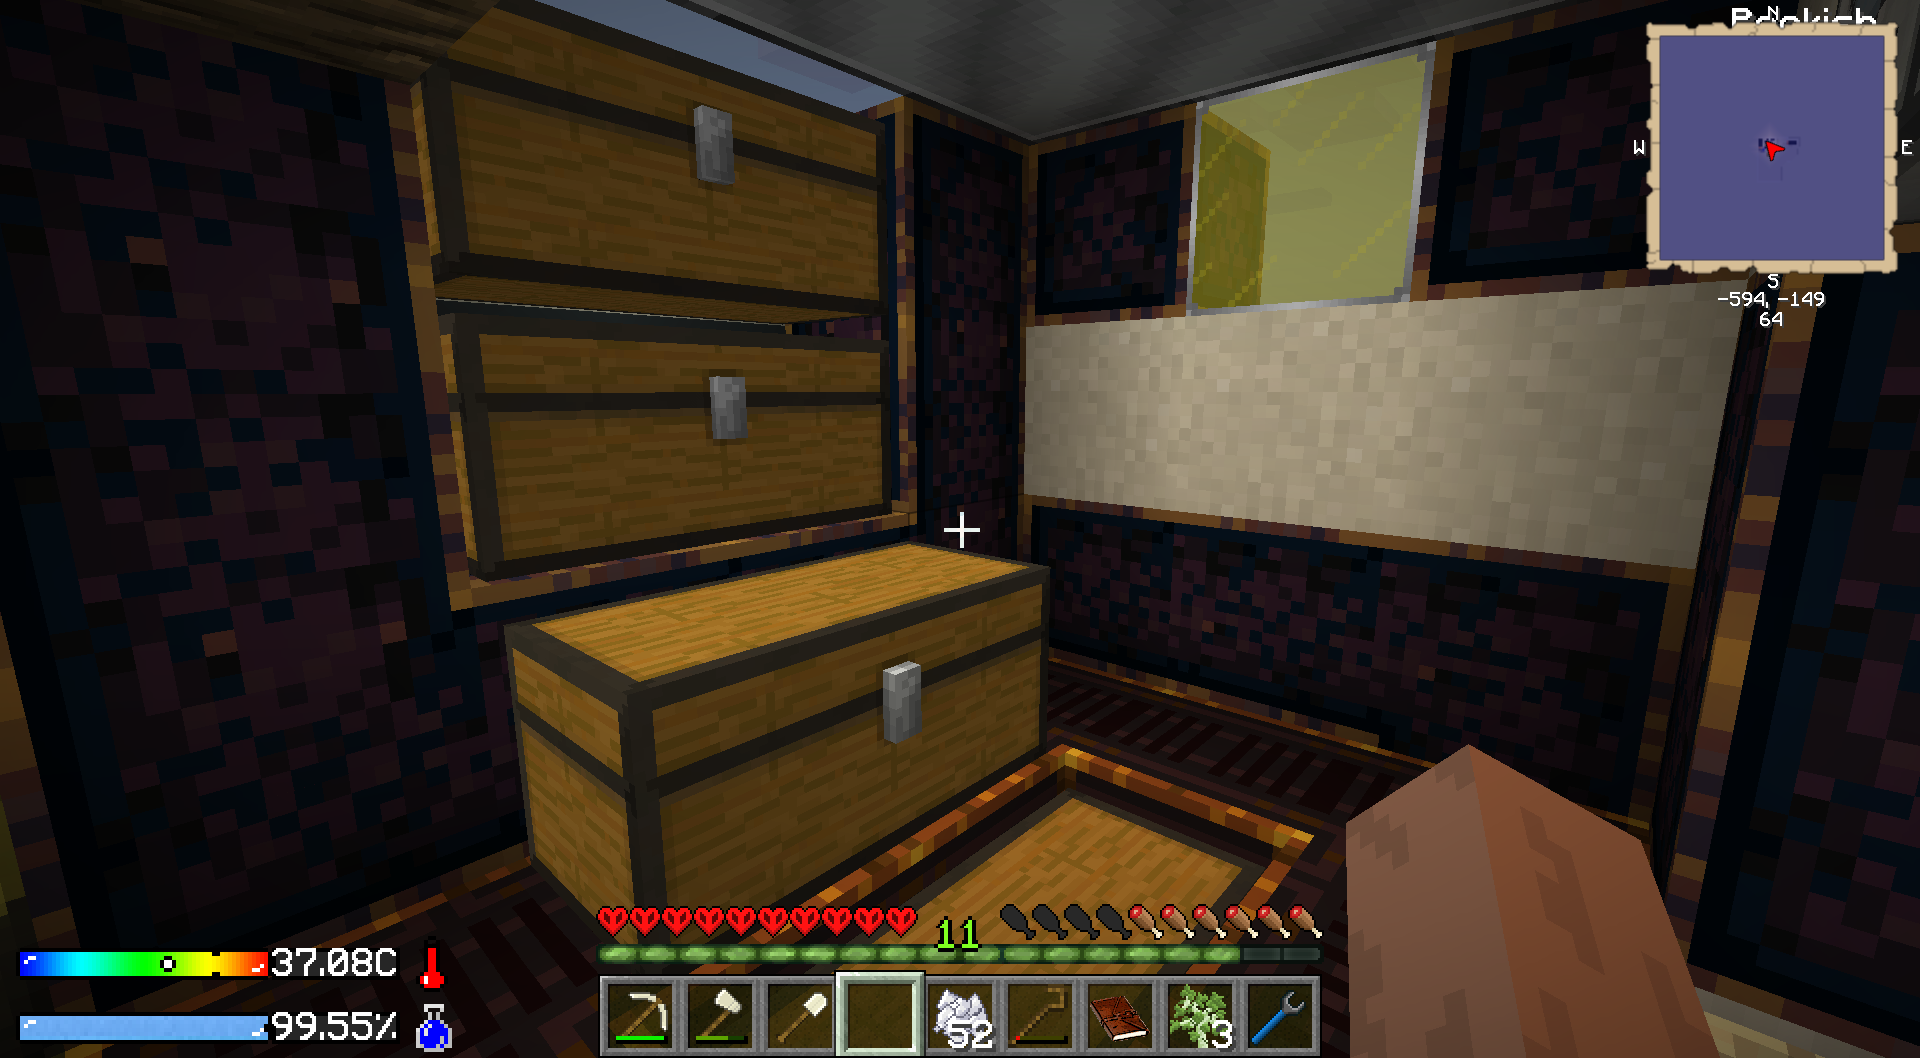
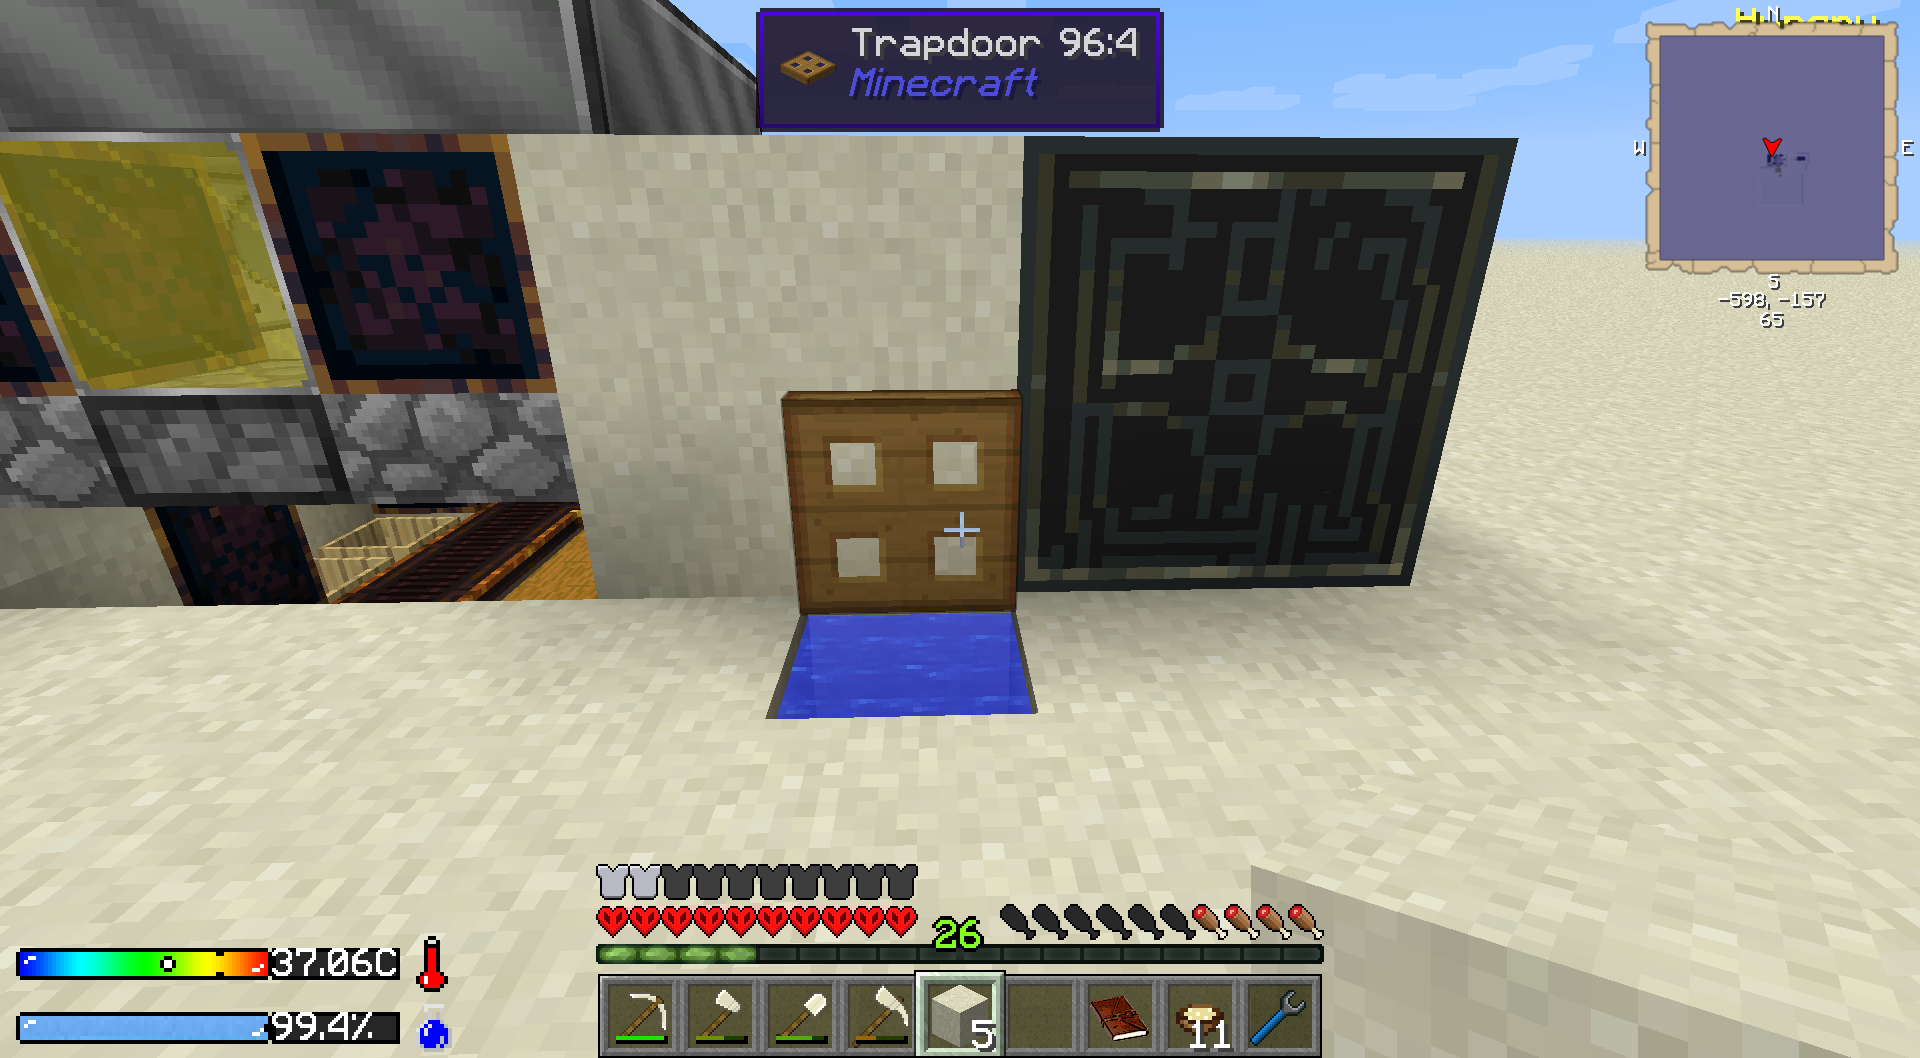
2. The Rotten Flesh goes into the barrels for more dirt. Make a Crook from the bones and turn the rest into bonemeal. Next cut down a couple of trees. Enough to make two trapdoors and enough chests to organize the storage a bit. My setup is usally: Saplings and seeds in the top chest, then organics, food and cooking tools. Dusts and ingots at the bottom and in the floor chest are mob drops and building materials.
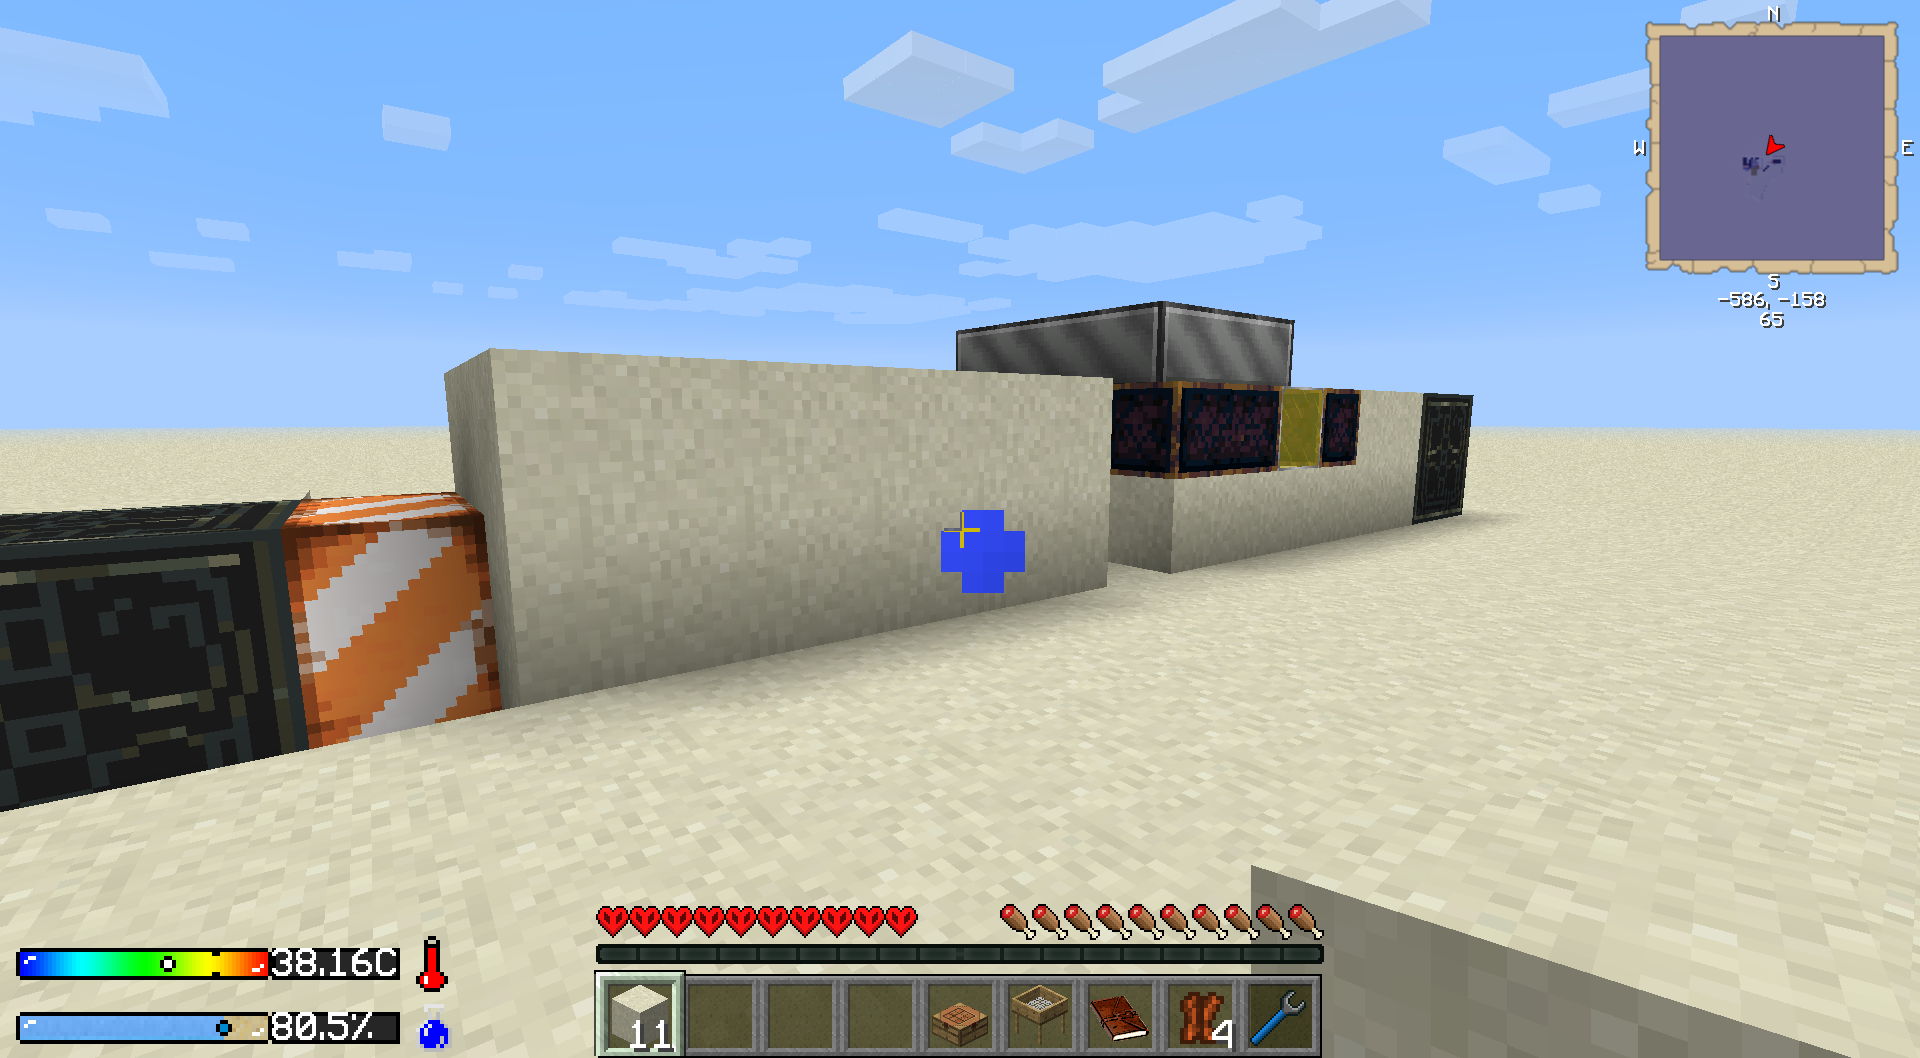
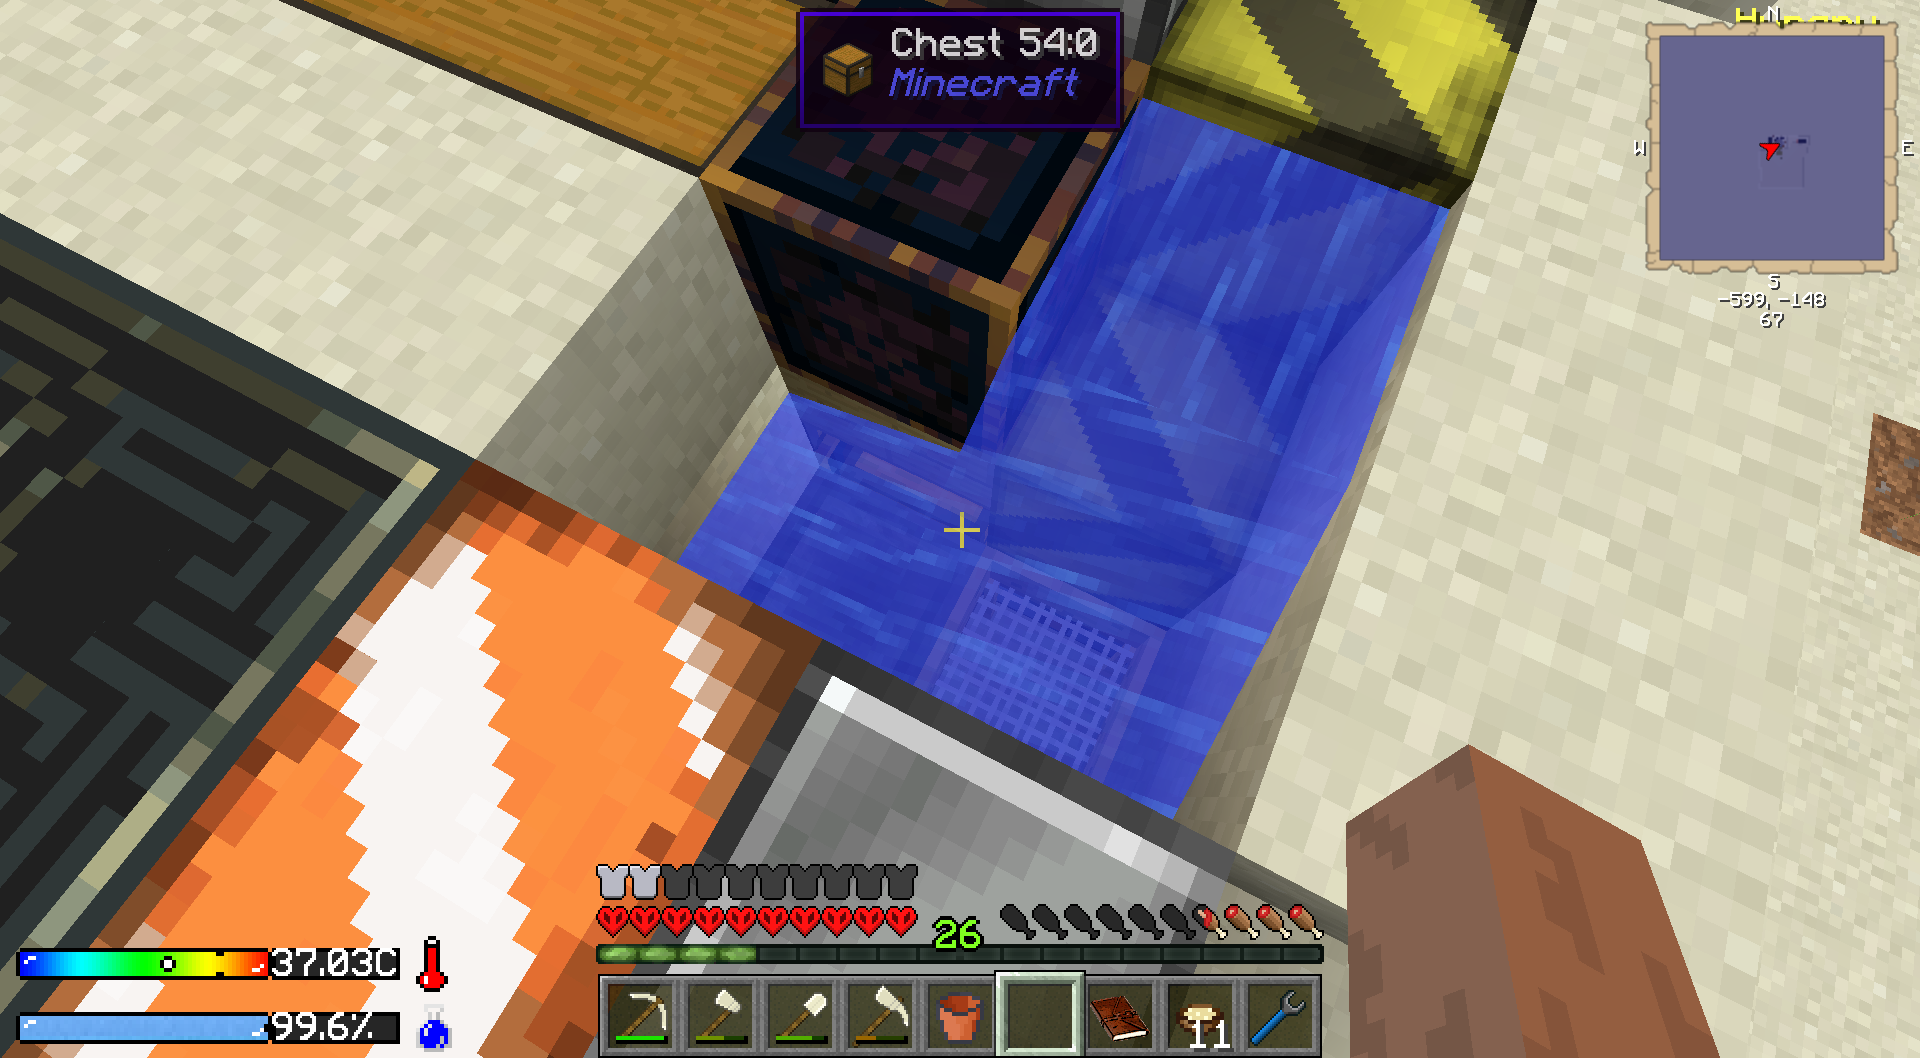
 3. Now something that doesn't make sense at first, we re-route the water stream towards the back of the building. Dig up the clay, replace it with dust. Then dig a channel towards the back, cover it up with factory blocks. A trap door above the last block (mainly to prevent mobs from standing in there), then fill everything up with dust.
And that's it for the day. If there is still time left, get some more wood and saplings. Otherwise bunker down and we'll take care of the food problem next.
 4. You should have at least 4 dirt now, which we will run through the sieve. Together with the stone from sifting the dust before, we should have enough to make a furnace. Get 24 stone pebbles, turn it into cobblestone, then slabs and that into a slab furnace.
Open up the back wall, it makes a good place for the furnace. If you still have a dirt left, place it in the corner and turn it into farmland. That was the reason for changing the water flow, we now have our own indoor garden. And outside on three blocks around the trapdoor we can grow sugar.
 5. In the furnace make an Iron Ingot (unless you got one as drop from zombies) and at least one silkworm. (More if you are low on food. They are much better than the Zombie Jerky.)
Turn in "Even More Desperate", the reward is a Rice Seed. This tiny little seed will not only be our food source for a long time, it will also help with the dirt production. Plant it, grow as much as possible and fill the barrels up again. Next thing we want, are the cooking utils. For that we need 6 stone, which means on average 6 dirt. So while the dirt is rotting away, kill a couple of skellies and zombies. Grow more rice using the bones, use the Rotten Flesh in the barrels and keep the hunger bar up with Zombie Jerky and yummy silkworms.
When you have 6 dirt, sieve it (hopefully it gets you the necessary 6 stones. Otherwise make one more dirt ... or two) and bake the 6 cobble in the furnace to smooth stone. Then craft the Mortar, Mixing Bowl, Cutting Board and Juicer for the quest. Turn in Cooking Utensils and get a Pot as reward.
Day 3: Plenty food and getting an Activator
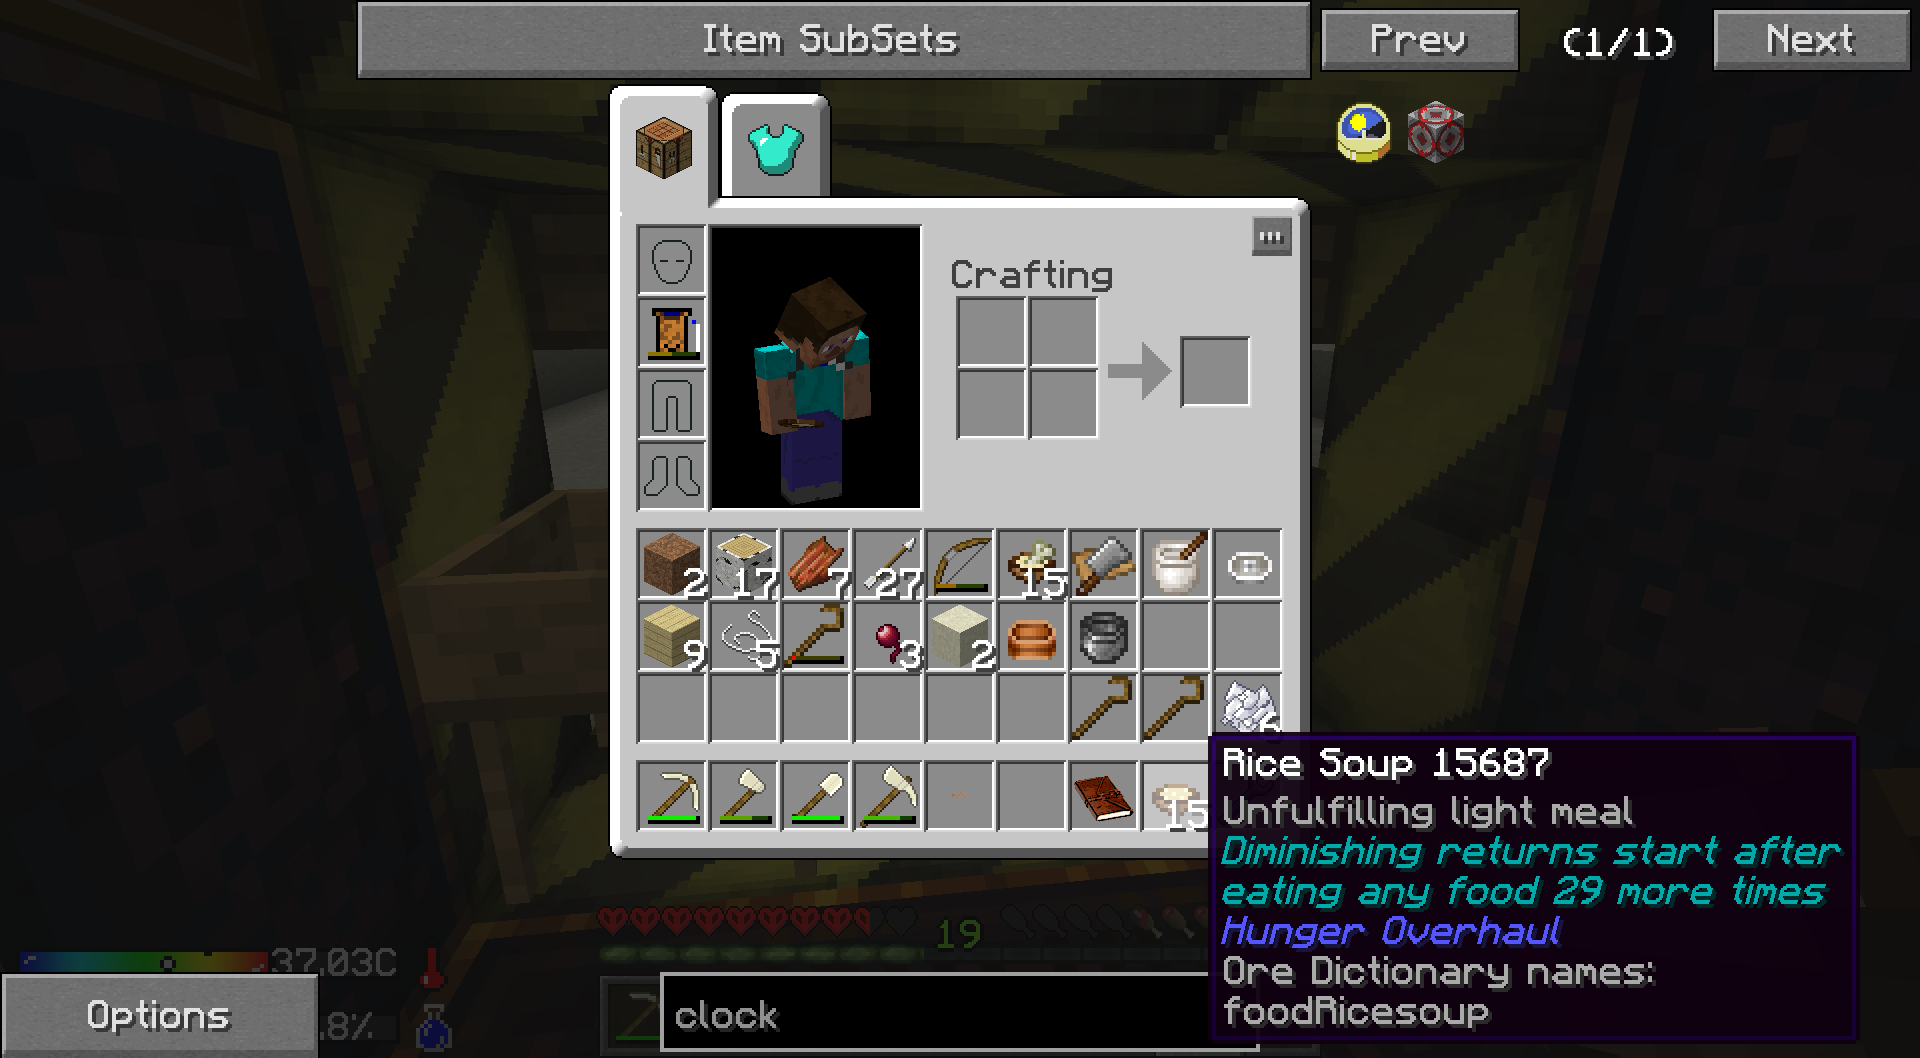
1. It should turn day by now. Collect all flesh and bones again. Turn the flesh into dirt, the dirt into water (which should be really, really low by now). Turn a few of the bones into Stock, grow more rice (only some, don't spend all the bonemeal!) and finally make Rice Soup. - Congratulations, now more risk of ever starving to death! - And 29 times left before SoL actually kicks in, that is a long time without worries about other food sources.
 2. With enough food now and also enough water for the day, it's time to relax a little bit. Collect some dust maybe, but mainly sped the day growing and cutting down out tree. We need 2 cobblestone, but mainly wood for the next quest ... and quite a bit of it.
3. You can finish the "Stocking Eyes" quest and get some soup for (much) later, but mainly we want to do "Tools of the Trade" tonight. Make two cobblestone, probably by sifting dust. No time pressure right now and the dirt can be used for other things.
Make a Stone Hammer, then the bone knife and handle (which makes such a lousy weapon that it's best to just throw it away after the quest is done) and finally the Wooden armor from the logs that we collected the day before. If you are out of bonemeal for the weapon, there are lots of mobs outside who gladly supply you with it.
4. You can also turn in "Firing it up". Setting up the Activator from the quest rewards will be the priority for the next day.
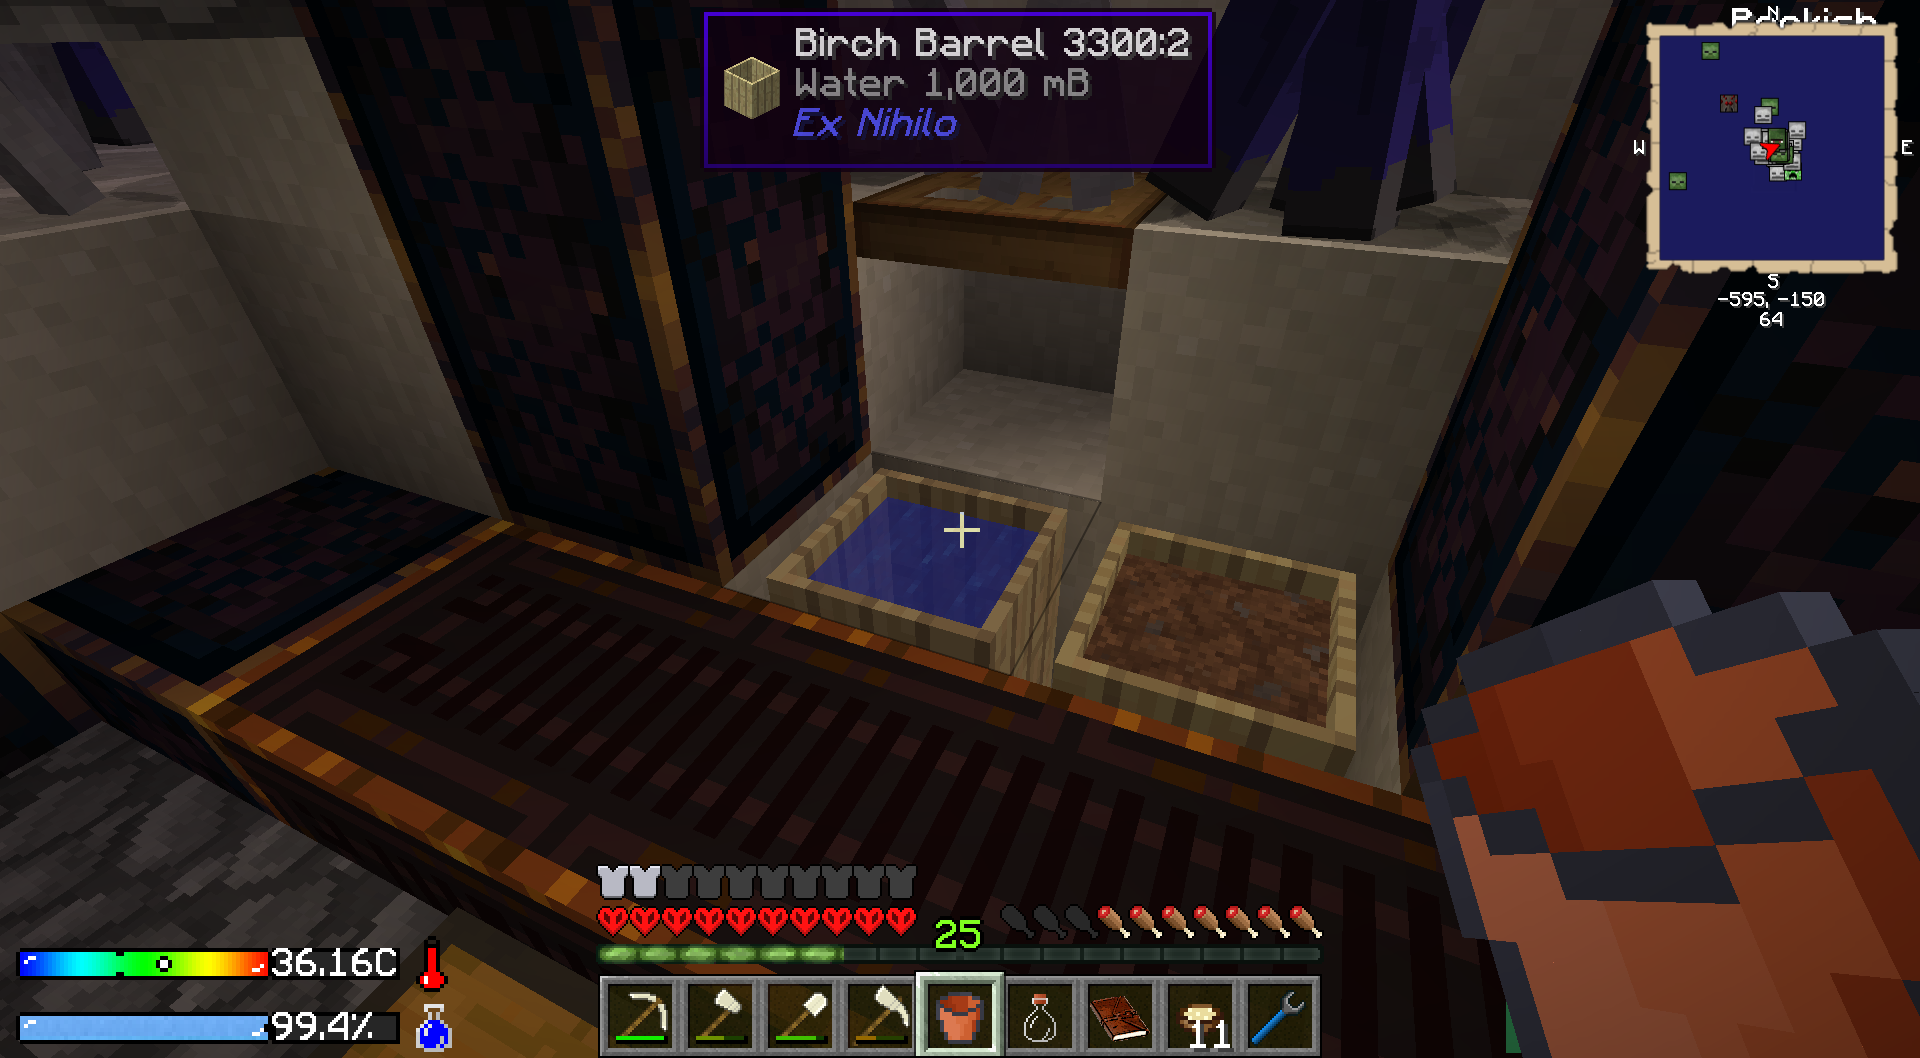
In order to do this we need a clay bucket, which is part of the next quest. (Nice how it fits together) We'll also need some water for it, so don't forget to make some more dirt.
10 clay, 7 bonemeal and we have a crucible and a bucket. THrow the crucible into the chest, the bucket into the furnace. And make some more water bottles during the night.
Getting a bucket of water is easy. Empty a bottle of water into a barrel, scoop it back up with the bucket. This is also how we will cheese "Melting Leaves!?" later on.
 5. I want to be able to access the activator from inside the shack, so we squeeze it into a corner. Won't be pretty, but it's only temporary anyway. Plug the activator into the wall, the chest beside it and a slab on top of the chest. Otherwise it won't open. Turn the Activator off for now, the outside plumbing will have to wait until daybreak.

Day 4: Simple Automatic Activator Setup
1. Collect stuff, then go to the back and cut off the waterflow. Place the water from the bucket there. (Don't wanna lose our little garden yet.)
Use the bucket to pick up the original water source block. Place the hopper behind the chest, the sieve behind the activator and pour water in from the top. Some dust into the Activator, turn it on to test it and we've got some rather low tech, but functioning automated ore production.
 2. We are running out of wood and the activator needs to be filled up with dust, so the rest of the day is pretty much only resource gathering.
Well, and that's it. We've got food, we've got water, plenty of resources coming in - the hard part is over. The next basic steps will be:
- Plant more trees, get plenty of wood and fence off the base area
- Create a mob farm (mainly to get Ender Pearls)
- Crucible setup for lava and water
- Cobblestone generator and automated gravel gathering
- Smeltery and High Oven
(or How to stop mDiyo from dying all the time
)This is an attempt of a detailed walkthrough to make (hopefully) the first couple days in Crash Landing a bit easier. Some of it will look familiar, especially Tetshio and Landstryder have excellent YouTube series out there. If in doubt, anything shown here is their idea.
Also, you have to enable the Zombie Awareness mod before the first night. Unless your computer can't handle it, you do want to have plenty of mobs around for their resources.
Day 1: The Basics.
1. Get the following items from the chest: Crescent Hammer, food, quest book, QDS, Workbench, Sieve and an energy cell into the inventory.
Dig up the dust behind the wreck and along it's side. Place it where the fires are. (Make sure you DON'T place one directly, where the Pyrothium source is.) Everything two high, so that no skellies or zombies can climb up.
Keep an eye on the Hydration level. When it drops down to 75%, drink a Cold Water Bottle. When both are empty, fill up the Camel Pack and equip it.
5. Pick up the chest, use the chest and the crafting station to secure one side of the entrance. Place the Sieve inside near the entrance.
8. Collect about a stack of dust, then start sifting. There should still be daylight left, keep an eye on the sapling in case it grows into a tree naturally. If you got really unlucky and didn't get enough wood, use the first few bonemeal to grow another tree. We need 8 spare saplings and at least 9 logs for the night. If you got lucky, you also got a silkworm already.
9. Keep sifting the rest of the stack, make a chest and dump all dusts in there. You should have at least 4 bonemeal now and some salt. Stones and iron are bonus, we'll need it later.
10. Make sure, you bound "Sapping the Saplings" to the QDS. When you are sure about it, check it again.
Refill your Camel Pack, set up the Fluid Transposer to output the liquid into the QDS (ONLY the liquid, we want the bottle back) and then throw a bottle of water in there.
Turn 3 planks into slabs and you should have exactly 12 planks left to make two barrels. Place them down, fill them up.
Combine the dirt with an empty bottle, two salt with a Rotten Flesh and then it's time to turn in some quests: "Desperate Times", Sapping the Saplings" and "Drinking Mud". Some food as rewards and a couple water bottles, both needed to survive the next day.
13. Turn the bones (which you hopefully got from the skellies) in bonemeal, make a hatchet head and two shovel heads and then craft a shovel. If you still have wood left, then also a Mattock.
And that's it for the night! Turn the remaining wood into chests if you want, refill the Camel Pack and clean out your inventory for the next day.
Day 2: A Slab Furnace
1. First run a circle around your shack and collect all drops. Also kill all the spiders you see, even if you have to go out of your way a bit. You want to get a spider eye, but more importantly they are a PITA to find for a kill quest (which has a Machine Frame as reward!).
2. The Rotten Flesh goes into the barrels for more dirt. Make a Crook from the bones and turn the rest into bonemeal. Next cut down a couple of trees. Enough to make two trapdoors and enough chests to organize the storage a bit. My setup is usally: Saplings and seeds in the top chest, then organics, food and cooking tools. Dusts and ingots at the bottom and in the floor chest are mob drops and building materials.
Dig up the clay, replace it with dust. Then dig a channel towards the back, cover it up with factory blocks. A trap door above the last block (mainly to prevent mobs from standing in there), then fill everything up with dust.And that's it for the day. If there is still time left, get some more wood and saplings. Otherwise bunker down and we'll take care of the food problem next.
Open up the back wall, it makes a good place for the furnace. If you still have a dirt left, place it in the corner and turn it into farmland. That was the reason for changing the water flow, we now have our own indoor garden. And outside on three blocks around the trapdoor we can grow sugar.
Turn in "Even More Desperate", the reward is a Rice Seed. This tiny little seed will not only be our food source for a long time, it will also help with the dirt production. Plant it, grow as much as possible and fill the barrels up again. Next thing we want, are the cooking utils. For that we need 6 stone, which means on average 6 dirt. So while the dirt is rotting away, kill a couple of skellies and zombies. Grow more rice using the bones, use the Rotten Flesh in the barrels and keep the hunger bar up with Zombie Jerky and yummy silkworms.
When you have 6 dirt, sieve it (hopefully it gets you the necessary 6 stones. Otherwise make one more dirt ... or two) and bake the 6 cobble in the furnace to smooth stone. Then craft the Mortar, Mixing Bowl, Cutting Board and Juicer for the quest. Turn in Cooking Utensils and get a Pot as reward.
Day 3: Plenty food and getting an Activator
1. It should turn day by now. Collect all flesh and bones again. Turn the flesh into dirt, the dirt into water (which should be really, really low by now). Turn a few of the bones into Stock, grow more rice (only some, don't spend all the bonemeal!) and finally make Rice Soup. - Congratulations, now more risk of ever starving to death! - And 29 times left before SoL actually kicks in, that is a long time without worries about other food sources.
3. You can finish the "Stocking Eyes" quest and get some soup for (much) later, but mainly we want to do "Tools of the Trade" tonight. Make two cobblestone, probably by sifting dust. No time pressure right now and the dirt can be used for other things.
Make a Stone Hammer, then the bone knife and handle (which makes such a lousy weapon that it's best to just throw it away after the quest is done
) and finally the Wooden armor from the logs that we collected the day before. If you are out of bonemeal for the weapon, there are lots of mobs outside who gladly supply you with it.4. You can also turn in "Firing it up". Setting up the Activator from the quest rewards will be the priority for the next day.
In order to do this we need a clay bucket, which is part of the next quest. (Nice how it fits together
) We'll also need some water for it, so don't forget to make some more dirt.10 clay, 7 bonemeal and we have a crucible and a bucket. THrow the crucible into the chest, the bucket into the furnace. And make some more water bottles during the night.
Getting a bucket of water is easy. Empty a bottle of water into a barrel, scoop it back up with the bucket. This is also how we will cheese "Melting Leaves!?" later on.
Day 4: Simple Automatic Activator Setup
1. Collect stuff, then go to the back and cut off the waterflow. Place the water from the bucket there. (Don't wanna lose our little garden yet.)
Use the bucket to pick up the original water source block. Place the hopper behind the chest, the sieve behind the activator and pour water in from the top. Some dust into the Activator, turn it on to test it and we've got some rather low tech, but functioning automated ore production.
Well, and that's it. We've got food, we've got water, plenty of resources coming in - the hard part is over. The next basic steps will be:
- Plant more trees, get plenty of wood and fence off the base area
- Create a mob farm (mainly to get Ender Pearls)
- Crucible setup for lava and water
- Cobblestone generator and automated gravel gathering
- Smeltery and High Oven
Last edited:
Yeah, I've been somewhat lazy with that lately. I'll try to fix that for next week.
@Iskandar he was talking to me (sorry to clog your thread) but I *think* if you upload them Wednesday or before they won't be going up late Friday night like they have been (in my timezone).
Sent From Something That You Won't Care About Using Tapatalk 2
Apparently I may need to re-add Zombie Awareness. Well, this is a puzzle. I'll work onit this week, see what I can do. Maybe with ZA gone adding special mobs and special AI as default wouldn't be over powered? Maybe?
I've been playing with the Specials configs with ZA out.
The fishers, throwers & posion are out, and testing other ratios to see how hard it can get.
Tried to add in Creeper Collateral to be able to use the special creepers, but there was some problem I couldn't figure out. Being able to find a Dirt Creeper would make it worth setting other stuff harder.
ZA really makes the it super easy, you get way too much flesh and bones. But might be too hard with out it.
I'm aware, I was just commen ting that I've just gotten a bit lazy about when I post updates. I aim for Wednesday, but I've been drifting lately.Yes @Iskandar, I was referring to @pc_assassin's post.