Johnleys fast and easy Server Setup Guide.

Johnley

New Member
Jul 29, 2019
36
0
0
Hi There!

Contrary to popular belief, you do not need some behemoth 27 core god machine to run FTB. In this case, I am describing my setup that i have for me and a small group of friends. there are usually about 5-6 people on at peak times, so this is for really small communities. However some of the scripts I use can help those guys too! I will be using command lines and linux commands, but none of them are too scary.

For my example I will be using a server from [Redacted]
Instead, kiddies, go ahead and find a 2 gig vps. thats what i'm using in this tutorial. for simplicity i pointed to where this vps was, but now you get to google for one for the same price i got it for. HAVE FUN.

PART 1: IN WHICH A MADMAN PRECONFIGURES THE SERVER.
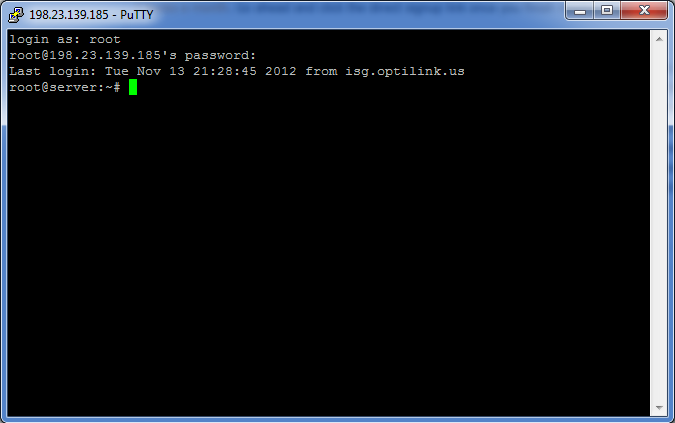
So you have your shiny new server, and you got an email from them saying "SSH login details." Now what the poo is SSH? it is essentially a way to connect to another computers command line. so we are going to use PuTTY, a windows SSH client. Ignore all the other options, and just put your servers IP in the address box and hit connect. It will pop up a box saying "Login as: " Here, type in root and hit enter. It will now ask for a password. "But Johnley, when I type nothing shows up!" No worries, this is a feature dating back to the 90s, its designed to protect your password from bad guys. go ahead and put your password in, and press enter. if it says Access Denied, try again, copy and pasting from your email. otherwise, hit the Questions section below. Now you should have a screen like this:
mAEac.png


Right! so now we have this nice server, lets see how much ram its got. type
Code:
# free -m
in the console (thats what you are at right now) and you should get something like this:
Code:
            total      used      free    shared    buffers    cached
Mem:          2048        25      2022          0          0        15
-/+ buffers/cache:        10      2037
Swap:            0          0          0
Not bad, not bad. but lets run a quick script on the server to clean out some unused processes. If you are still using debian or ubuntu, we are going to use this script. It brought my usage down to about 5 megs. to grab it and run, do:
Code:
# wget -q http://www.lowendbox.com/scripts/lowend-debian.sh
# bash ./lowend-debian.sh
It will run, and you will see a whole bunch of stuff roll by. this is just uninstalling some gaff from the server and updating all your applications. you might get a prompt now and then, just press enter. At this stage, we should reboot. type reboot at the prompt and hit enter. it will kill your connection; but no worries, click on the lightning bolt computer in the top left corner and hit "restart session." log back in, and now lets run free -m again:
Code:
            total      used      free    shared    buffers    cached
Mem:          2048        14      2033          0          0          9
-/+ buffers/cache:          4      2043
Swap:            0          0          0
Nice! but I bet we can do better. I bet you won't be using the server as a mail server, so at the prompt, run:
Code:
# apt-get -y remove sendmail*
and then wait.
done? good. lets reboot again and check our free -m:
Code:
            total      used      free    shared    buffers    cached
Mem:          2048          9      2038          0          0          7
-/+ buffers/cache:          2      2045
Swap:            0          0          0
Nice! that leaves plenty of ram for our minecraft server. now lets get to the minecraft server stuff.

PART 2: IN WHICH A MADMAN INSTALLS A MINECRAFT SERVER.
Ok, so now lets make us a user for the minecraft server. don't want to run everything as an administrator, do we? go ahead and type
Code:
adduser minecraft
at the prompt. it will ask you for a password, but won't show it to you, just like logging in. after that, you can press enter through the name and location bits, and press enter to confirm.
Code:
# adduser minecraft
Adding user `minecraft' ...
Adding new group `minecraft' (1000) ...
Adding new user `minecraft' (1000) with group `minecraft' ...
Creating home directory `/home/bob' ...
Copying files from `/etc/skel' ...
Enter new UNIX password:
Retype new UNIX password:
passwd: password updated successfully
Changing the user information for bob
Enter the new value, or press ENTER for the default
        Full Name []:
        Room Number []:
        Work Phone []:
        Home Phone []:
        Other []:
Is the information correct? [Y/n]
awesome! now lets do a few more things to get everything running for java, which runs minecraft. I follow this guide, which you can just copy and paste the commands from straight into your terminal. once you've done that, lets get our server running. lets open up a new screen so that we can leave the server running after we close our terminal:
Code:
# screen
press enter to get to a new prompt. now lets get the server file from feed-the-beast.com:
Code:
$ wget http://repo.creeperhost.net/direct/FTB2/67e5b096596d54255f46697589eae39b/FTBBetaAServer.zip
the file is pretty big, and may take a few seconds to download. you should get download bar with wget showing an ETA (estimated time of arrival). now lets unzip that:
Code:
$ unzip FTBBetaAServer.zip
and now if we look at our directory with the ls command, we see:
Code:
$ ls
FTB-Beta-A.jar      README.txt        Server Start.sh  coremods
FTBBetaAServer.zip  Server Start.bat  config          mods
now we are on the home stretch! lets open up that startup file:
Code:
$ nano Server\ Start.sh
and change the values. I run with
Code:
java -Xms512M -Xmx1500M -jar FTB-Beta-A.jar
so that i have a bit of wiggle room with java. hit ctrl-o and enter, then ctrl-x and you are 2 steps away from launch!
PART 3: IN WHICH A MADMAN FINALLY LAUNCHES THE SERVER.
Now we need to make linux recognize that file as an executable. run:
Code:
$ chmod a+x Server\ Start.sh
and then run:
Code:
$ ./Server \Start.sh
BOOM! you now are loading a server. go play.
Now go check out This post on how to improve what you just made. Dudes a genius, I had completely forgot about naming screen sessions >.<

PART 4: IN WHICH A MADMAN ANSWERS SOME QUESTIONS.
Q: My ram usage goes up instead of down after the script runs. help?
A: In some cases, the script actually backfires and installs some stuff. to remedy this, we run
Code:
# apt-get remove samba* bind* sasl* --purge
to get rid of it.

Q: are you actually a madman?
A: Yes. 3 cups of coffee and 2 hours of sleep make jack a crazed lunatic.

Q: whats with the # and the $ at the beginning of your commands?
A: those are to keep me slightly sane. when you run a program as root (the admin) it has a # in front. a regular user (minecraft) has a $ in front.

Q: Why did you remove your link to that host?
A: apparently I was advertising.

Please leave me a review of my work, and point out any errors or bugs! I'm not a linux master by any standard, but I definitely am no noob.
 

mooner93

New Member
Jul 29, 2019
19
0
0
As far as I am aware the is wonderful guide good sir! I didn't have to use it myself but it appears to be 100% accurate for anyone looking to use it.
 

Greedseed

New Member
Jul 29, 2019
1,107
0
0
altho its a very nice post. You have received a warning for promoting outside FTB services.
 

Bråthen

New Member
Jul 29, 2019
41
0
0
Nice guide Johnley! You should also add some backup procedures to your guide for safety. Just a suggestion :)

Edit: Make sure to su och sudo if you run the server as root and then make the backup script, i prefer to run the server not as root for safety but there going to be just fine as root too.

The steps would then be:
  • Naming our screen session (for sending commands later)
  • Creating a backup directory outside the server dir
  • Making of a shell script backing the server directory to our backup directory we just created
  • Making this a automated and daily job using cron (I use vixie-cron)
Naming our screen session

Use -S flag to name a session in screen.
Code:
$ screen -S ftb
Then when the screen is "detached" just give the command:
Code:
screen -d -r ftb
And you are inside screen session "ftb" again. The reason for this is that we will like to send some commands to our screen session before and after doing a simple backup.

For note you can detach your screen session (so it will run in background when you exit ssh) for that use the command Ctrl+a+d and your server is in background.


Creating backup dir

You can place the backups in one directory that suites your system but I use the home folder (~) in this example:
Code:
$ cd /home/minecraft
$ mkdir ftb-backup

Making shell script

Here we're going to make a shell script doing it automatic for us. Fire up your favorite editor (I use nano) and in this example we name the backup-shell ftp-backup.sh in our backup folder.
Code:
$ cd ftb-backup
$ nano -w ftb-backup.sh
Now here is the full shell script.
Code:
#!/bin/bash
 
# Set time for backup process
TIME=$(date +"%Y-%m-%d.%H:%M")
 
# Set destination and source path for tar command
DEST="/home/minecraft/ftb-backup/ftb-srv$TIME.tar.gz"
SRC="[SERVER_FOLDER_PATH]"
 
# Turning world-save off and broadcast msg ING
screen -S ftb -X stuff "say Starting backup. World not saving... $(printf '\r')"
screen -S ftb -X stuff "save-off $(printf '\r')"
screen -S ftb -X stuff "save-all $(printf '\r')"
 
# Backup with tar for compressed file
tar -czf $DEST $SRC
 
# Turning world-save on and broadcast msg
screen -S ftb -X stuff "save-on $(printf '\r')"
screen -S ftb -X stuff "say Backup complete. World saving... $(printf '\r')"
First we set the date and time format (YYYY-mm-dd.H:M) so the file gets a timestamp. We use variable TIME to be a part of the filename making the destination of file in variable DEST. (using same user as Johnley created in his guide)

As for the variable SRC this is were you post your server path preferably beginning from / (rootpath). Exemple: /opt/ftb-server

We have to disable world-auto-saving, with save-off, for clean backup and making a last save of all the world-files, with save-all, before we fire tar command. printf and \r is only used for making a [enter] to execute the line in screen. Remember were sending this to our screen session named ftb.

Then there is a process of compressing and making an archive of the server-folder at our destination path with tar.

After that were turning world-auto-save on again with save-all.

To fire this shell file you have to again make file executable by typing:
Code:
$ chmod a+x ftb-backup.sh
Now were going to test that we get a file from the script at our destination by typing:
Code:
$ ./ftb-backup.sh
$ ls -l
ftb-srv2012-11-20.00:00.tar.gz  ftb-backup.sh
Here you then should see two files one compressed file containing the server directory and the shell script. Each time you fire the shell script you add one backup file to the path.

For safety you should also doublecheck that the compressed file actually contains the server folder and it's content. For listing a compressed .tar.gz file run:
Code:
tar -ztvf ftb-srv2012-11-20.00:00.tar.gz | less
The character | is "pipe" and less makes it easy to tap through the list to see if the content is equal to your serverfolder. Close the view by hitting "q".


Daily automated backup with cron

I use vixie-cron to make the crontab installation. Use apt-get to install it if you're using Debian or Ubuntu. Every linuxdistro has it's own packet command. I use Gentoo and therefore emerge.

To create cron entry you have to fire up crontab, run:
Code:
$ crontab -e
This will go in edit mode in the "crontab file". Then print in this syntax:
Code:
0 12,00 * * * /home/minecraft/ftb-backup/ftb-backup.sh
And then hit Ctrl+x and answer "yes" for installing it in crontab.

(*m *H *D *M *Y, minut, Hour, Day, Month, Year. So the backup is been made 12:00 and 00:00 every day, every month, every year. Also be sure to delete old backup files otherwise we're going to have disk problems in a while. :))

Now you are at fully automated backup interval twice a day midday and midnight able to rollback if the server crashes or something else is missing. There is also good to just run the ftb-backup.sh file whenever there is a need to make a backup in case of server maintainance like modupgrade or something else.

Johnley, feel free to grab all the above and make it part of your nice guide. Cheers all!
 

MrZwij

New Member
Jul 29, 2019
452
0
0
Thank you guys for taking the time to write this stuff down. Much appreciated.
 

b0bst3r

New Member
Jul 29, 2019
2,195
0
1
You may want to change this page to reflect the filename change to FTBBetaA_Server.zip
 

Relinquo

New Member
Jul 29, 2019
4
0
0
With a little bit of fiddling I've managed to get this working on my own personal ubuntu box, but I have one further question.

How would I get the minecraft server to automatically start when I, for whatever reason, restart the server itself?
 

Johnley

New Member
Jul 29, 2019
36
0
0
the simplest way would be to symlink that startup.sh file to your /etc/init.d/, like this.
(run this in /etc/init.d/)
Code:
ln -s /directory/with/your/start.sh start.sh
update-rc.d start.sh defaults

If anyone else has a better suggestion, please chime in.
 

GrnEyedDvl

New Member
Jul 29, 2019
1
0
0
A better way for most newbie Ubuntu/Linux users would be to install rcconf (installed by default on 12.04 and above) and then you can toggle startup scripts off and on via a gui like screen.

sudo apt-get install rcconf

You may have to install dialogue depending on your system configuration. If you have a brand new install of 12.04 or 12.10 you will.

Then just run it:

sudo rcconf

You will get a screen like this:

rcconf.jpg


Notice I have 6 MC installs showing (there are actually 9 I think) but only 2 of them are enabled at system boot. The rest I boot as needed with a simple startup script. If you name things properly and are smart about allocating system resources you can run several instances of MC at one time, whether its vanilla MC or FTB or Tekkit or whatever.

I have a fairly extensive Linux MC server tutorial written, someday I will copy it over here.
 
  • Like
Reactions: Johnley

Relinquo

New Member
Jul 29, 2019
4
0
0
I don't know if its just me being silly, but the ftb screen wouldn't recognize the commands when I put them into the ftb screen directly. Commands such as 'whitelist' and 'stop'. The backup script is working beautifully but the way.
In the end I just ran the backup and killed the screen itself. Now I'm running it with the gui until I can work out how to get commands to work directly.

Also, about the startup question I posed earlier, how do I get it to run in a detached screen, since from what I gather, thats what the backup script shown earlier is looking for in order to post commands and server messages.
 

racer0940

New Member
Jul 29, 2019
4
0
0
Thanks for the help to all involved! I've got the server running, but I hit a snag snag on the backup section.

I did pretty much everything brathen has listed to do, however, I keep getting this returned:

Code:
tar (child): Cannot connect to ftb-srv2012-12-18.00: resolve failed
 
gzip: stdin: unexpected end of file
tar: Child returned status 128
tar: Error is not recoverable: exiting now

this is the sh file, I'm pretty daggone positive that my problem is the SRC line, but I have no idea what to put there. I've called the user ftb.
Code:
#!/bin/bash
 
# Set time for backup process
TIME=$(date +"%Y-%m-%d.%H:%M")
 
# Set destination and source path for tar command
DEST="/home/ftb/ftb-backup/ftb-srv$TIME.tar.gz"
SRC="/home/ftb"
 
# Turning world-save off and broadcast msg ING
screen -S ftb -X stuff "say Starting backup. World not saving... $(printf '\r')"
screen -S ftb -X stuff "save-off $(printf '\r')"
screen -S ftb -X stuff "save-all $(printf '\r')"
 
# Backup with tar for compressed file
tar -czf $DEST $SRC
 
# Turning world-save on and broadcast msg
screen -S ftb -X stuff "save-on $(printf '\r')"
screen -S ftb -X stuff "say Backup complete. World saving... $(printf '\r')"
Any help would be appreciated. Thanks!

edit: Is there a page somewhere that shows an auto saving script as well?
I know I sound so new to all of this, there's a very good reason...
 

Bråthen

New Member
Jul 29, 2019
41
0
0
I don't know if its just me being silly, but the ftb screen wouldn't recognize the commands when I put them into the ftb screen directly. Commands such as 'whitelist' and 'stop'. The backup script is working beautifully but the way.
In the end I just ran the backup and killed the screen itself. Now I'm running it with the gui until I can work out how to get commands to work directly.

Also, about the startup question I posed earlier, how do I get it to run in a detached screen, since from what I gather, thats what the backup script shown earlier is looking for in order to post commands and server messages.

When you are in screen just type server commands plain as is.
Code:
whitelist
or
Code:
stop

Screen is running in background (detached) if you press Ctrl a+d. Recall the screen session with:
Code:
screen -d -r ftb


thanks Brathen for backup script :)
Anytime! Good that its working. :)


Thanks for the help to all involved! I've got the server running, but I hit a snag snag on the backup section.

I did pretty much everything brathen has listed to do, however, I keep getting this returned:

Code:
tar (child): Cannot connect to ftb-srv2012-12-18.00: resolve failed
 
gzip: stdin: unexpected end of file
tar: Child returned status 128
tar: Error is not recoverable: exiting now

this is the sh file, I'm pretty daggone positive that my problem is the SRC line, but I have no idea what to put there. I've called the user ftb.
Code:
#!/bin/bash
 
# Set time for backup process
TIME=$(date +"%Y-%m-%d.%H:%M")
 
# Set destination and source path for tar command
DEST="/home/ftb/ftb-backup/ftb-srv$TIME.tar.gz"
SRC="/home/ftb"
 
# Turning world-save off and broadcast msg ING
screen -S ftb -X stuff "say Starting backup. World not saving... $(printf '\r')"
screen -S ftb -X stuff "save-off $(printf '\r')"
screen -S ftb -X stuff "save-all $(printf '\r')"
 
# Backup with tar for compressed file
tar -czf $DEST $SRC
 
# Turning world-save on and broadcast msg
screen -S ftb -X stuff "save-on $(printf '\r')"
screen -S ftb -X stuff "say Backup complete. World saving... $(printf '\r')"
Any help would be appreciated. Thanks!

edit: Is there a page somewhere that shows an auto saving script as well?
I know I sound so new to all of this, there's a very good reason...

Your backup folder may not be in your server folder. You now try to backup the backup folder aswell.
But you could do a exeption by alter the tar command in your scriptfile to:
Code:
tar --except="/home/ftb/ftb-backup" -czf $DEST $SRC
That way you don't have to move the folders.

Could also be the ":"-character. Try add \ just before : in TIME variable where the script define the time. Colon can in some cases do strange things in filenames. Also you could replace it with a period. Please make a reply on how it is working either way, thanks! :)

As for the auto saving you can use crontab. Alter your crontab file with this command:
Code:
crontab -e

And type the entry in the guide. Then close and save your crontab. This will make a scheduled command running the backup script in background.

Edit: Re-read my post and couldnt decide wether the backupfolder is in the server dir or the other way. Think it is so I will just leave it there. Multitasking isnt always good :D Correct me if Im wrong though. Thanks!
 

defakto

New Member
Jul 29, 2019
63
0
0
I've found, on multiple boxes that using

java -Xms256M -Xmx4G -XX:+AggressiveOpts -XX:-UseParallelGC -XX:ReservedCodeCacheSize=16m -XX:parallelGCThreads=2 -jar FTB-Beta-A.jar

greatly improves performance, more so than the typically flags that people reference. Even using 2g or less memory I have less server issues. Though, the config obviously needs to be tweaked for your personal setup.
 
  • Like
Reactions: Johnley

Dread Quixadhal

New Member
Jul 29, 2019
5
0
0
Clever trick with screen, I like it. :)

One thing that might help ensure backups are valid, I added a "sync; sleep 10; sync" before the tar operation, as I noticed on occasion the minecraft server was still flushing activity out to disk. The screen command returns as soon as it pushes the commands into the console window, even though it might take the server a few seconds to actually do the save-all operation.

Thanks guys!
 

jasonmicron

New Member
Jul 29, 2019
20
0
0
Great guide - but still, it isn't generally advisable to SSH in directly as root, and even better would be to use ssh keys rather than a password. SSH into the server as root the first time if you need to, only to create your own user account and generate your SSH keys, then only use that account from that point on.

I'm more paranoid than most though.
 

Johnley

New Member
Jul 29, 2019
36
0
0
Great guide - but still, it isn't generally advisable to SSH in directly as root, and even better would be to use ssh keys rather than a password. SSH into the server as root the first time if you need to, only to create your own user account and generate your SSH keys, then only use that account from that point on.

I'm more paranoid than most though.
This isn't a complete guide to linux, as there are more of those than hair on my head. this is a quick guide to getting a server started.