Things you are going to need:
With that out of the way, its time to get down to business. Pick a location and make two folders or more if you work on multiple projects. The first one is going to be all the original textures from mods and vanilla. The second folder is the finished work. It will require the same folder structure to work properly when packaged back into a .zip. Minecraft can read folders as textures but we can't distribute an entire folder very fast.
To get the vanilla textures, find your versions folder. Its in the main install directory for whatever launcher you use. Open the version folder you want and open the .jar inside. Pluck the assets folder and put that into your source folder. Now mods are a little deeper but still fairly easy. First find your instances folder, then the instance folder you want the mod from, then the minecraft folder, and finally the mods folder. Right click on the mod of choice and open it with the archiving tool. The only folder we care about again is assets and if you guessed it goes in the source folder, you are catching on quick. If you are asked to merge, select yes. No files will be overwritten unless you have copied that mod previously. Save for a few mods, every texture in the game is stored in that assets folder.
Now, inside each mod folder or even vanilla folder is just a folder called textures. If there is anything else, you can safely delete it unless the mod author is mucking about abnormally. Inside that folder is either the textures themselves or sub folders with textures in them. Most mods break into groups of blocks, items, GUI's, entities, and particles.
Edit: Part 2 is being worked on.
The first step to making a texture from an existing one is to open the original in your image manipulation software. From here I will call this IMS. After its open find the resize tool and expand to to the correct size. Control + R is a common shortcut for this. Unless you are working on a texture sheet like those from old versions of Minecraft, length and width must be the same. You can use any size. Nearest neighbor will multiply your pixels so when shrunken back down the image is the original. Best Quality attempts to increase quality by creating new pixels based on the colors of the existing ones. More on this later.
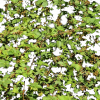
For brand new textures from nothing, you will create a new texture. This can be commonly done with Control + N. If your IMS creates a background automatically, delete it so you have a fully transparent work area. Now you have the choice of importing existing textures as new layers or creating your own using the tools in your IMS. This is art so make what you think looks good, not what you think others will like. A general tip is that anything used in world generation or decoration needs to tile well. This means that from a medium distance, you can't pick out the lines where each block is. For anything else like items, machines, entities, or GUI's this doesn't matter because you want them to be distinct.
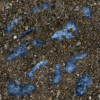
Once you have a texture, either from resizing or from scratch you can apply a variety of effects to it, commonly called filters. You want to create a unified feel for your pack, so make sure the style is consistent. Something to avoid is gradients over large areas. It makes the whole thing look bland and out of place unless you are working with high definition packs. You can find plugins for most IMS to add more filters but careful not to go overboard, you probably won't need a lot of them much.
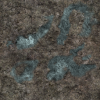
You don't have to use filters at the end and you aren't limited to one filter. In fact, using layers and filters you can do a lot of work and at the end you can merge all the layers. For simple textures you don't need anything special, and will most likely find it takes the same amount of time to do it by hand or using the color replace tool.
That's all I have for you right now. Let me know what if you have any questions or comments, good and bad. Oh, before I forget, save files as .png or you will have a bad time. Minecraft won't read other formats and a good deal of them are lossy which means they lose quality.
- A computer, with all the normal accessories. A screen with decent color reproduction is great but not required. At least 4 gigs of memory is suggested for running a modded instance of Minecraft and image manipulation software. This is not light on memory if you are loading a lot of textures at once.
- An operating system. Doesn't matter if you run Windows, Mac, or Linux. Hell, run all three at the same time if you want.
- A copy of Minecraft. Legal copy or not doesn't matter to me, but you need to be able to run mods.
- Your choice of image manipulation software. There are tons out there. Paint won't cut it though. Paint.Net is fine and what I use. For Linux, look into Gimp, for Mac I don't really know asides from Photoshop. Mac users, what do you use?
- Your choice of archiving software. Every OS has tons of choices, but as long as it can read and write .zip files you are golden.
- Time. Simple recoloring stuff takes only minutes but creating entirely new textures or resizing existing ones can take much longer.
With that out of the way, its time to get down to business. Pick a location and make two folders or more if you work on multiple projects. The first one is going to be all the original textures from mods and vanilla. The second folder is the finished work. It will require the same folder structure to work properly when packaged back into a .zip. Minecraft can read folders as textures but we can't distribute an entire folder very fast.
To get the vanilla textures, find your versions folder. Its in the main install directory for whatever launcher you use. Open the version folder you want and open the .jar inside. Pluck the assets folder and put that into your source folder. Now mods are a little deeper but still fairly easy. First find your instances folder, then the instance folder you want the mod from, then the minecraft folder, and finally the mods folder. Right click on the mod of choice and open it with the archiving tool. The only folder we care about again is assets and if you guessed it goes in the source folder, you are catching on quick. If you are asked to merge, select yes. No files will be overwritten unless you have copied that mod previously. Save for a few mods, every texture in the game is stored in that assets folder.
Now, inside each mod folder or even vanilla folder is just a folder called textures. If there is anything else, you can safely delete it unless the mod author is mucking about abnormally. Inside that folder is either the textures themselves or sub folders with textures in them. Most mods break into groups of blocks, items, GUI's, entities, and particles.
Edit: Part 2 is being worked on.
The first step to making a texture from an existing one is to open the original in your image manipulation software. From here I will call this IMS. After its open find the resize tool and expand to to the correct size. Control + R is a common shortcut for this. Unless you are working on a texture sheet like those from old versions of Minecraft, length and width must be the same. You can use any size. Nearest neighbor will multiply your pixels so when shrunken back down the image is the original. Best Quality attempts to increase quality by creating new pixels based on the colors of the existing ones. More on this later.
For brand new textures from nothing, you will create a new texture. This can be commonly done with Control + N. If your IMS creates a background automatically, delete it so you have a fully transparent work area. Now you have the choice of importing existing textures as new layers or creating your own using the tools in your IMS. This is art so make what you think looks good, not what you think others will like. A general tip is that anything used in world generation or decoration needs to tile well. This means that from a medium distance, you can't pick out the lines where each block is. For anything else like items, machines, entities, or GUI's this doesn't matter because you want them to be distinct.
Once you have a texture, either from resizing or from scratch you can apply a variety of effects to it, commonly called filters. You want to create a unified feel for your pack, so make sure the style is consistent. Something to avoid is gradients over large areas. It makes the whole thing look bland and out of place unless you are working with high definition packs. You can find plugins for most IMS to add more filters but careful not to go overboard, you probably won't need a lot of them much.
You don't have to use filters at the end and you aren't limited to one filter. In fact, using layers and filters you can do a lot of work and at the end you can merge all the layers. For simple textures you don't need anything special, and will most likely find it takes the same amount of time to do it by hand or using the color replace tool.
That's all I have for you right now. Let me know what if you have any questions or comments, good and bad. Oh, before I forget, save files as .png or you will have a bad time. Minecraft won't read other formats and a good deal of them are lossy which means they lose quality.
Last edited: