Integrated Circuits Alpha
The sister thread here: http://www.minecraftforum.net/forum.../2352247-integrated-circuits-alpha-v0-8r12#c2
The sister thread here: http://www.minecraftforum.net/forum.../2352247-integrated-circuits-alpha-v0-8r12#c2
Hello dear Redstone Fetishists! Integrated Circuits is a Mod that lets you create, you guessed it, Integrated Circuits. If you've played with mods like RedPower, P:R or bluepower before, you should feel home right away. The ICs are created by combining the standard logic gates that were first introduced by RedPower. The behaviour of the gates is described here:
http://projectredwiki.com/wiki/Logic_Gate
If you find any inconsistencies, please report them to me.
What are the benefits?
- Performance - Because you don't need constant block updates
- Portability - Every circuit can be carried around as a blueprint
- Testablity - Circuits are created with the CAD, so you can debug them in real time
- Compatibility - Works with most Redstone/Wire related Mods out there
CAD
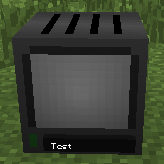
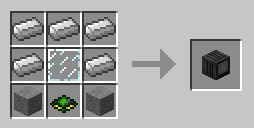
The CAD is the first block that you'll need when creating circuits. It has a front slot where you have to insert a floppy disk that will store your circuit as a blueprint. The floppy is needed to assemble the circuit, but more of that later. The CAD has a rather complicated looking GUI, but don't worry, once you got used to it, it's quite simple.
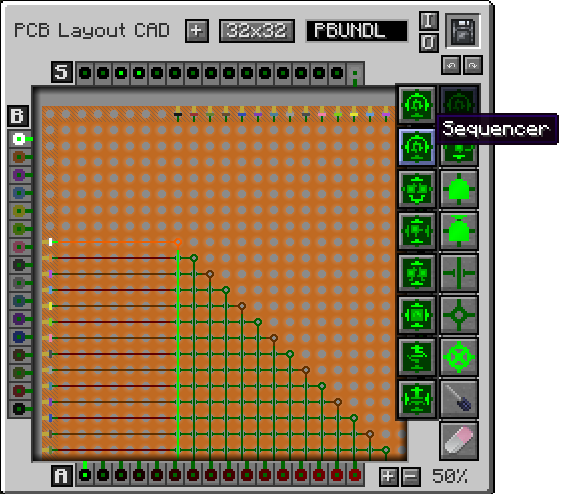
- Simple: Digital redstone input, 0 or 1
- Analog: Analog redstone input, signal strength from 0 to 15
- Bundled: Digital redstone input, 16 channels
On the top right you see the IO, The slot is displaying the floppy disk you inserted to the CAD. "I" imports a circuit from the floppy, "O" stores it. The two arrows are "undo" and "redo", it's also using the keyword shortcuts CTRL + Z and CTRL + Y. The top row is the general section, you can change the circuit's name with the textbox (up to 7 characters, that's all what fits on the circuit, I'm sorry), The size with the center button that displays the current dimension and the "+" clears the complete circuit.
There are three tiers of circuits, the first tier (16x16) can only deal with Redstone input, and the other two tiers (32x32 and 64x64) accept either type of connection.
On the right you see the tool section, with roughly ordered circuit parts that you can select. The currently selected part is highlighted in blue and it snaps to the perfboard in the middle when you hover over it. Wires can be dragged and the other parts are simply clicked onto the circuit. The rubber is used to remove circuit parts and the screwdriver can configure certain parts, for example rotate them and changing the delay in some cases. Detailed information will be shown when you hover a circuit part in edit mode.
The middle part shows the currently edited circuit, you can chage the frame by dragging with the shift key pressed. You can zooom with the mouse wheel or by pressing the "+" and "-" buttons on the botton right side.
That's about all you need to know about the CAD, onto the next step, assembling the circuit!
Assembler
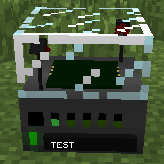
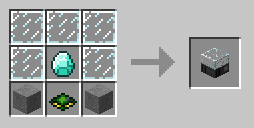
Once you have a blueprint ready, you can assemble a circuit to place it down in-game. For that you need the assembler. Just like with the CAD, click onto the front slot to insert your floppy disk. If you did everything correctly, the assembler should show you a list of ingredients you need in order to produce a PCB. But first, you need to populate the assembler with a few lasers that will etch the PCB for you. Lasers are crafted like this:
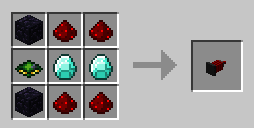
Each assembler can hold up to four lasers, more of them will make the processing faster, of course.
The assembler can interact with pipes just like you'd imagine, the back is the output of circuits, every other side is input. You can request a couple of PCBs by hand, just change the number displayed with the "+" and "-" buttons. It will adjust the amount of ingredients needed and the an "X" is diplayed next to the ingredient if not supplied, an arrow when supplied. The "run" button starts the job, the "X" button can cancel a job. The bottom left slot is for a blank Circuit Board.
When the assembler is done processing, it will spit out a Printed Circuit board that can be transformed into the finished circuit by placing it in a crafting grid. (I plan some more processing steps here, this is only temporary)
Circuits
Okay, you have the circut now, place it down! You can place them on either side of a block, of course.
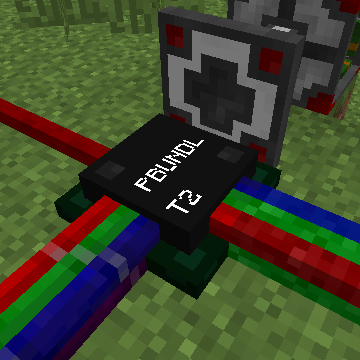
It will act just like in the CAD.
7 Segment Displays
These are my personal favourite:
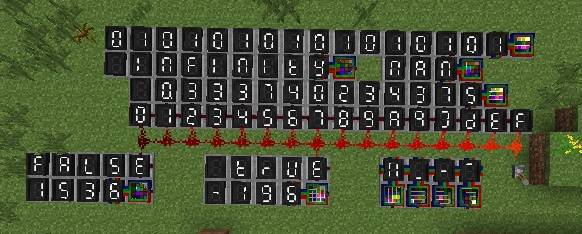
I'll leave it to you to figure out how they work, they are as best to use with the circuits.
If you ever wanted to build a calculator that can use floating points and were too lazy to build the digital to analog converter, there you have it. They can also output other types of signals so don't worry if you don't want floats ^^
They are also dyeable, btw.
Items
There are a couple of miscellaneous mostly related to processing and crafting. I won't go through those in any further delail. Note that every crafting recipe of the mod is influenced by the amout of compitable mods you are playing it, for example the silicon bowle won't appear if you have P:R installed.
Screwdriver
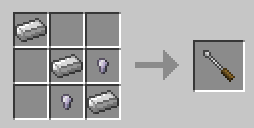
The screwdriver is needed if you don't have any other mod installed that can provide one, you can rotate the circuits/segments with it. It's crafted like this:
Compatibility
Integrated Circuits is designed to have a large spectrum of supported mods, In total:
Project:RED, Minefactory Reloaded, Red Logic, (bluepower - in progress), Forge Multipart and Computer Craft.
You'll need either MFR, RL or P:R in order to use the bundled output on the circuits up to their full potential, however, it will work without any wires if you place them next to each other, I wouldn't recommend that though.
Circuits and 7 Segment Displays both have a FMP compitable version that can be crafted by adding a stone cover to the normal gate.
The FMP gates can ONLY work together with Project:Red's bundled wires and don't have CC support so keep that in mind!
The CC integration is quite interesting because you can do crazy stuff like this:
Download / Installation / Legal
Ah, the interesting part!
ICs has a jenkins server, so you can always get the newest build of here:
http://jenkins.rx14.co.uk/job/Vic/job/Integrated-Circuits/
It is also on GitHub and open source, you can get stable builds from there as well:
https://github.com/Victorious3/Integrated-Circuits
See the releases page.
Integrated Circuits is licensed under a Creative Commons licensce BY-NC-SA-4.0

What does that mean to you?
You have permission to distribute copies of the mod in modified or unmodified form, with modpacks, etc AS LONG as you give proper credit and DON'T charge for it. So no adfly links or anything like that.
While it says that you can re-host the mod, please don't. I can't stop you from doing it but I'd like you to respect me and my effort that's been going into it so rather use the maven repo in place:
http://mvn.rx14.co.uk/simple/local/vic/mod/integratedcircuits/integratedcircuits/
How do you install it? What a question, it's a forge mod so place it in the mods folder...
You need CCC in order to run it, everything else is optional. You can get CCC here:
http://chickenbones.net/Pages/links.html
That's about it, you should be good to go now! If you have any questions, feel free to ask me,
I frequent IRC on irc.esper.net@#obsidian
I'm also on twitter: https://twitter.com/VicNightfall
Credits
<< See the sister thread >>
Last edited: