Making Animated Backgrounds

SkeletonPunk

New Member
Jul 29, 2019
2,063
-3
1
This is a tutorial for people who want to know how to make their Minecraft main menu background animated.
This is not the best way to do it, but its the way I did it. The quality of the gif will also not look like the one in the example(I know it looks weird and blurry, and that was to make it look like Minecraft's default blurred panorama background).

In order to make this you will need the following things
  • A recording software(I am going to be using Fraps).
  • A video to gif converter(I am going to be using GifYoutube) and Make A Gif
  • (OPTIONAL) An image editing program that can edit gifs.
  • A gif editing program that will turn a gif into the frames it has(I will be using EZGif)
  • Minecraft Forge
  • Custom Main Menu Mod
  • Resource Loader

Once you have those its time to begin:

The first step is to make the actual video. If you want to keep your main menu looking smooth I suggest you make this a perfect looping gif (or as close to perfect as you possibly can). And if you are using the free version of fraps like me, then I suggest you leave some space around the top that is not necessary for the video so you can just crop it out.

Here is an example of one:

After you have done this you can convert it to a gif. I wanted to get a better quallity gif then I would if I used my regular way, so I used the webm version of the gif and turned that into a gif using Make A Gif.

Here is the result:
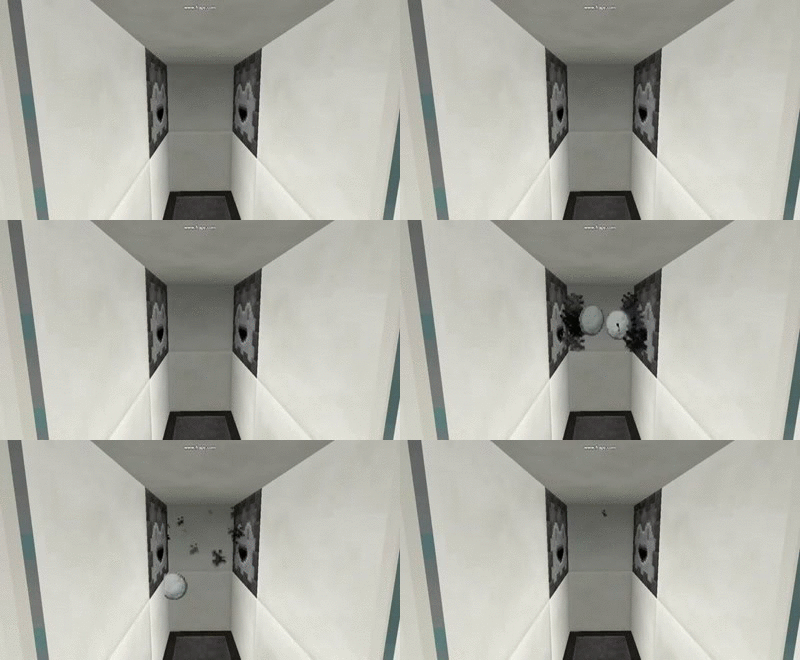
CM5v9kW.gif


Now that you have that use the gif editor of your choice to turn the gif into a bunch of frames, once you have downloaded them you must convert them into png files. The easiest way to do this is to put everything into a compressed file and rename the ".gif" into ".png". This will probably take a little bit. Once this is done put it in a folder inside your resource folder.

After that go into your menu json and add something similar to this:
Code:
 "background":
        {
            "image" : "",
            "slideshow":
            {
                "images" : ["example:frame_001.png","example:frame_002.png","example:frame_003.png","example:frame_004.png","example:frame_005.png","example:frame_006.png","example:frame_007.png","example:frame_008.png","example:frame_009.png","example:frame_010.png","example:frame_011.png","example:frame_012.png","example:frame_013.png","example:frame_014.png","example:frame_015.png","example:frame_016.png","example:frame_017.png","example:frame_018.png","example:frame_019.png","example:frame_020.png","example:frame_021.png","example:frame_022.png","example:frame_023.png","example:frame_024.png","example:frame_025.png","example:frame_026.png","example:frame_027.png","example:frame_028.png","example:frame_029.png","example:frame_030.png","example:frame_031.png","example:frame_032.png","example:frame_033.png","example:frame_034.png","example:frame_035.png","example:frame_036.png","example:frame_037.png","example:frame_038.png","example:frame_039.png","example:frame_040.png","example:frame_041.png","example:frame_042.png","example:frame_043.png","example:frame_044.png"],
                "displayDuration" : 1,
                "fadeDuration" : 0
            }
        }

The result should be something like this
 

Plainy

New Member
Jul 29, 2019
366
0
0
So how did you get the menu buttons to the sides again? :p

#Ontopic:
That actually is awesome now to create some sort of timelapse or would that be to much of the good stuff?
 

buggirlexpres

Relatable Gamer
Trusted User
Retired Staff
Nov 24, 2012
3,937
7,362
663
she/her
twitter.com
So how did you get the menu buttons to the sides again? :p
Via the posX, alignment, and posY fields in the respective button. The alignment will determine where the button is based off of, and the x and y position will determine the offset from that spot.
Code:
"singleplayer":
{
"text" : "menu.singleplayer",
"posX" : 55,
"posY" : -35,
"width" : 90,
"height" : 20,
"alignment" : "left_center"
},
 

SkeletonPunk

New Member
Jul 29, 2019
2,063
-3
1
So how did you get the menu buttons to the sides again? :p

#Ontopic:
That actually is awesome now to create some sort of timelapse or would that be to much of the good stuff?
I suppose if you were to make a long animation, then stich EVERY frame together sort of like you would an animated texture then set the png.mcmeta framerate to 1 like so:
Code:
{
    "animation":
            {
                "frametime": 1
            }
}
then made the background like this
Code:
"background":
        {
            "image" : "example:[animatedimageyoudid'sname].png",
            "mode" : "stretch"
        }
    }
}
then it might work. But I have not tested that so don't quote me on it, this is also a MUCH better way to make animations if this works since you can get much faster animations as well as just having 2 files as your back ground instead of 73 or something.

In other news I have found a quicker more efficient and higher quality way of doing this using VLC. only problem is it can be buggy at times.

Here is an example of the what it can do:
notice the MUCH higher quality.

Here is a tutorial on that
1. Create a folder to store your frames and copy the path to it..

2. Click Tools -> Preferences in VLC.

3. Under “show settings”, click “all”.

4. Under “Video”, select “Filters”. Check the “Scene video filter”.

5. Expand “Filters” and select “Scene filter”,

6. Paste the path from earlier into “directory path prefix”.

7. Decide what proportion of the frames you want to export. So if you want every frame put "1" and and if you want every other frame put "2" in. Also make sure you have set a prefix to the one you have in your menu.json. So if its "frame_001" make the prefix "frame_".

8. Click “save”

9. Click Media -> Open Video and find your video. Patiently let the whole thing play.

10. Click Tools -> Preferences. Under “show settings”, click “all”. Under “video”, select “filters”. Uncheck “Scene video filter”. Click “save”. This is so that VLC won’t generate thumbnails the next time you play a video.

11. Open the folder you created earlier. The thumbnails should be there.

12. put all the images in your folder

13. There will probably be a bunch of 0's in front of the frame, all you have to do is use a programe like notepad++ and then find and replace "frame_"(for example") to "frame_000" then go to where the double digit frames are and do this with "frame_000" but replace it with "frame_00" keep doing this until every image is covered

14. test it.
 
  • Like
Reactions: Yulife

SkeletonPunk

New Member
Jul 29, 2019
2,063
-3
1
Is there a cap of frames we can use? Or is there a limited amount?
No, not that I am aware of at least. I was able to make an animation with 120 frames in it.The only cap is your patients to make the animation as far as I am aware of.
 
  • Like
Reactions: Yulife

Yulife

New Member
Jul 29, 2019
889
-4
0
No, not that I am aware of at least. I was able to make an animation with 120 frames in it.The only cap is your patients to make the animation as far as I am aware of.
That means it would get super smooth? Keke.
If I wanted to make a new main screen I wouldn't mind all that copy pasting, lol.
 
  • Like
Reactions: SkeletonPunk

SkeletonPunk

New Member
Jul 29, 2019
2,063
-3
1
So the question remains;
Can we have animation and the panoramic view?​

[ideally without a rotating camera; otherwise the .gif will be very large]
panoramic view is already a feature in Custom Main Menu.

EDIT: Oops, I think I get what you mean. Not without recording it.
 
Last edited:
  • Like
Reactions: Yulife

lumien

New Member
Jul 29, 2019
66
0
0
Wow, i didn't even think about this being possible with the slideshow feature xD. This is amazing! :D

I am in the process of adding apng (animated png) support to (for now) backgrounds at the moment so that will probably make animated backgrounds a bit easier :).
 

SkeletonPunk

New Member
Jul 29, 2019
2,063
-3
1
Wow, i didn't even think about this being possible with the slideshow feature xD. This is amazing! :D

I am in the process of adding apng (animated png) support to (for now) backgrounds at the moment so that will probably make animated backgrounds a bit easier :).
I guess all you would have to do to convert my method to an APNG is compress all the frames and put them in an APNG converter.
 
S

SHeepJuice

Guest
Mine isn't working for some reason? I used the code that was given at the start but all I get is a black screen?
 

Walter Disney

New Member
Sep 30, 2020
1
0
2
I know this is an old thread but when I got this working there was a lot of stuttering. How do I fix this?