Greetings everyone,
After being a creeper on foruns for some time, I have noticed that very few people make posts about the factorization servos. So after finally making a profile I actually start on a conversation about them which made me want to start this thread. Let's give them servos some love.
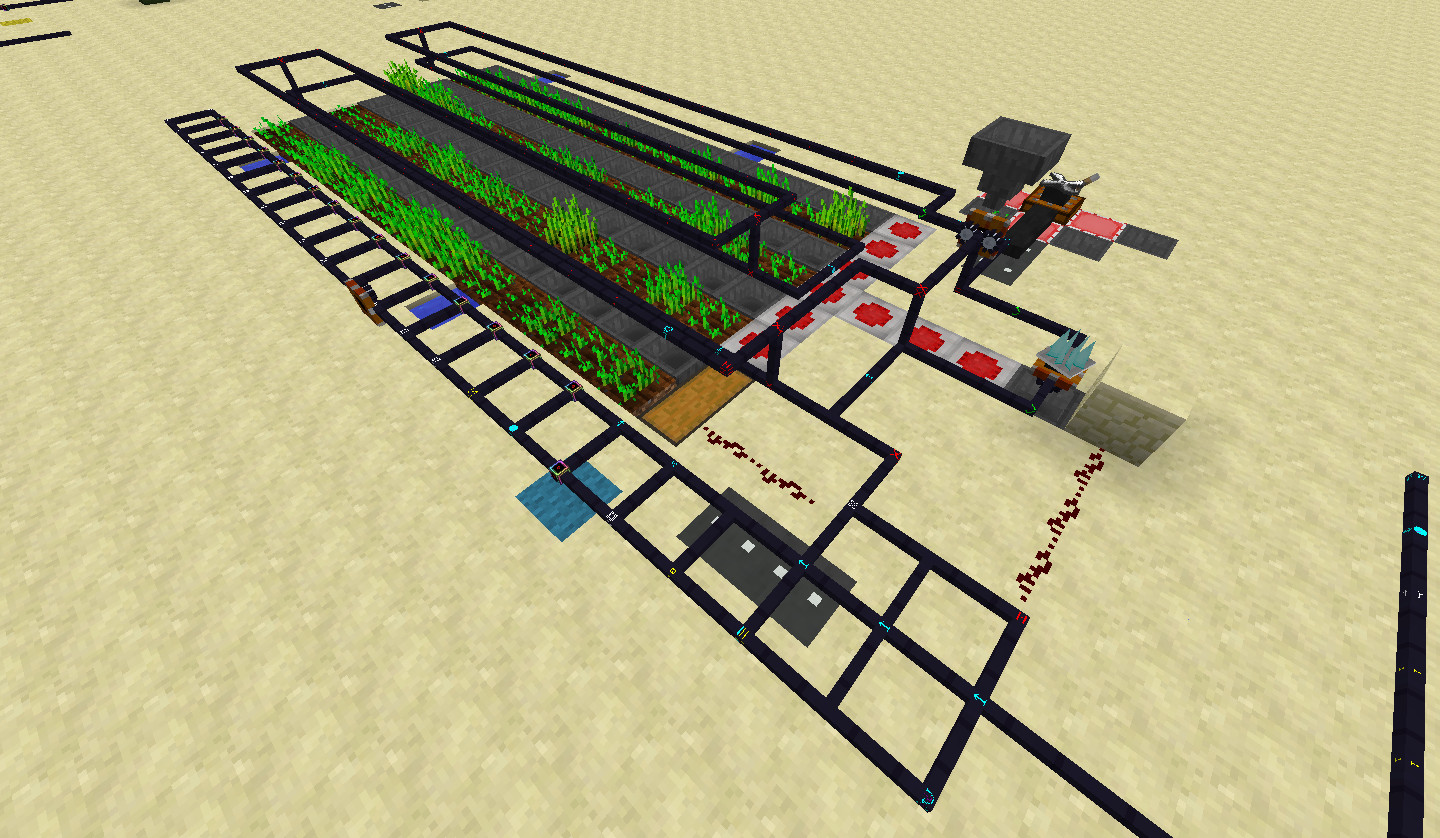
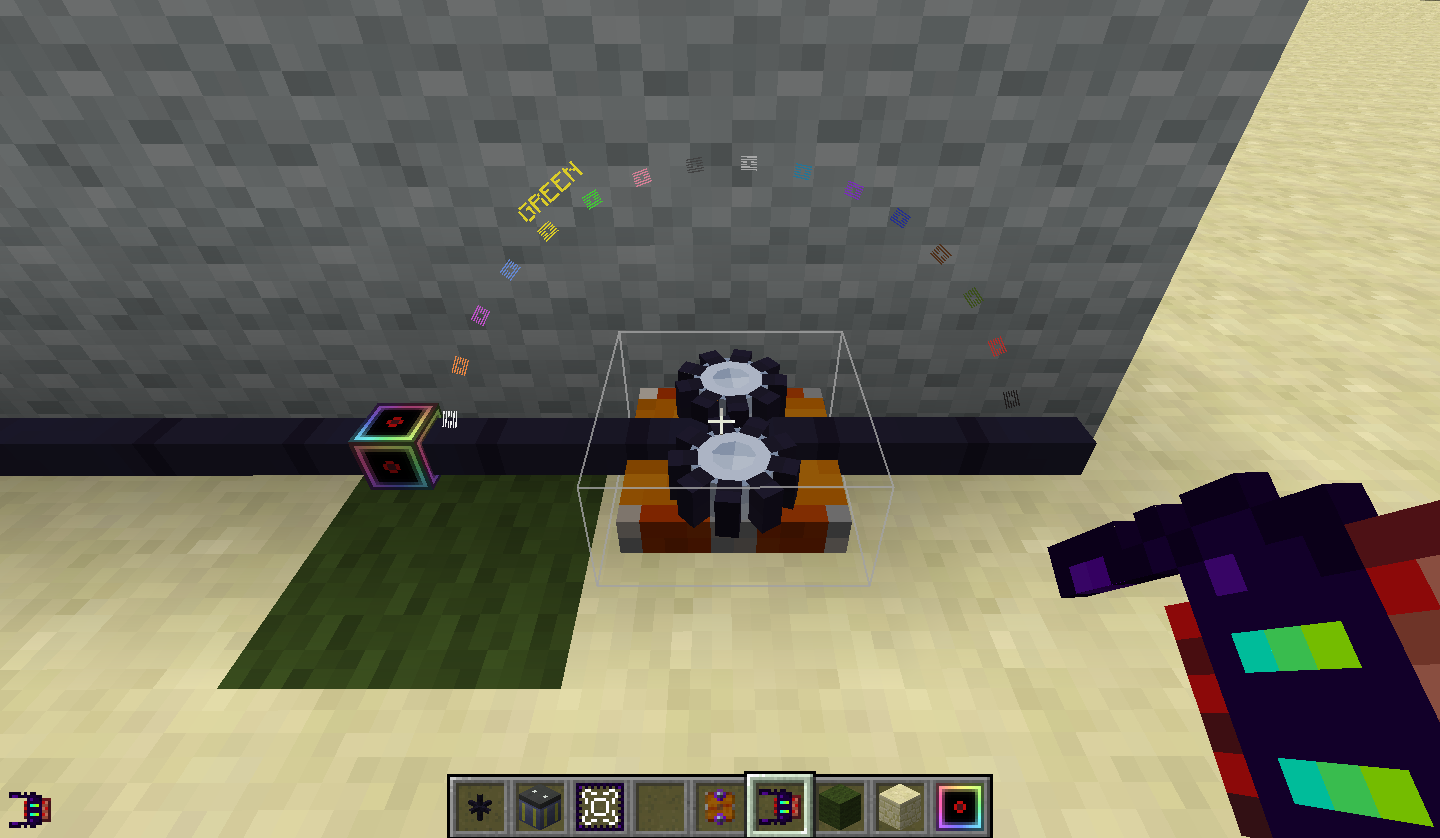
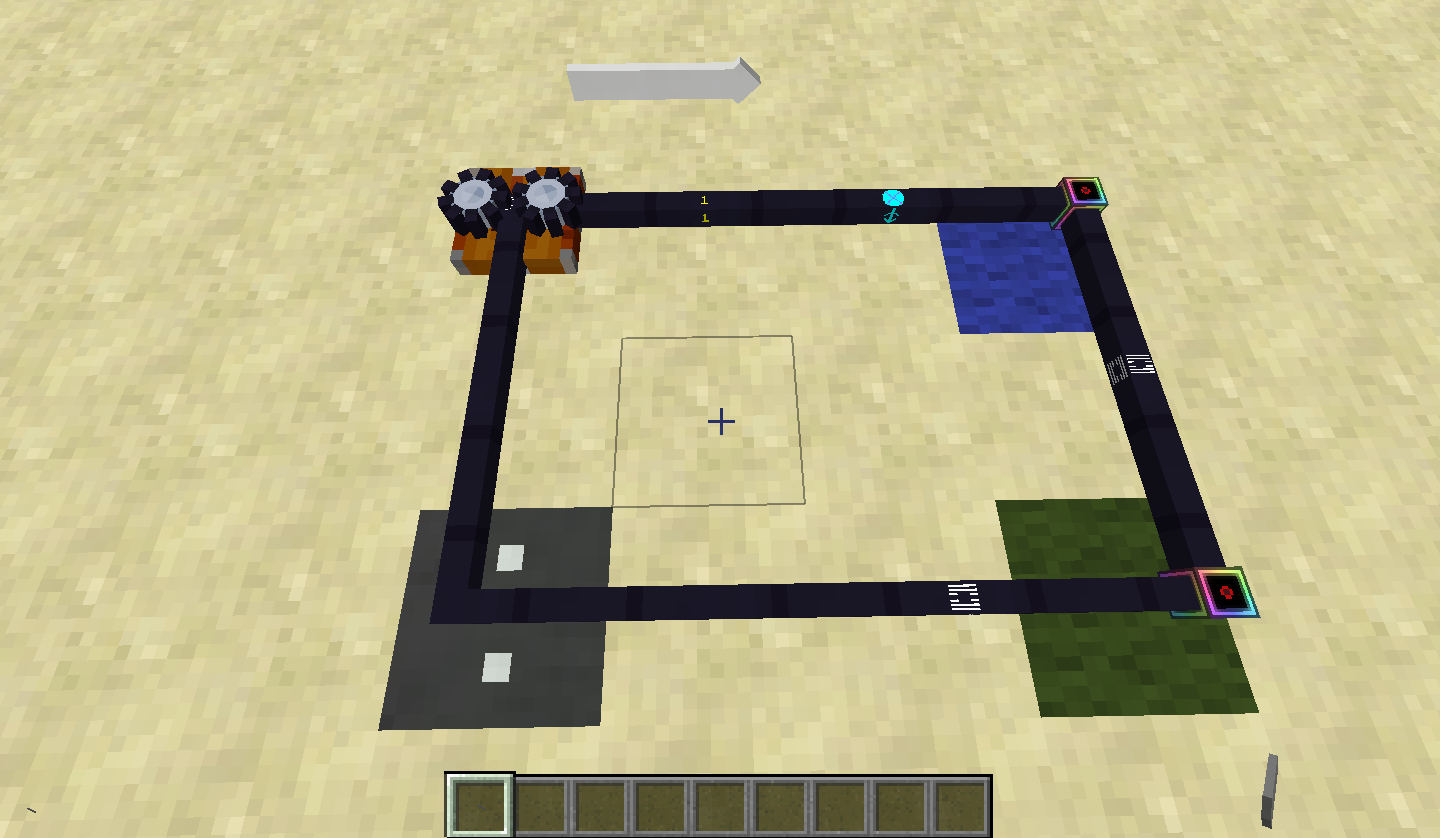
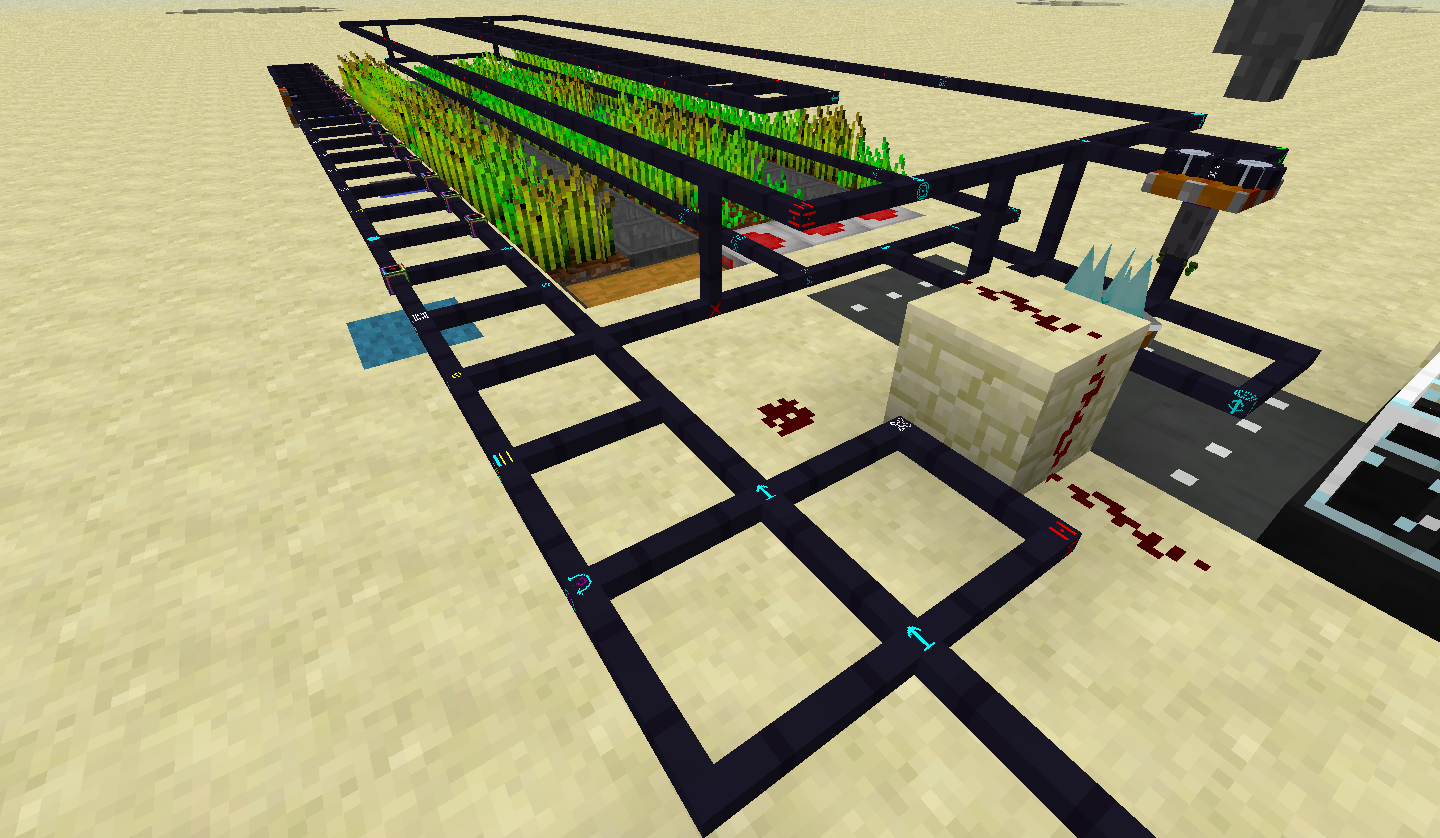
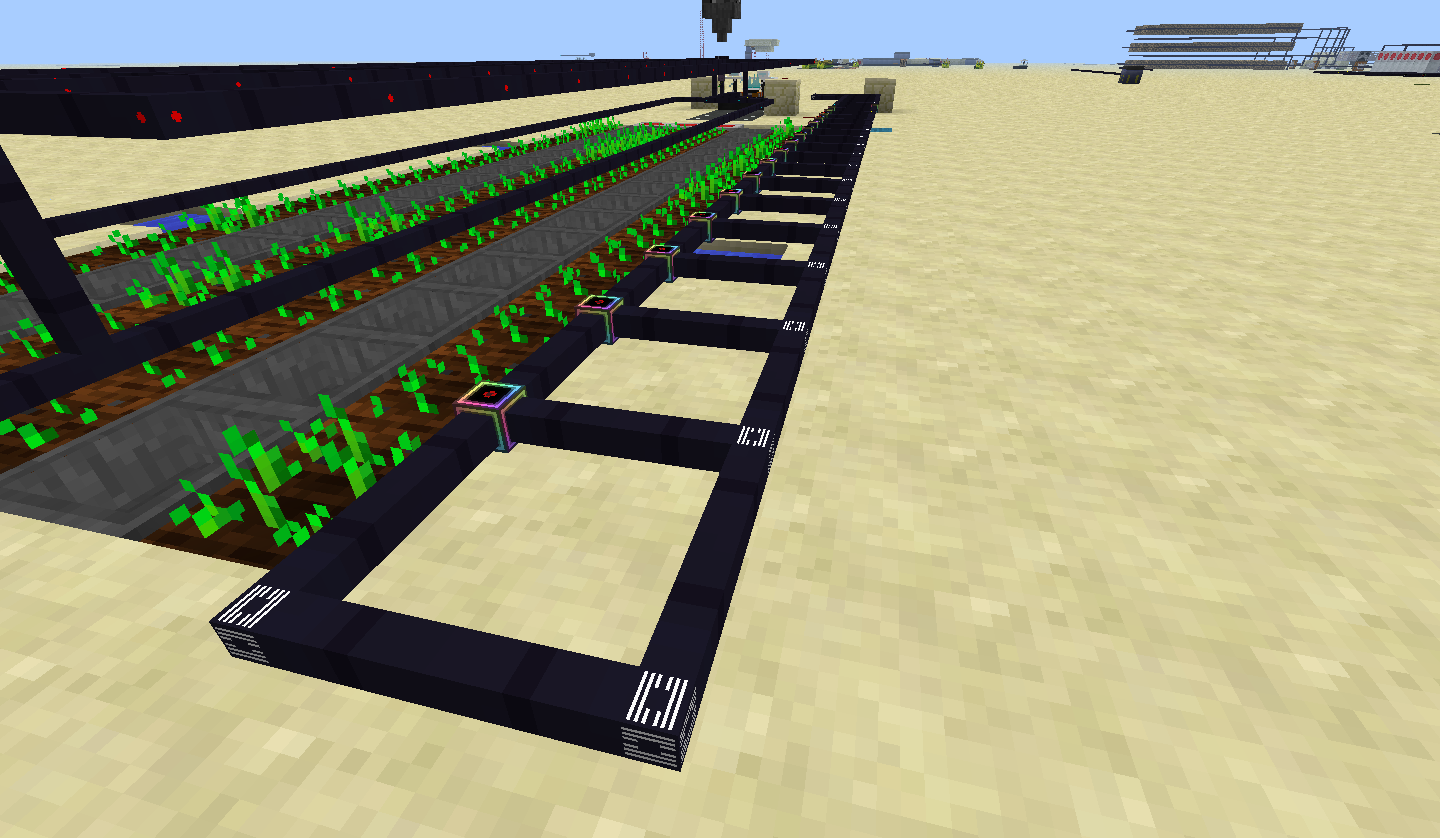
I'll start: here is how I automated Crystallizer's with only servos (I say "I" but I got the programming from somewhere else actually)
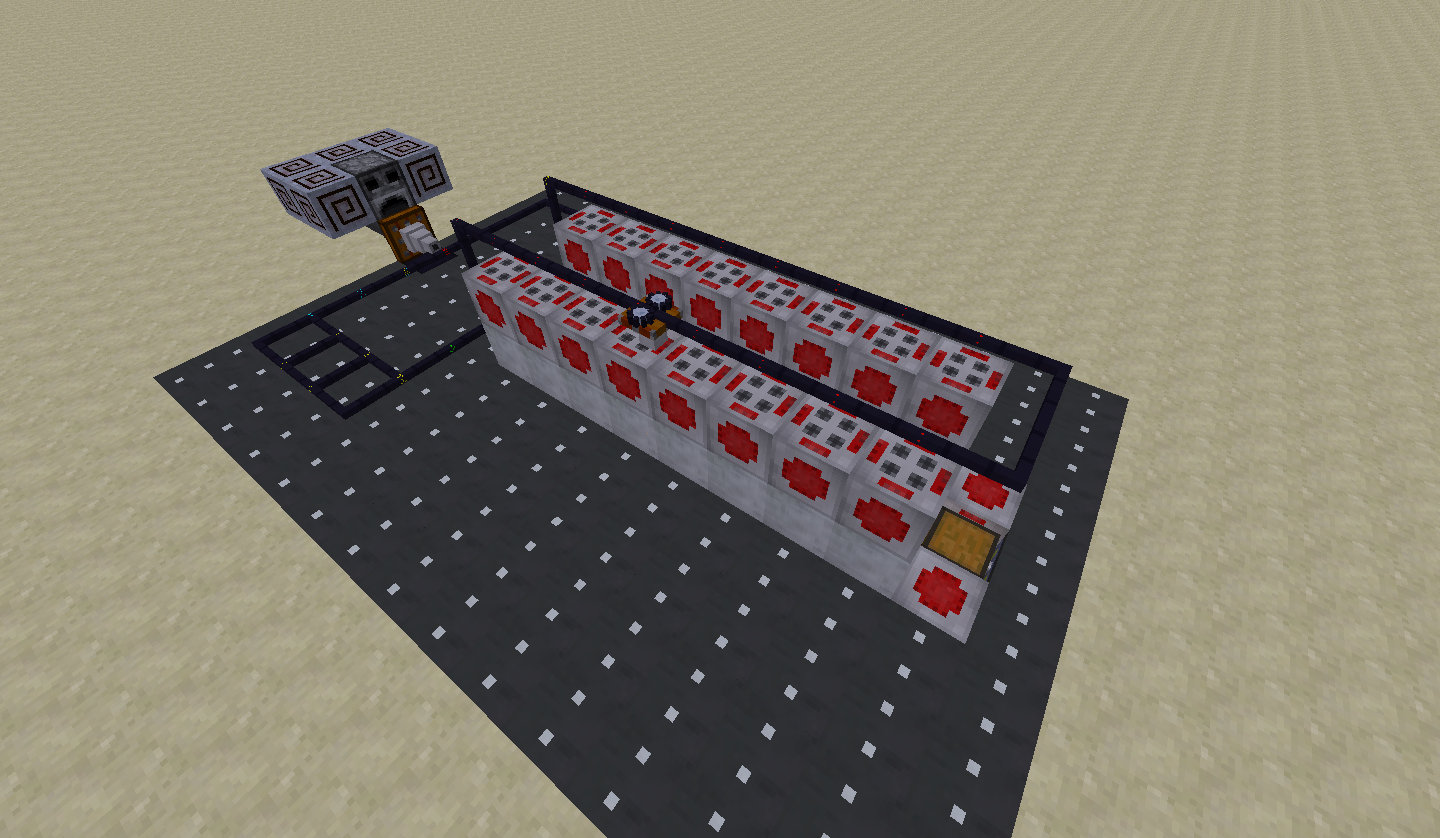
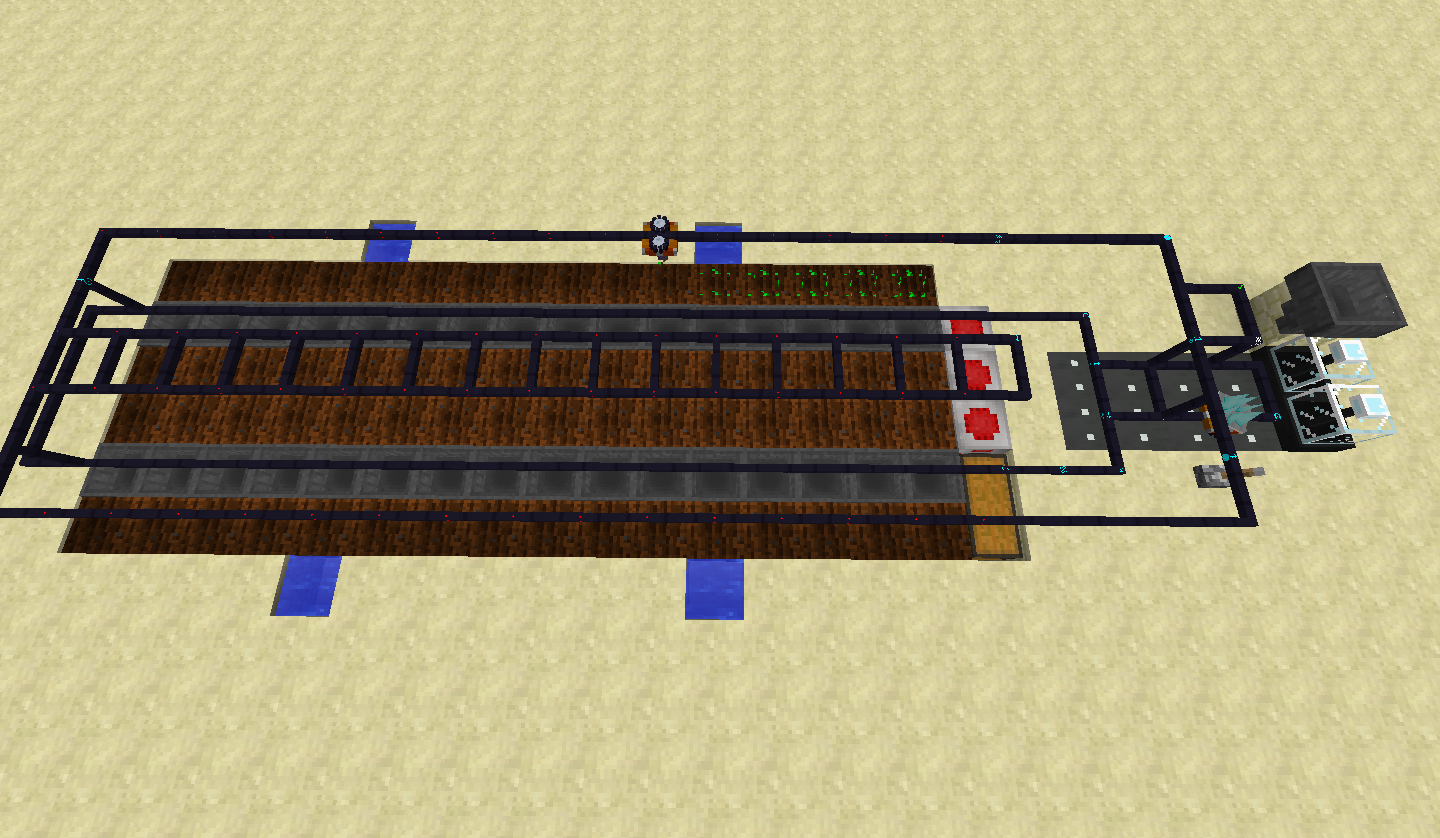
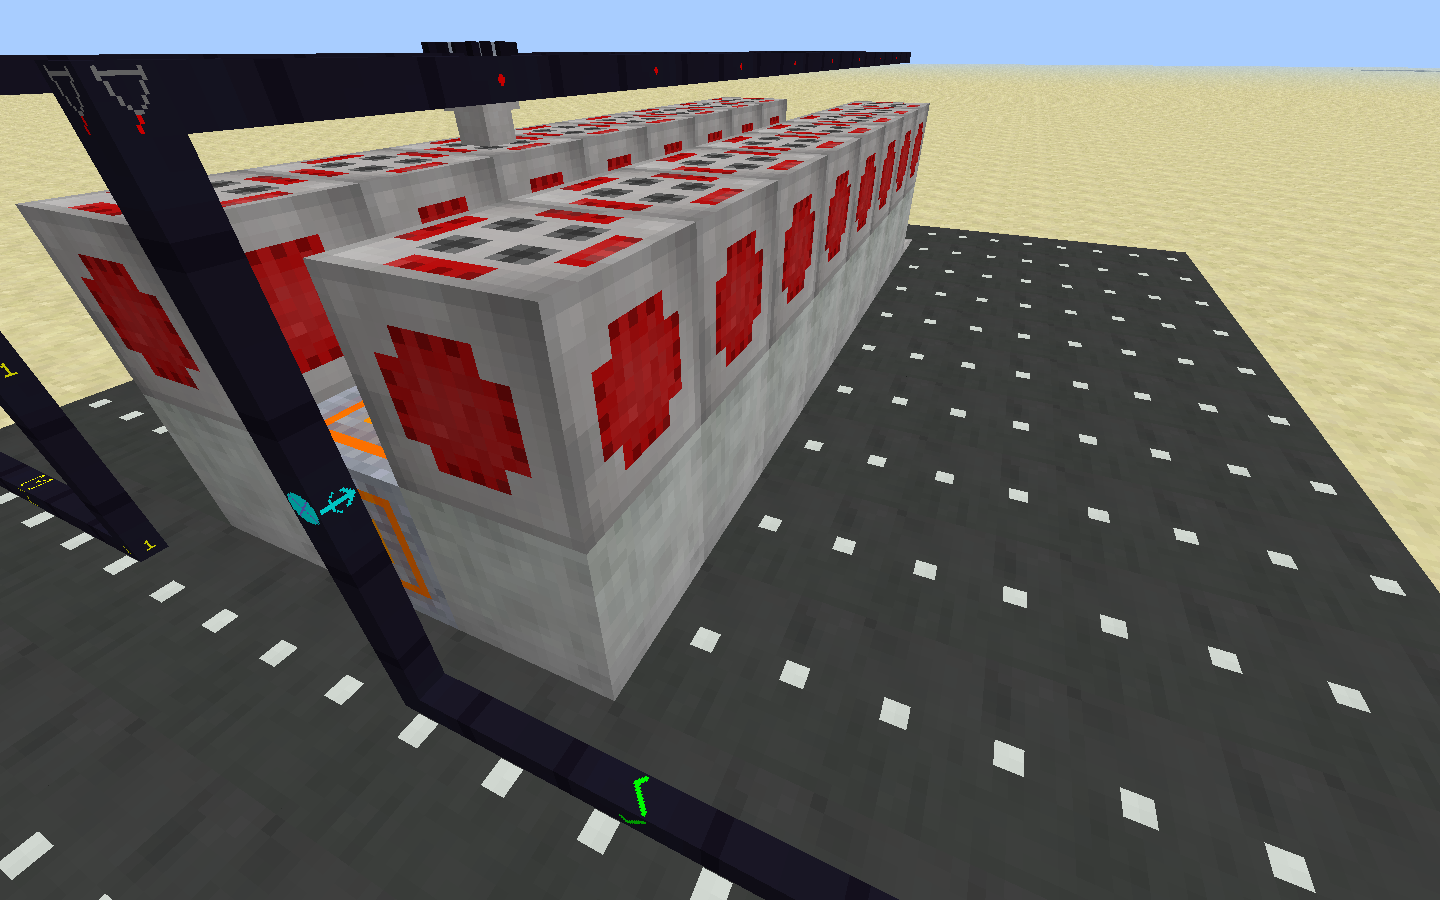
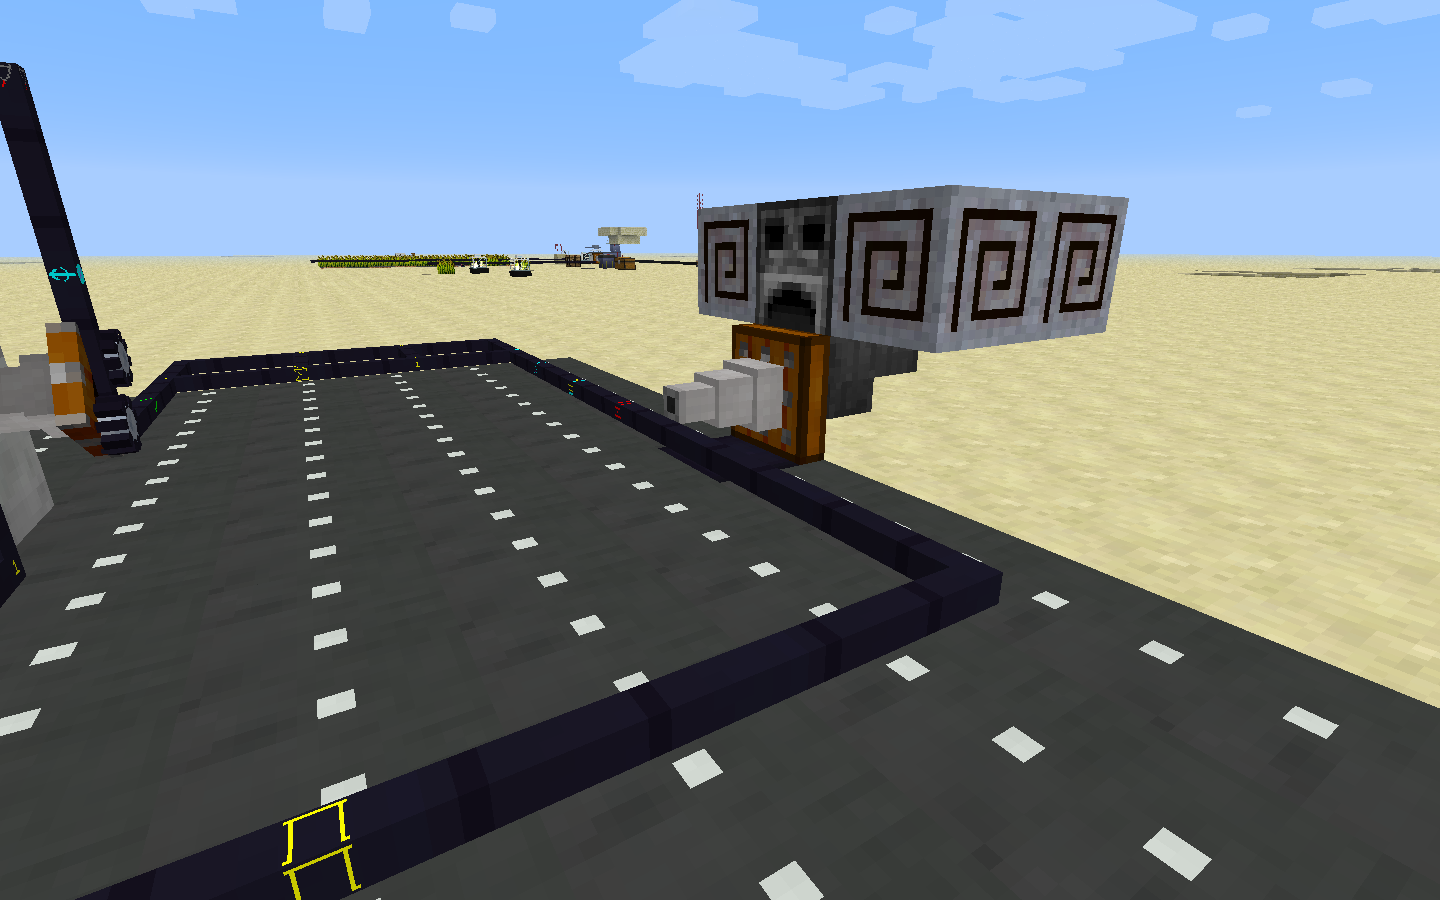
(The servo gets the chunks from the slag furnace - which is only decorative here - via a item shifter and goes its merry way in a anti-clockwise loop. It then inputs the chunks in the crystallizer through parasieves, which are basically filters that are saying "this kind of chunk can go here". There are hoppers below the criystallizers that are all pointing into the last two parasieves on the chest. Parasieves also act as extended acess to a inventory.)
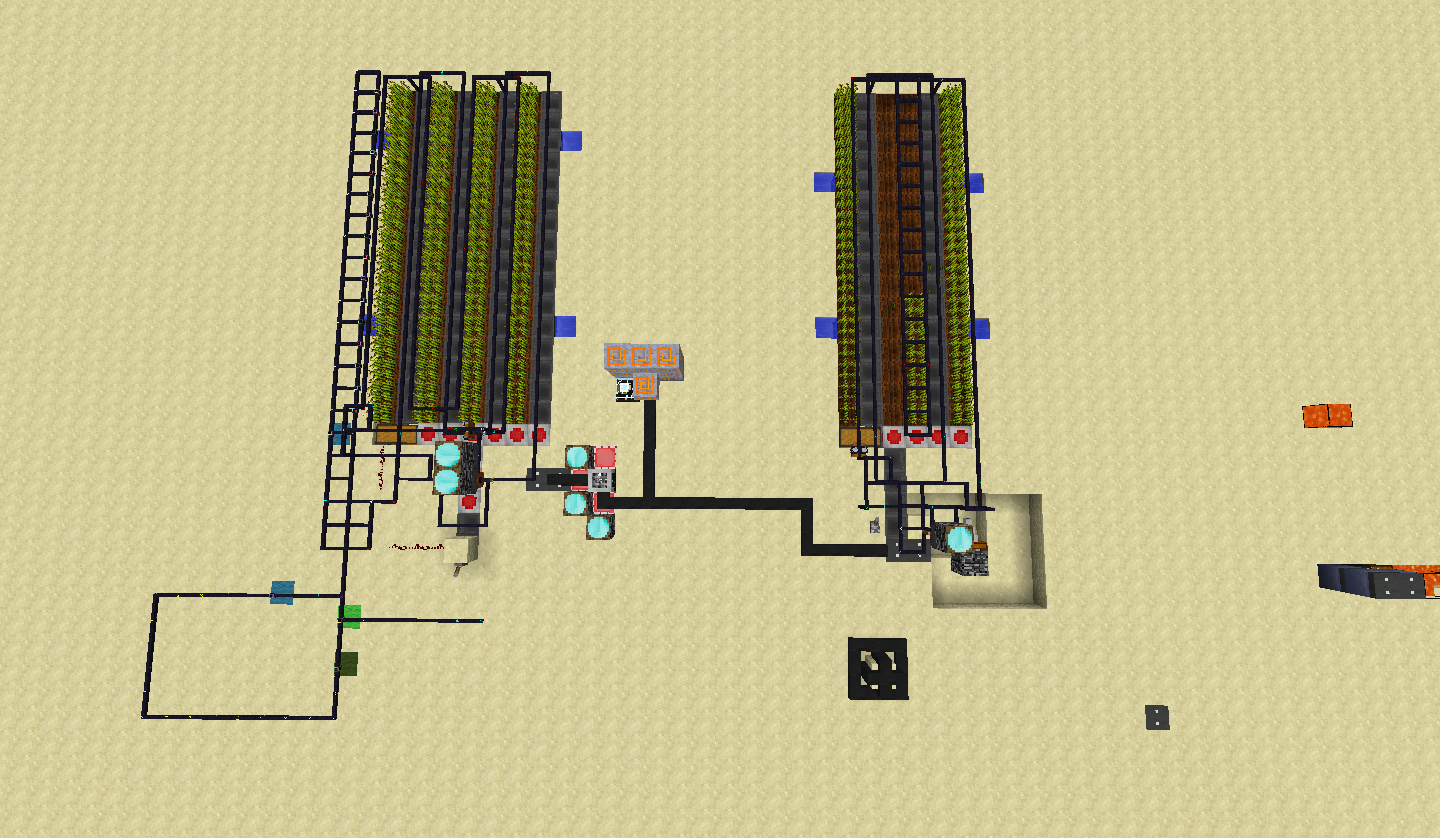
here is what you will see in this build:
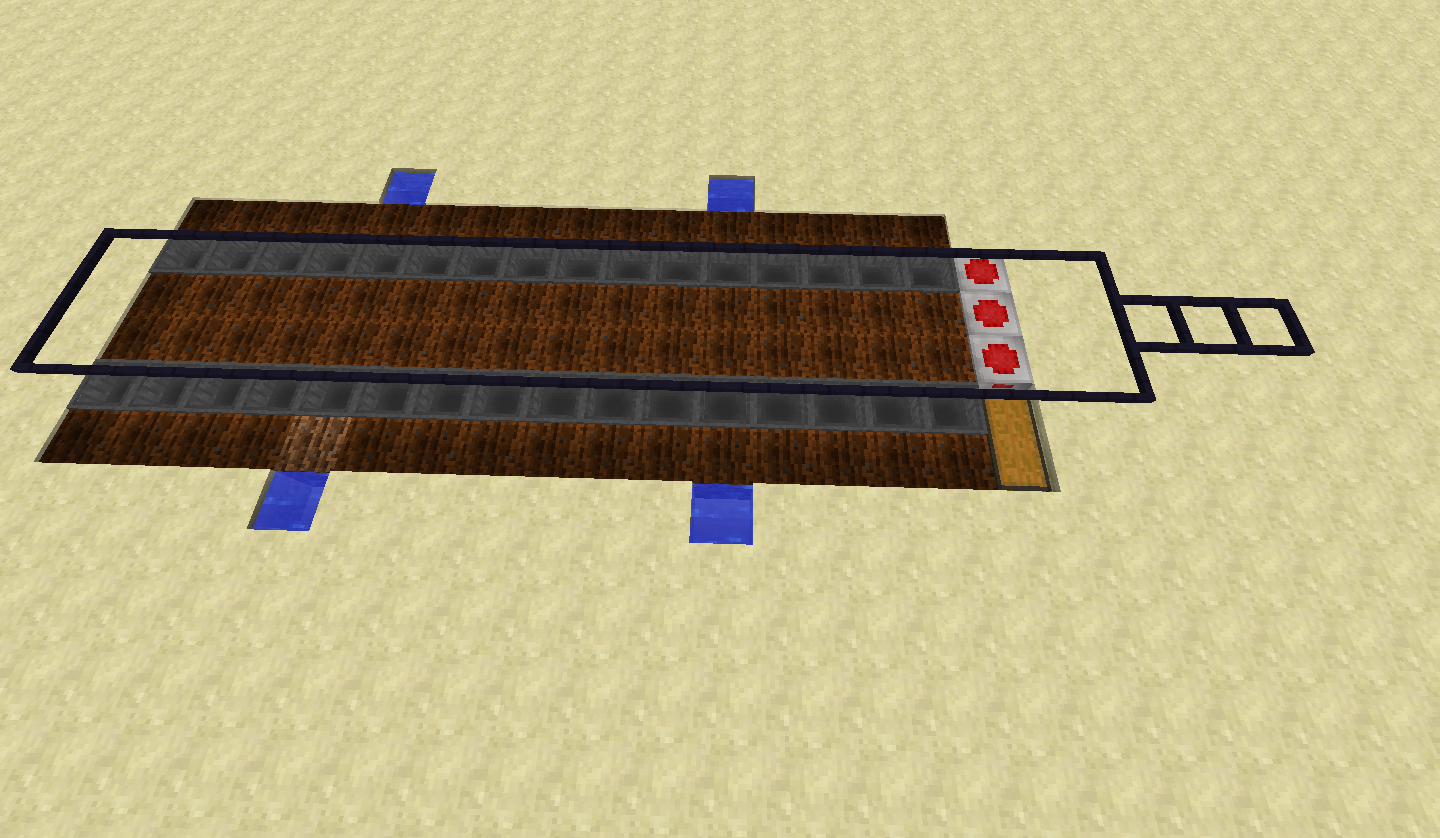
This setup especifically is based on processing lead and silver. I do admit it may still require some polishing but it works quite well for me.
Now onward to programming!
(Warning: I highly suggest you take a look at "http://purpleposeidon.github.io/FzDocs/html/" it is documentation on all machines and instructions by Neptunepink up-to-date with version 0.8.29, at least as I am writing this)

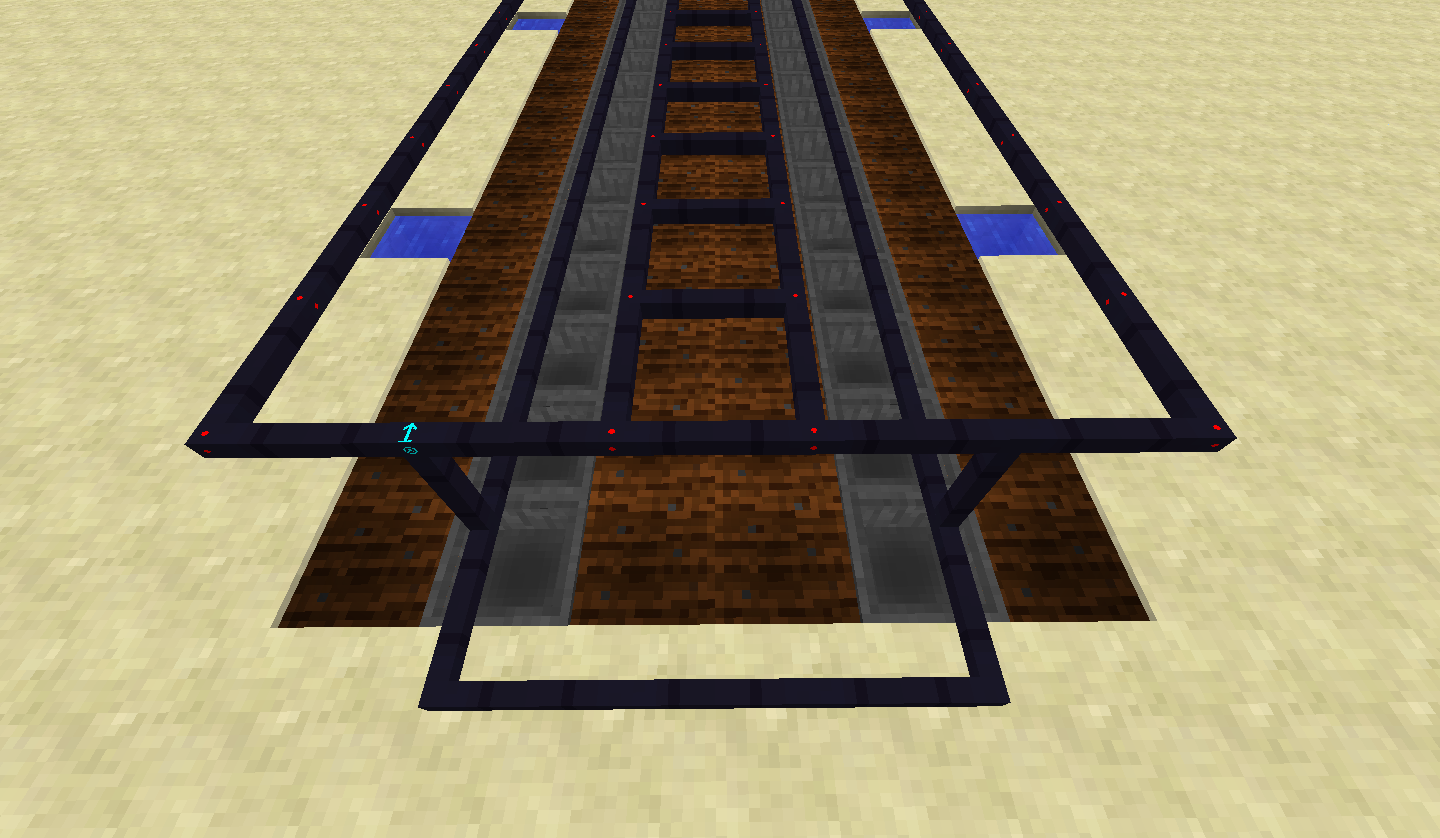
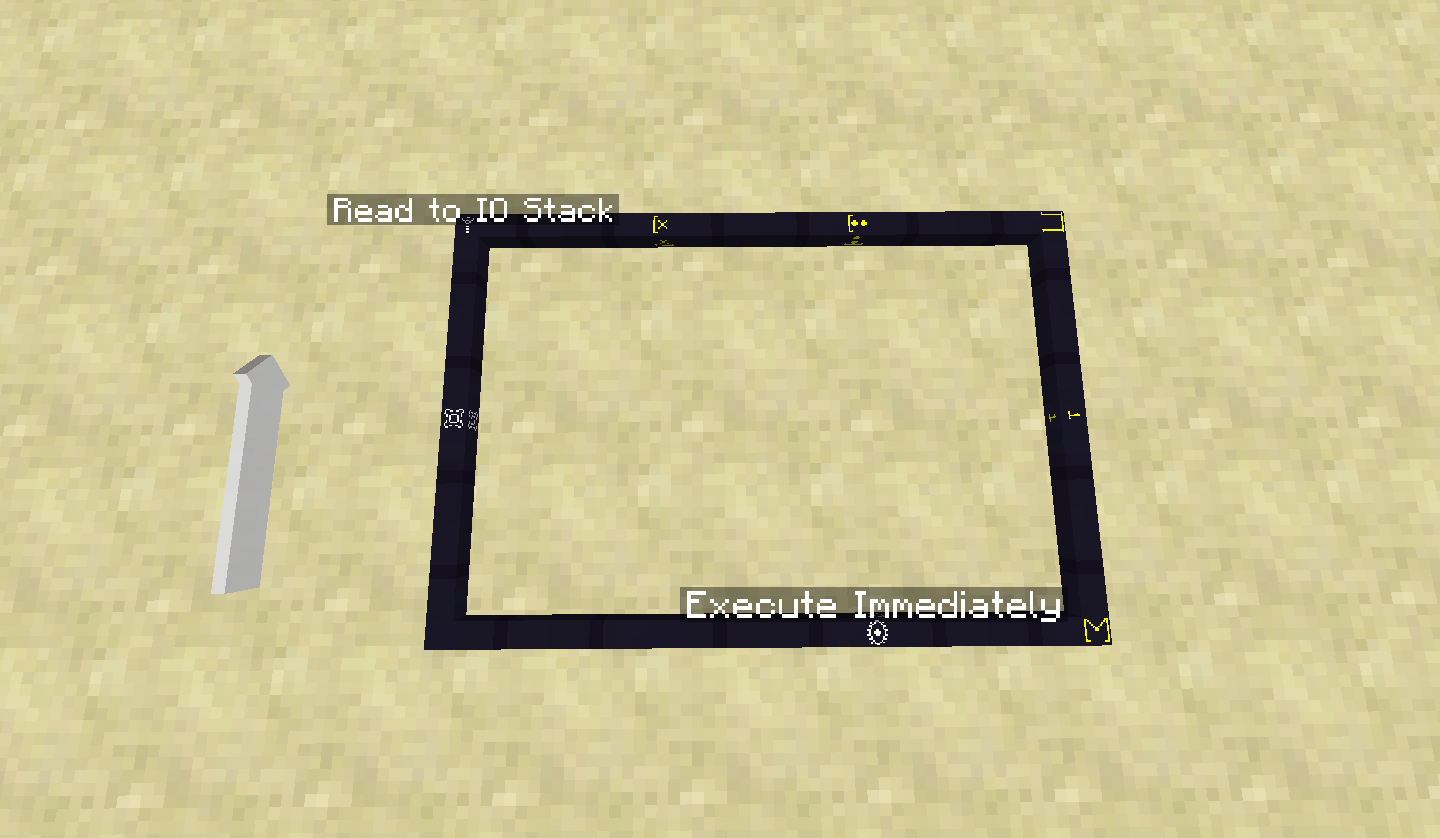
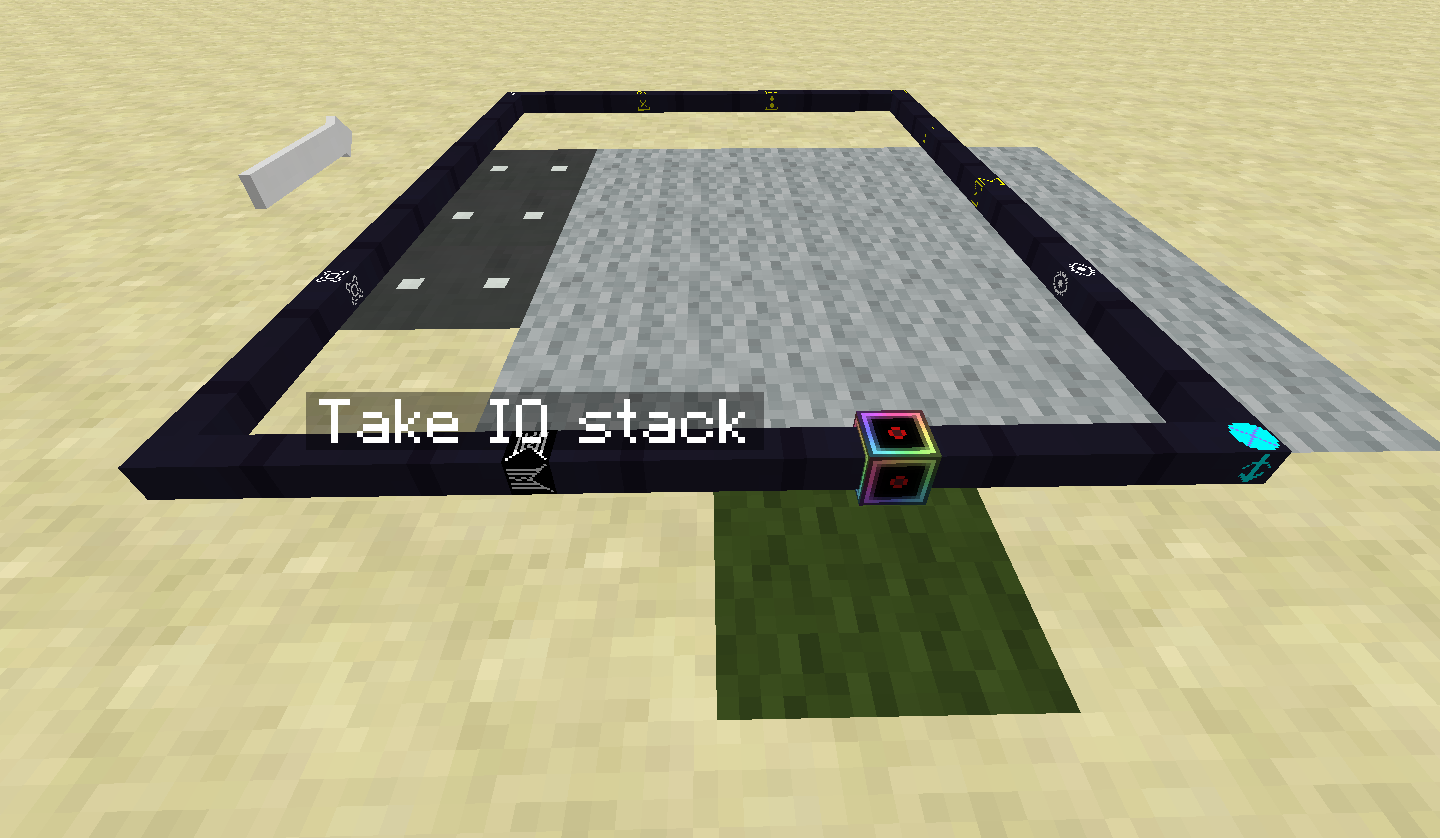
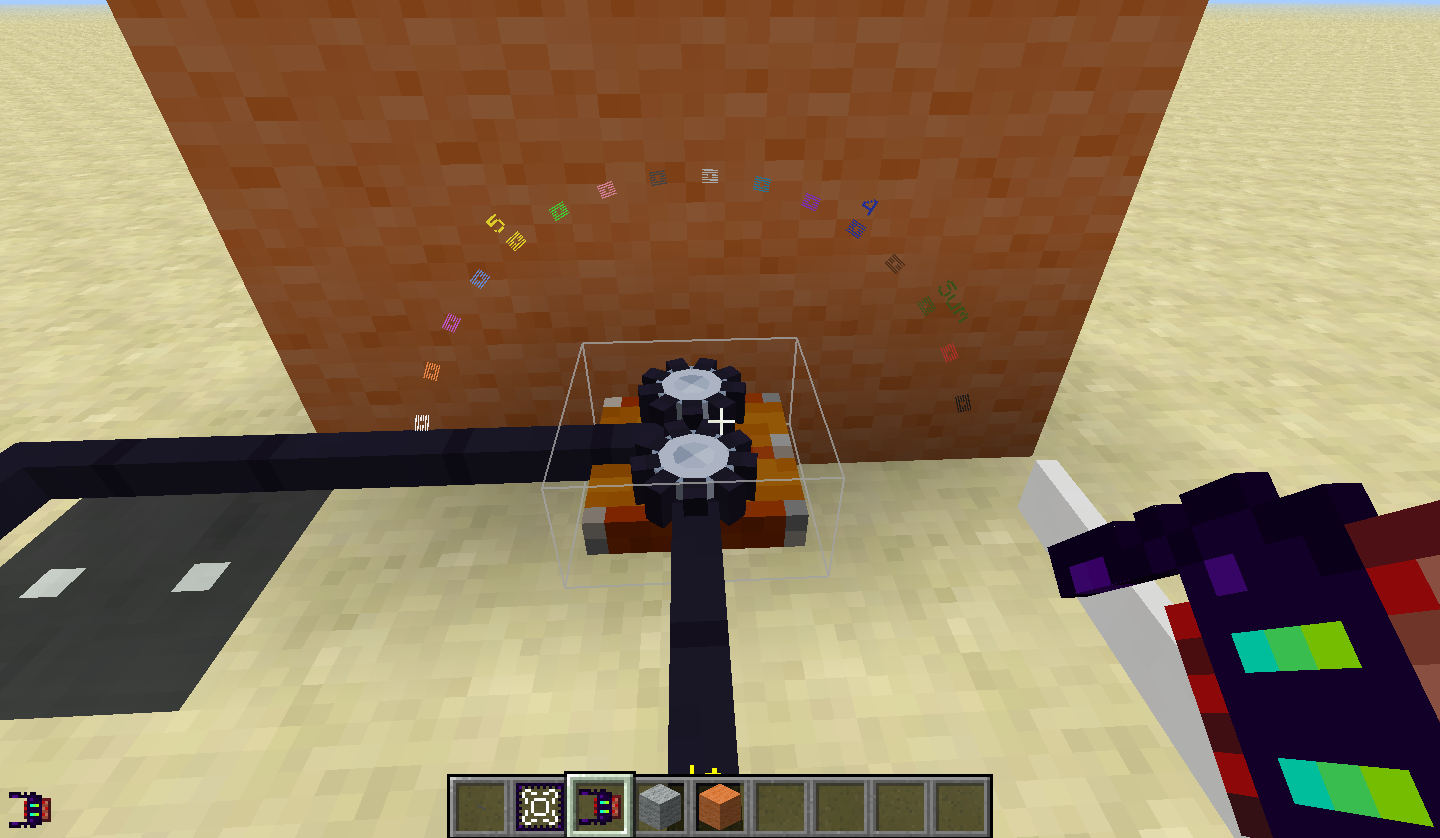
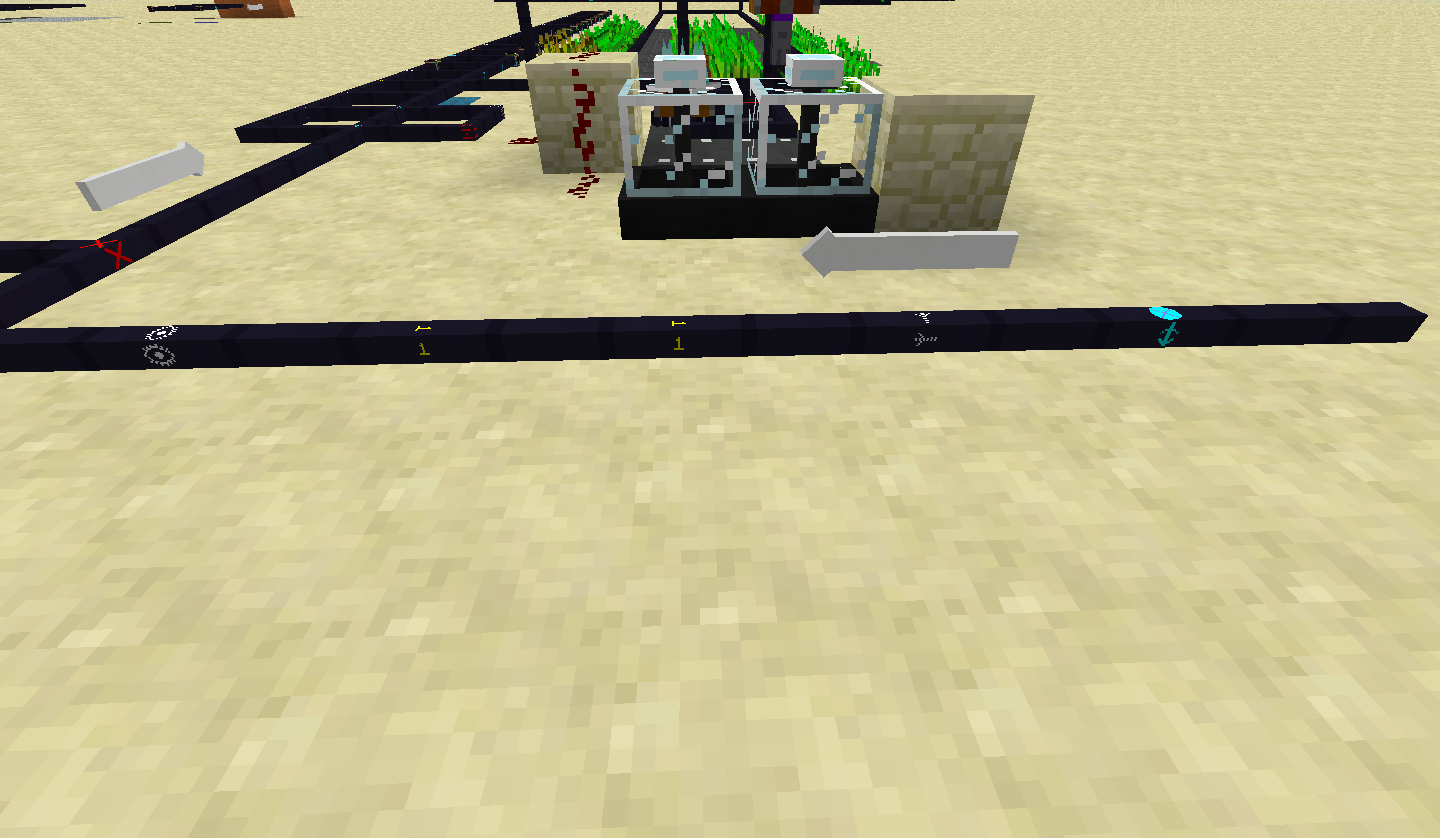
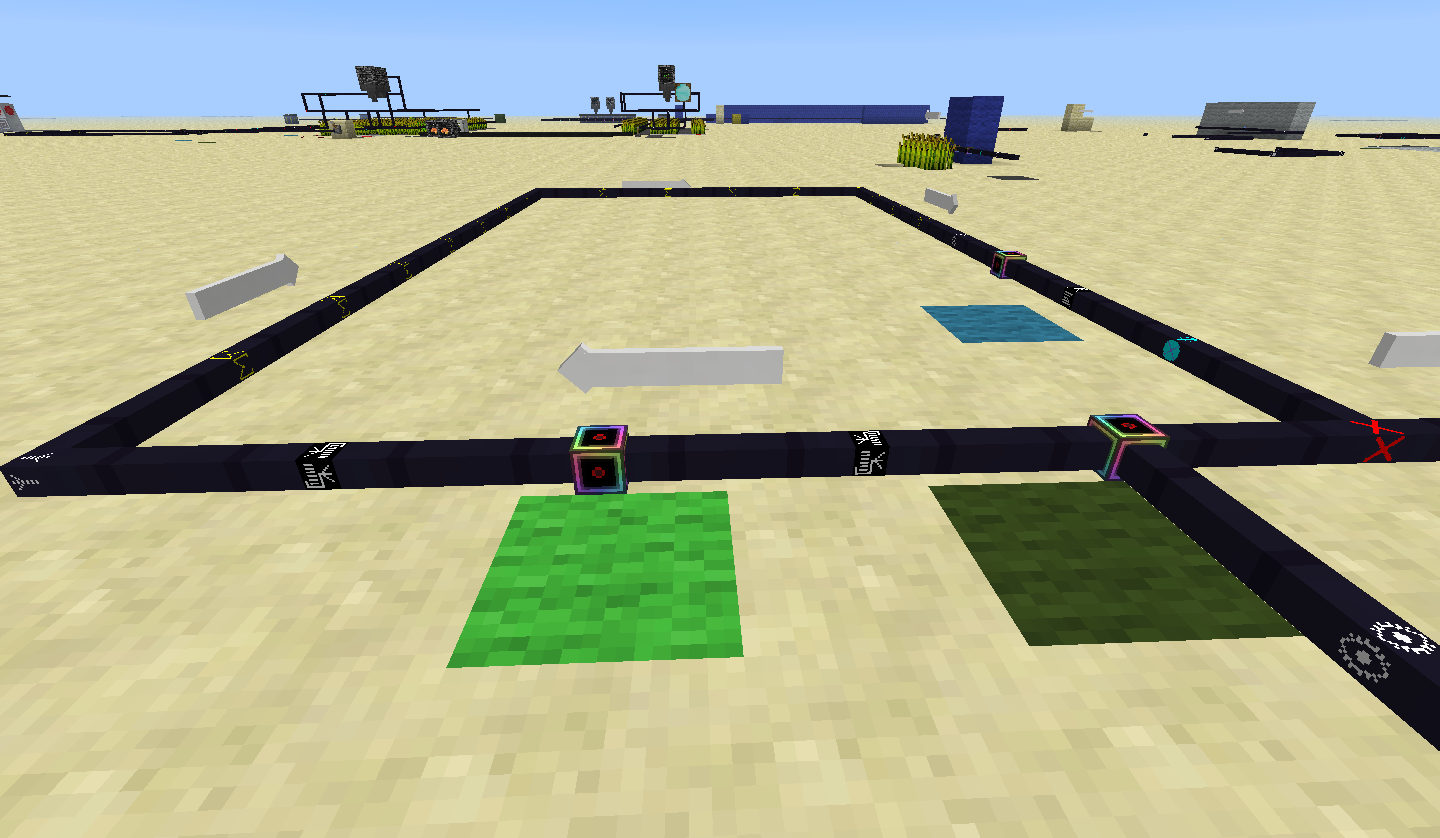
(in this picture: the chunks are loaded on the servo via the item shifter. Immedietly after starts the process of changing the slot where it put things.)
Let us say that this is the first run. The chunks will be loaded into the servo, compare will do nothing, jump - set to jump next - will make an error message, but that is only a message that says that there wasn't any information loaded on the servo that it could pull from for it to do its thing. It then will enter the set direction and go in that direction. From then on information will be loaded.
This should be a good time to explain that some instructions generate information and others use them. Generated information stays in a stack, which is made visible if you look at a servo with the logic matrix controller. A instruction that uses information will take the newest generated one for its purpose, and I mean literally take the information out of the stack.
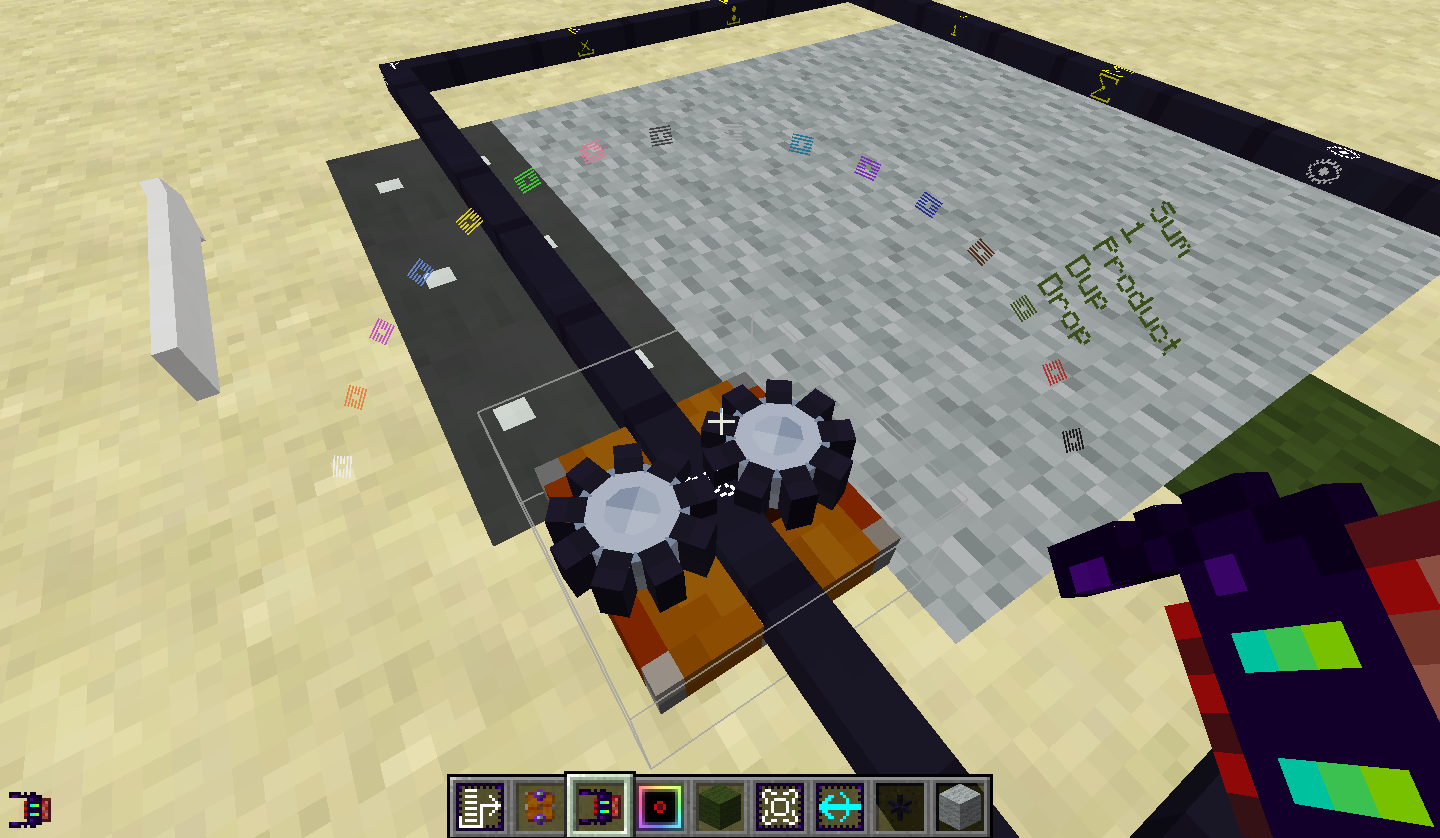
So, continuing: "1" wil add a number 1 to the stack, sum will try to add the last two information and generate a new one, in this case add 1 to nothing and you get 1. last on the line you have a duplicate function, which will duplicate that the newest information and add it again to the stack.
The entry control is there to make the servo prefer to go that way instead of the other. this instruction is on a diferent category which basically deals with movimentation of the servo.
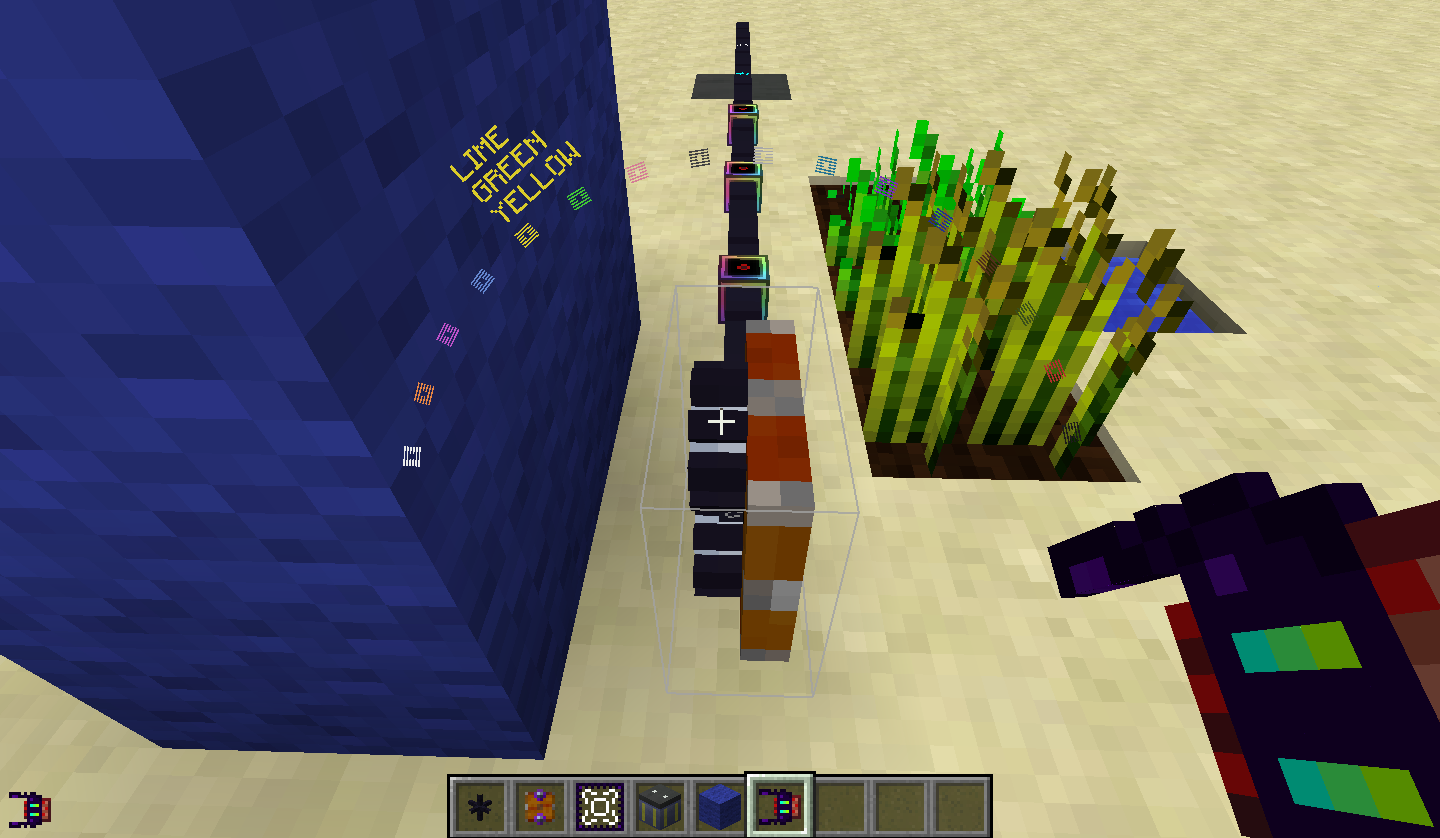
This part is easier to explain, I believe. after passing by the entry control the servo will go up and the point up instruction will make the direction of the socketed item face that direction.
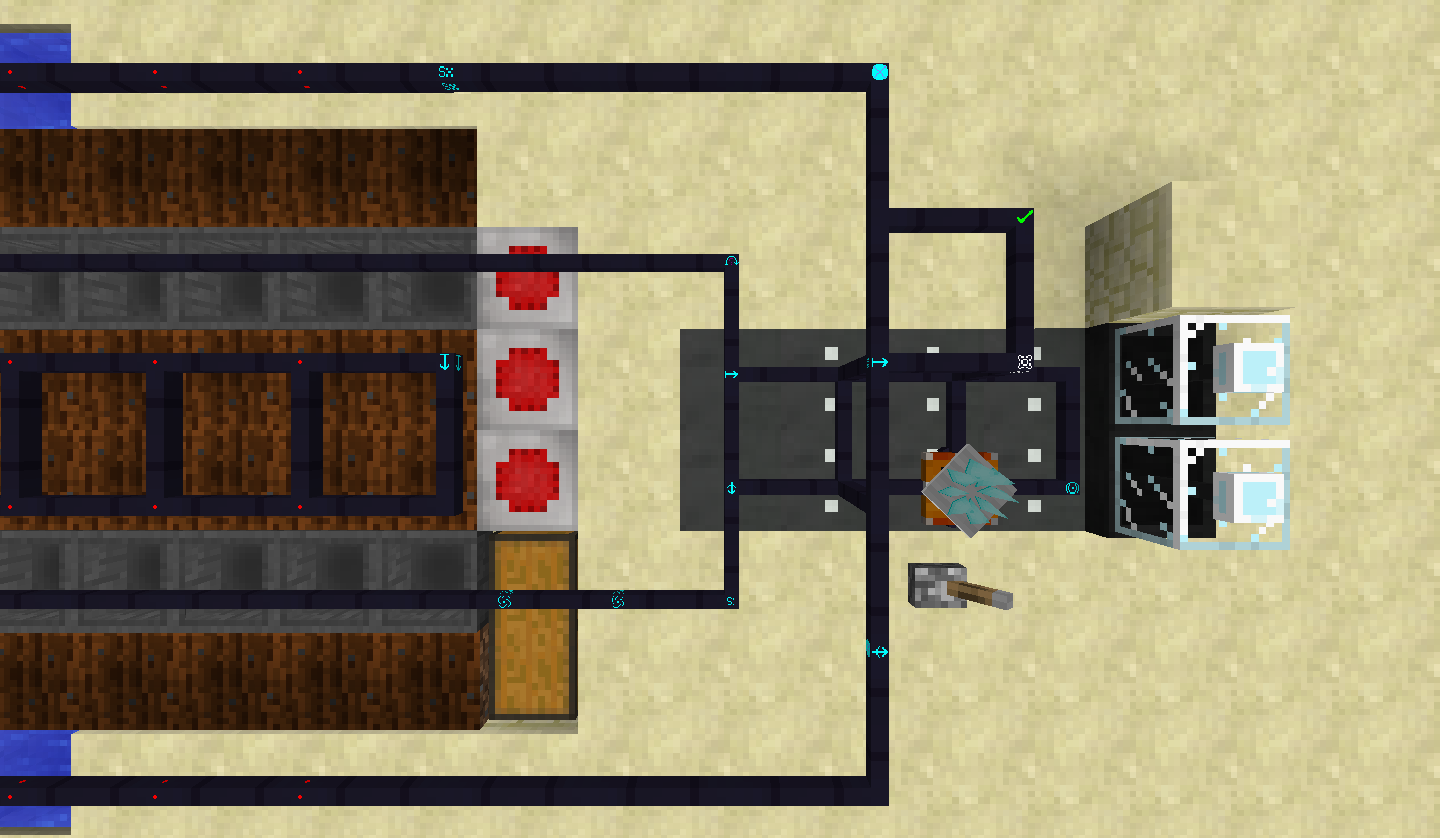
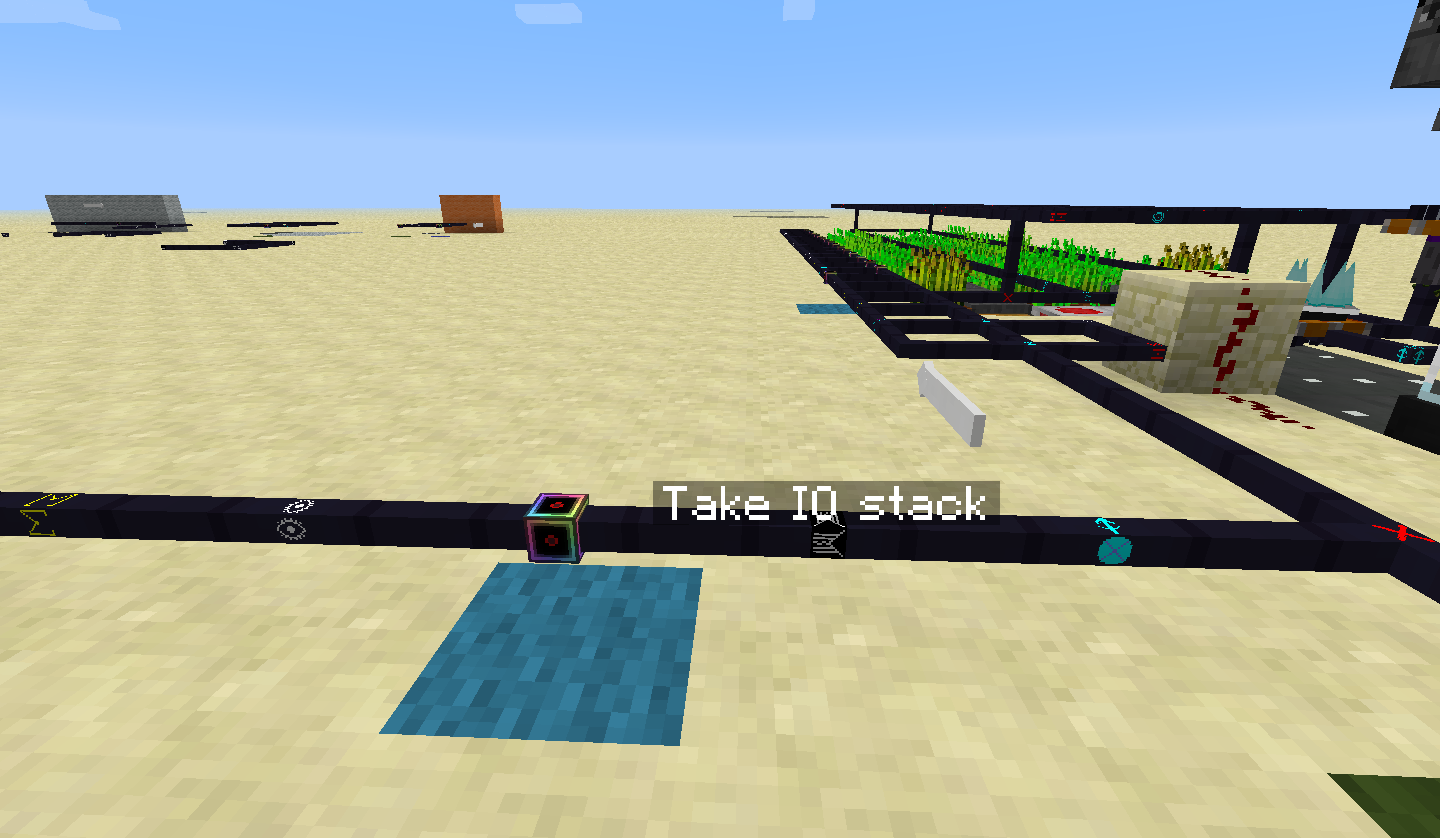
them you have the item shifter control (there is a picture of the gui of a item shifter below) set to change the targeted slot, it will pull one of the "1''s of the stack and make the item shifter target slot 1 of a inventory (I also cover how to set it up down below)
Last on this picture, the item shifter requires redstone pulse to work which is the job of all those socket controls (the red dots).
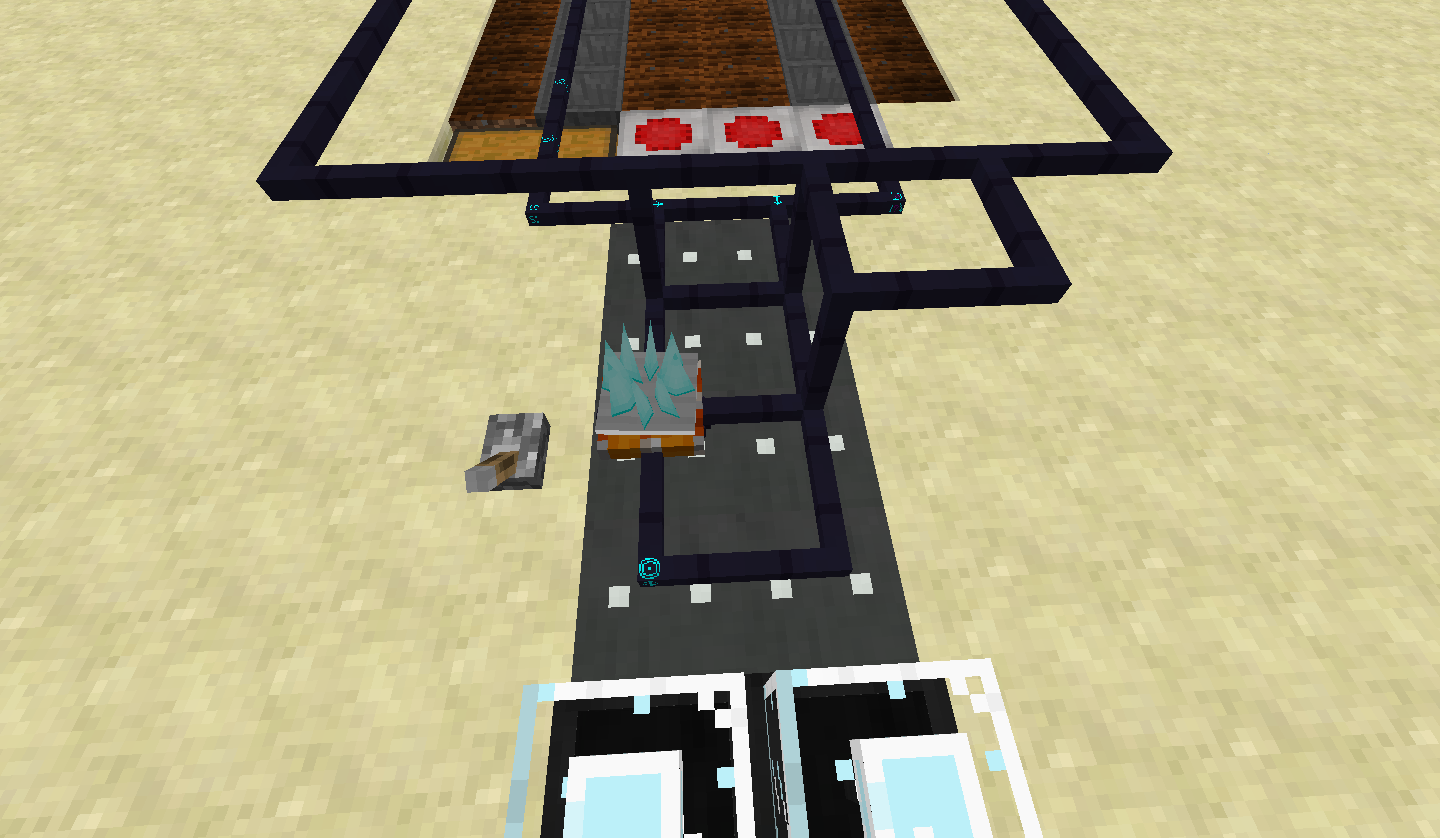
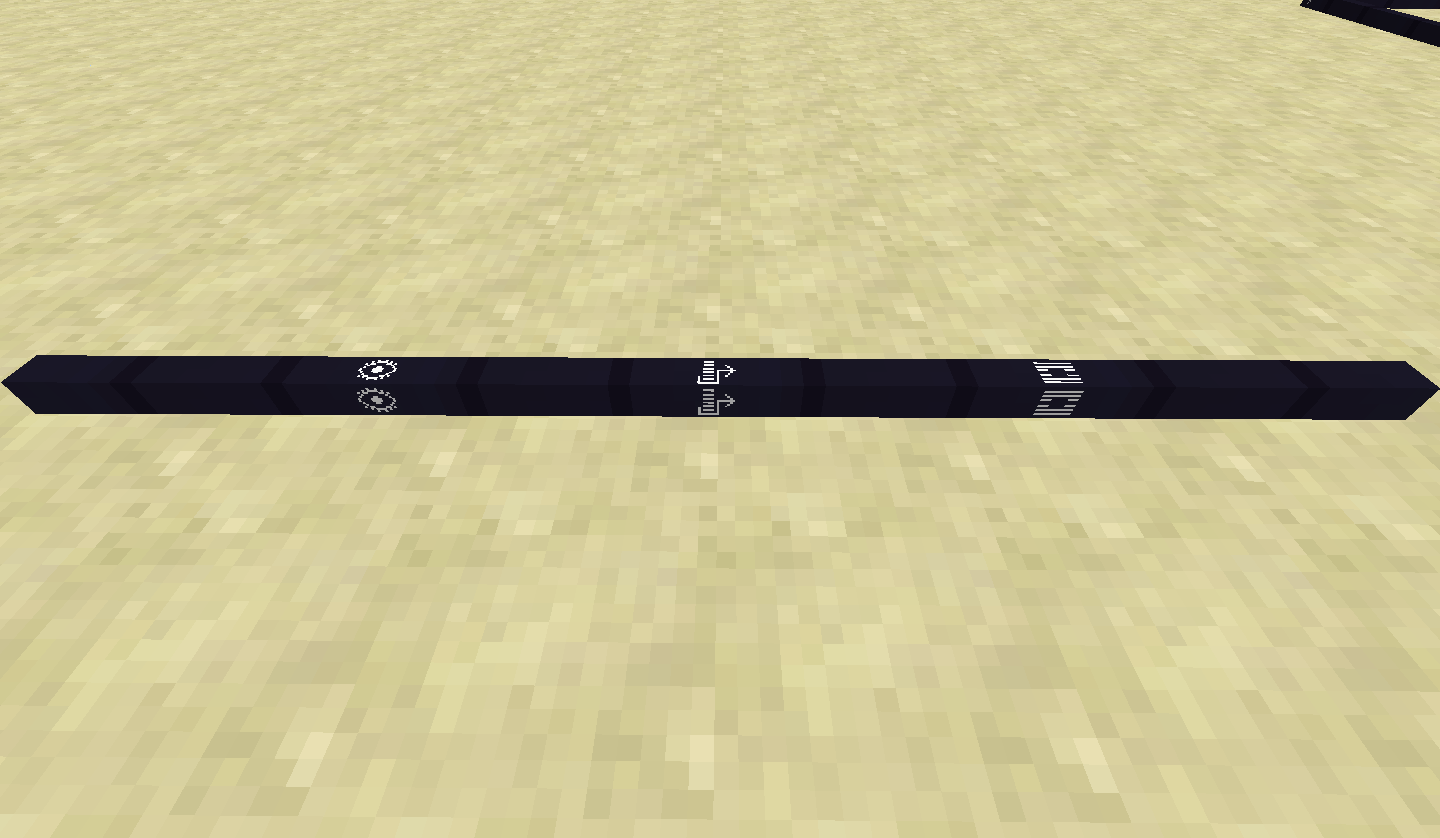
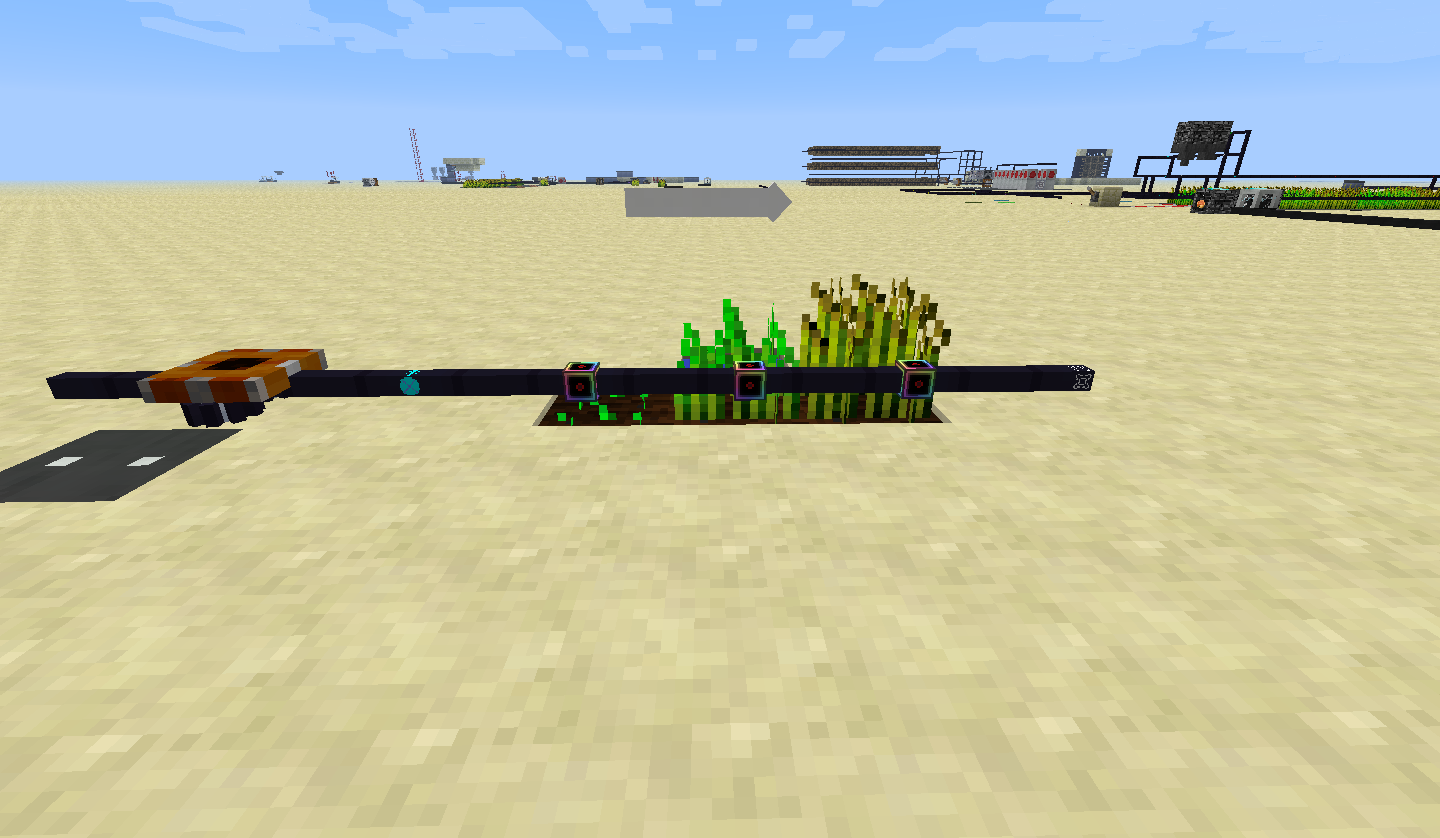
I also would like to take the oportunity to explain something. socket control will interact ONLY with the servo, as far as i'm aware, use a redstone pulse instruction for actual sockets ( like in the second picture).

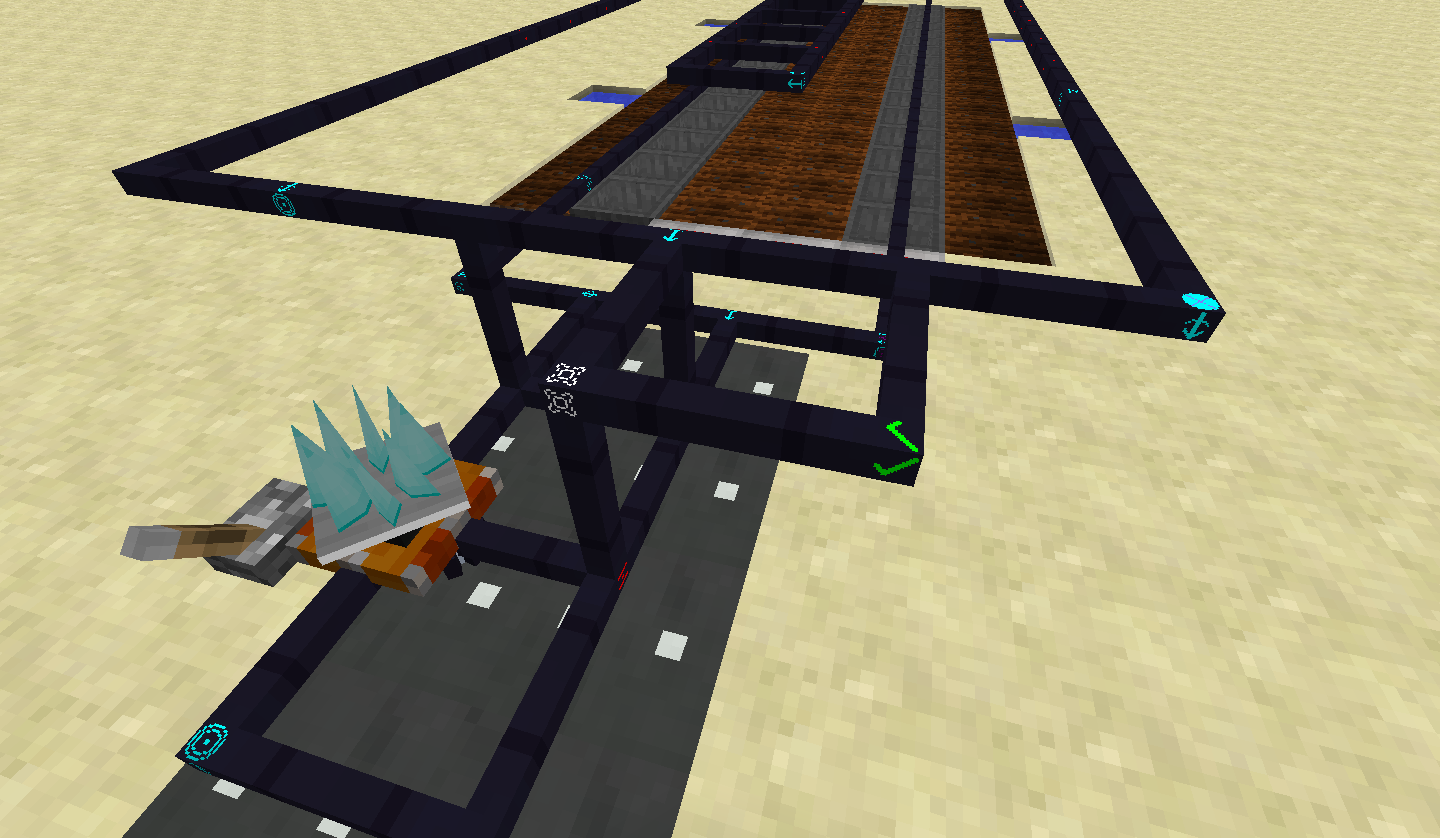
So after inputing the chunks into the crystallizers, we need to change the targeted slot on the shifter. This part here is basically preparation for reseting the targeted slot. As the servo goes round and round it will put chunks on slot 1, 2, 3 and 4, slot 5 should have the aqua regia, which means that the only slot left is slot 0.
Maybe this is a little confusing but let me get on with the first run example.
Prior to this part you most likely have only a number 1 on your stack. This part here will duplicate that number and right after, it will generate a number "4" on your stack.
As it continues its path it will start the loop.
The chunks will be loaded into the servo, compare as it is, will pull the last two information on the stack, and see if they are equal. After that it will generate a new type of information that is called boolean. There are two types of booleans: true or false. On the first run it will compare if 4 is equal to 1 and obviously will generate false.
Jump - set to jump next - will try to get a boolean from the stack. Note that instructions, as far as I know, will always check the last generated information on the stack, they will not look through the stack for the last inputed information they can use. If the boolean is true the servo will skip the next instruction, if not, it won't jump the next instruction.
In our first run example the boolean jump got was "false" which means it will NOT "jump" the direction set instruction, which is the next one, so it will go in that direction,"1" wil add a number 1 to the stack, sum will add the last two information, so 1+1=2, so 2 will be generated on the stack and go forth to be set as the target slot.
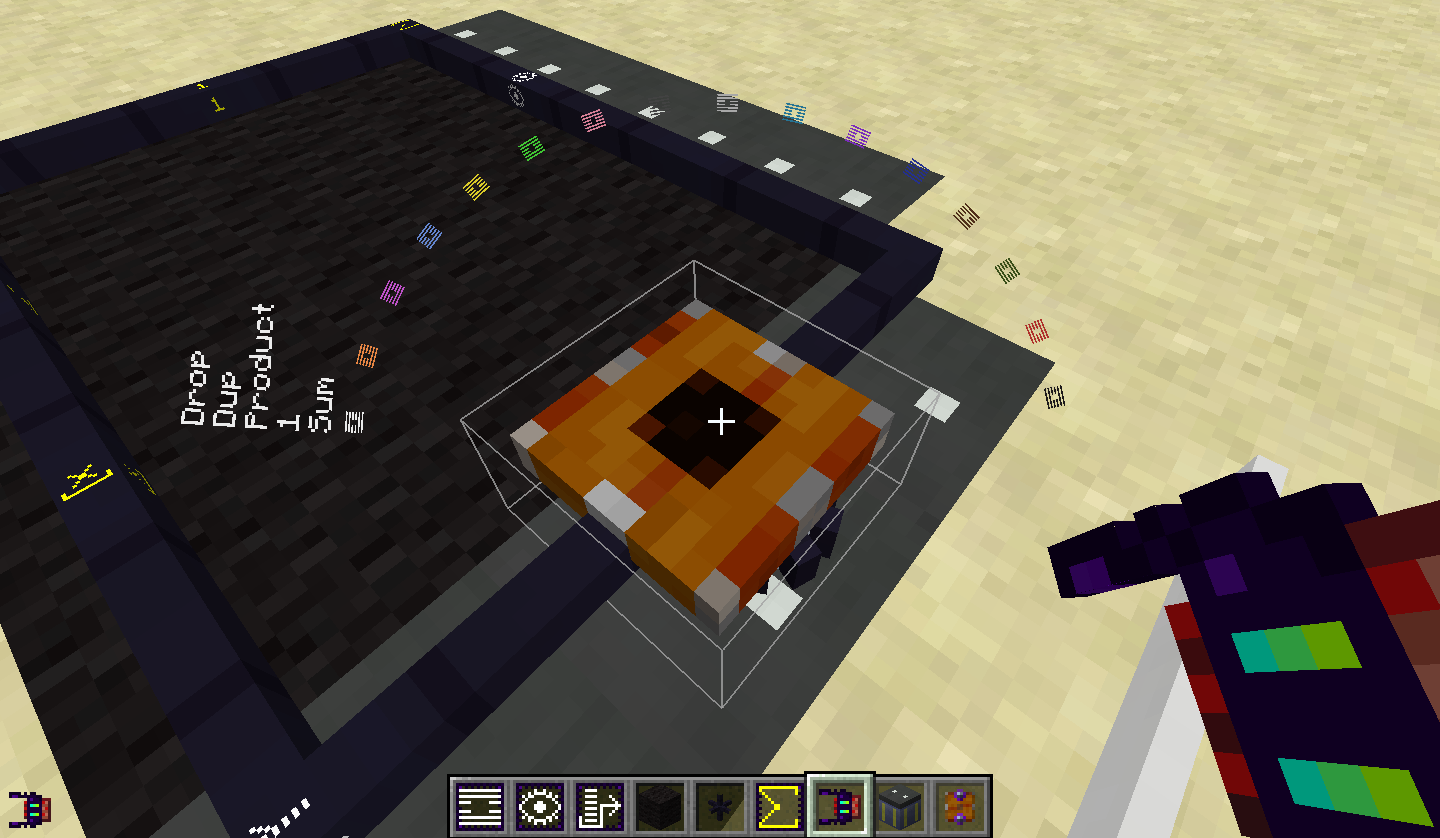
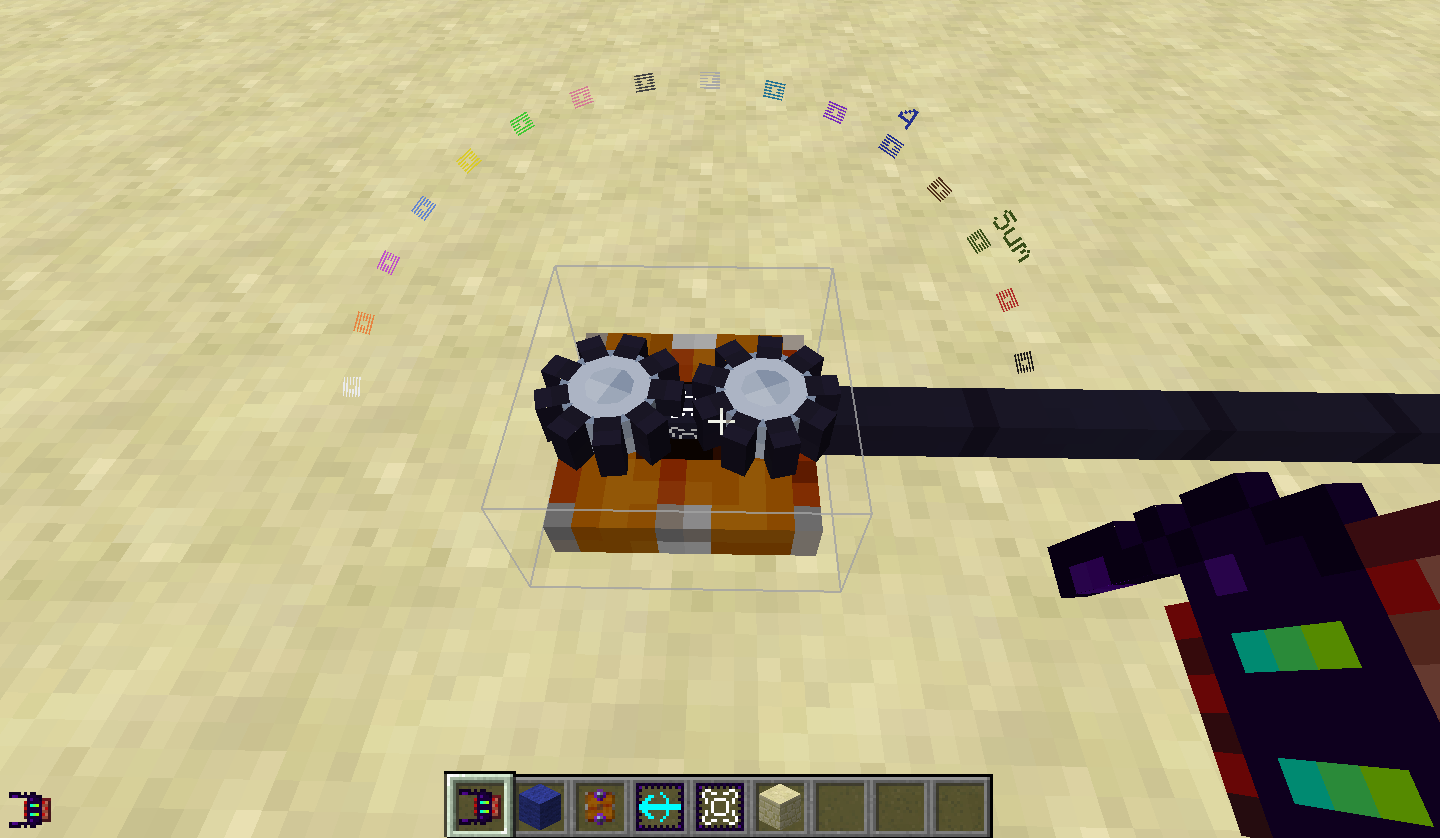
When compare generates the boolean "true", the direction set instruction will be skiped and the servo will take the longest route around. It will pass over the drop instruction, which drops the latest information from the stack, at this point there should have only be one information on the stack, and now that you dropped it, the stack should be clean. "0" will generate the number 0 on the stack, duplicate will duplicate it and then the slot 0 will be filled.
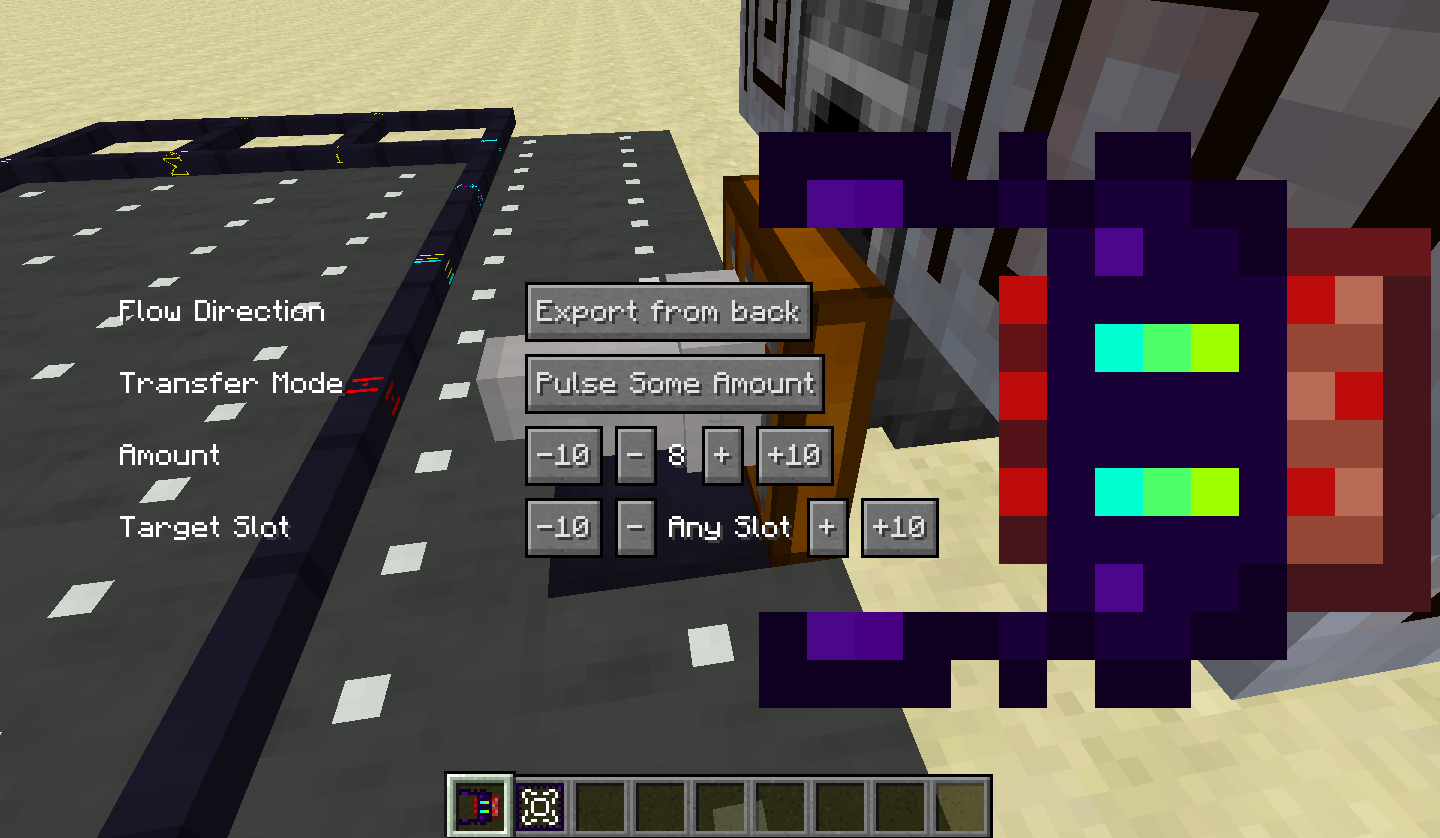
(For this build to work the best, please remember so set "Amount" to 8.)
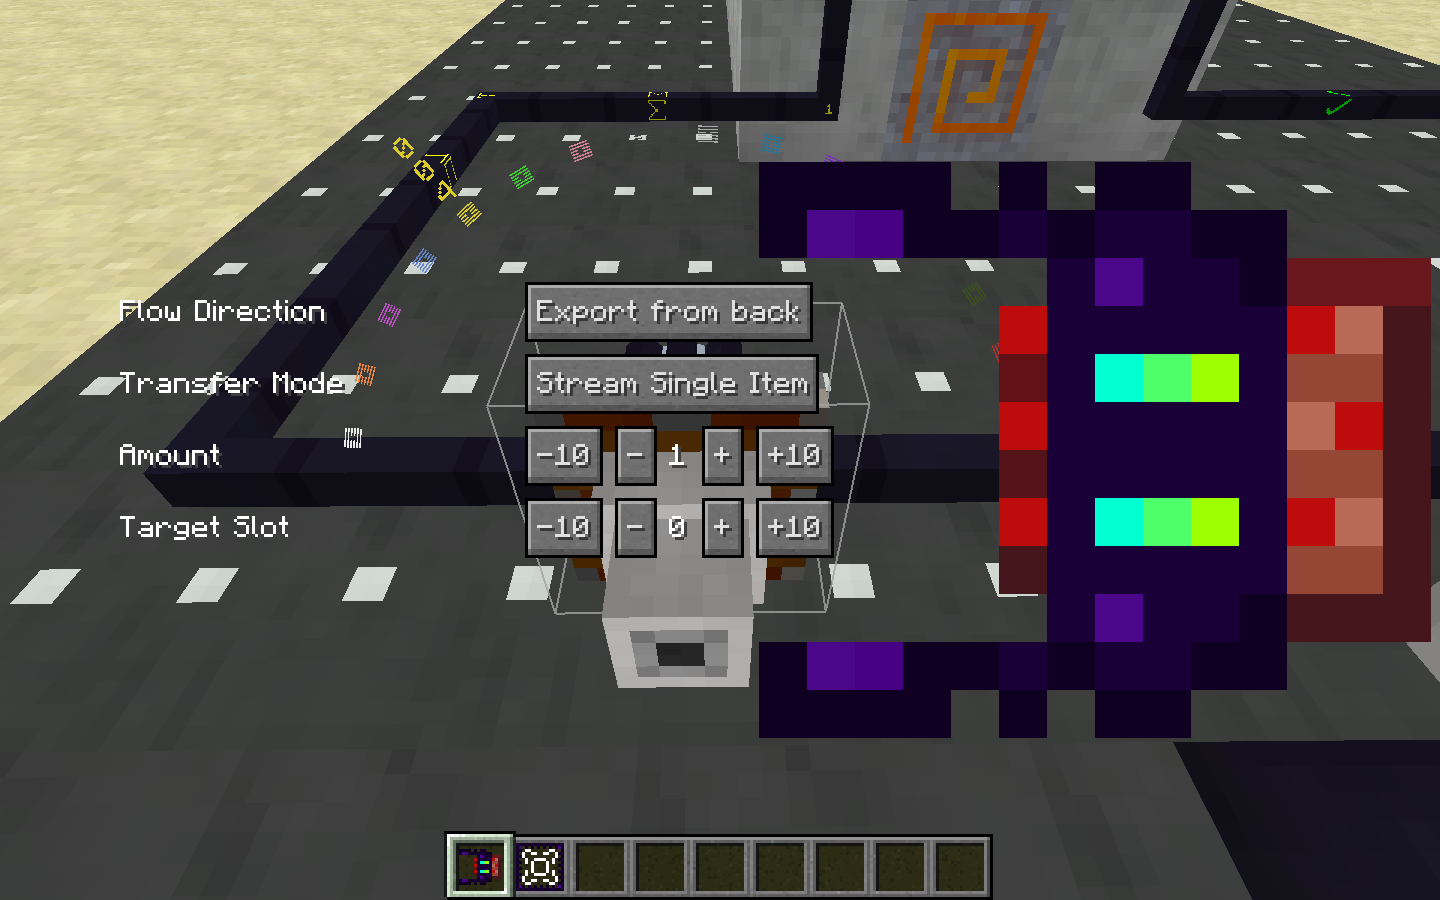
("Transfer Mode - stream single item" will make the amount unchangeable)
I will post pictures for how I am doing things, if you have any questions please post it here and I will do my best to answer then for you!
I will be posting some other builds with servos.
And finally, If you say I'm a giant noob and am doing it wrong, well... I am very interested on how you're doing it please post it down below.")
After being a creeper on foruns for some time, I have noticed that very few people make posts about the factorization servos. So after finally making a profile I actually start on a conversation about them which made me want to start this thread. Let's give them servos some love.
I'll start: here is how I automated Crystallizer's with only servos (I say "I" but I got the programming from somewhere else actually)
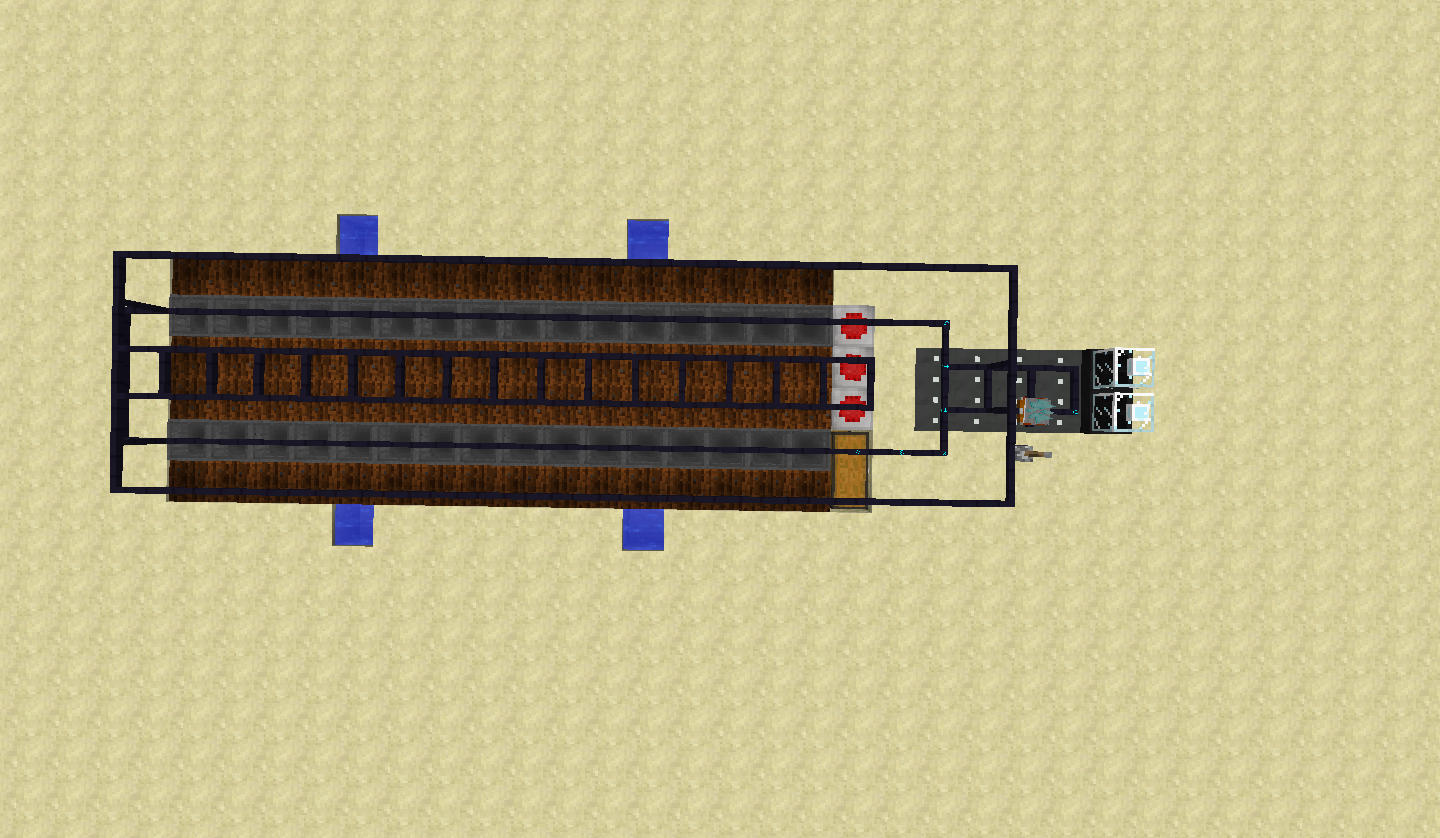
(The servo gets the chunks from the slag furnace - which is only decorative here - via a item shifter and goes its merry way in a anti-clockwise loop. It then inputs the chunks in the crystallizer through parasieves, which are basically filters that are saying "this kind of chunk can go here". There are hoppers below the criystallizers that are all pointing into the last two parasieves on the chest. Parasieves also act as extended acess to a inventory.)
here is what you will see in this build:
- 16 crystallizers
- 18 parasieves
- 17 hoppers - taking things out of the crystallyzers and the slag furnace
- a bunch o servo rails
- a socket and a servo
- two item shifters
- 16 aqua regia put on slot 5 of the crystallizer (sorry, forgot picture)
- Instructions for the servo:
- Integer;
- Sum;
- Product;
- Compare;
- Duplicate;
- item shifter control;
- socket control;
- drop;
- redstone pulse;
- jump;
- entry control; and
- point top.
This setup especifically is based on processing lead and silver. I do admit it may still require some polishing but it works quite well for me.
Now onward to programming!
(Warning: I highly suggest you take a look at "http://purpleposeidon.github.io/FzDocs/html/" it is documentation on all machines and instructions by Neptunepink up-to-date with version 0.8.29, at least as I am writing this)
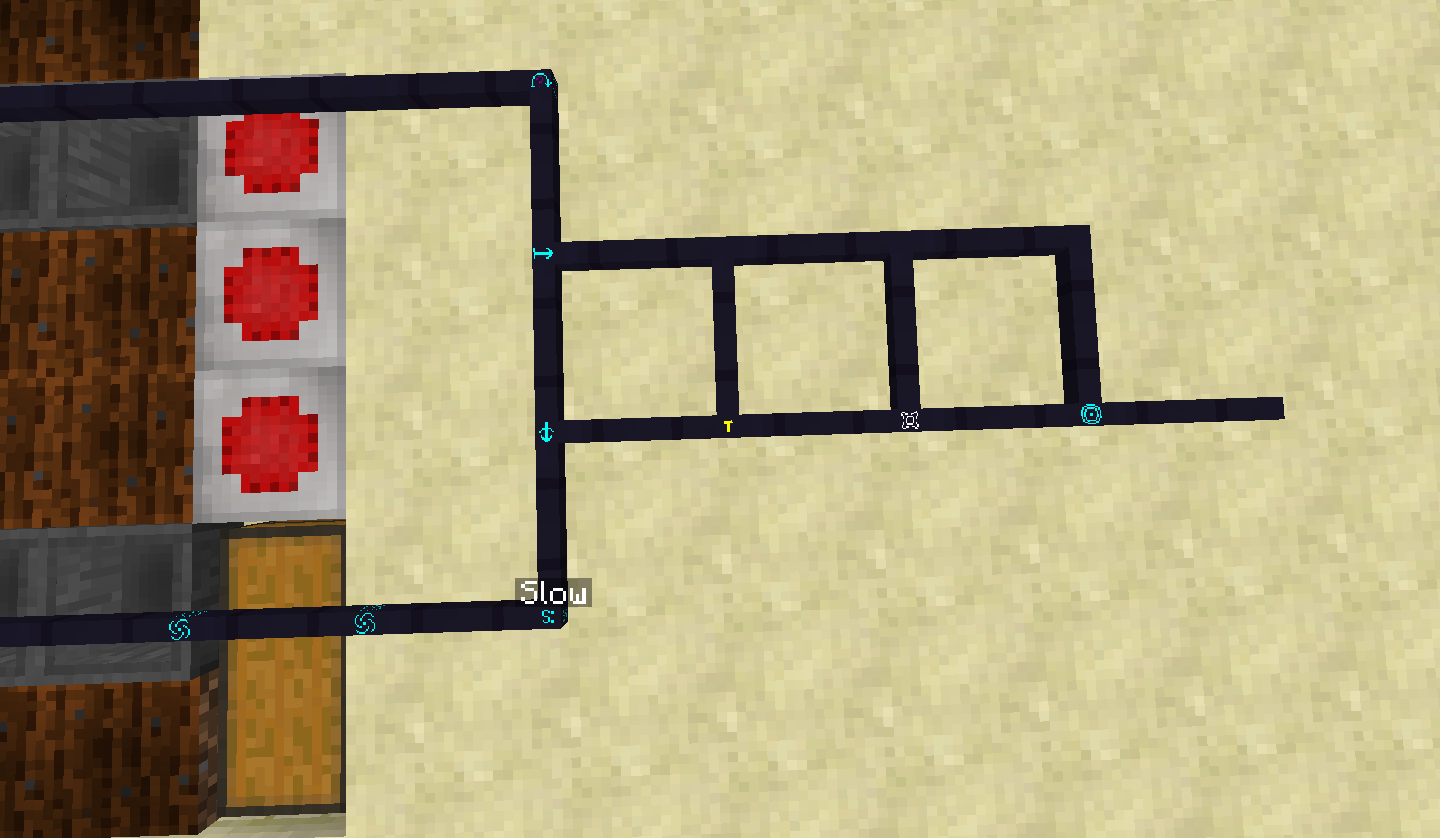
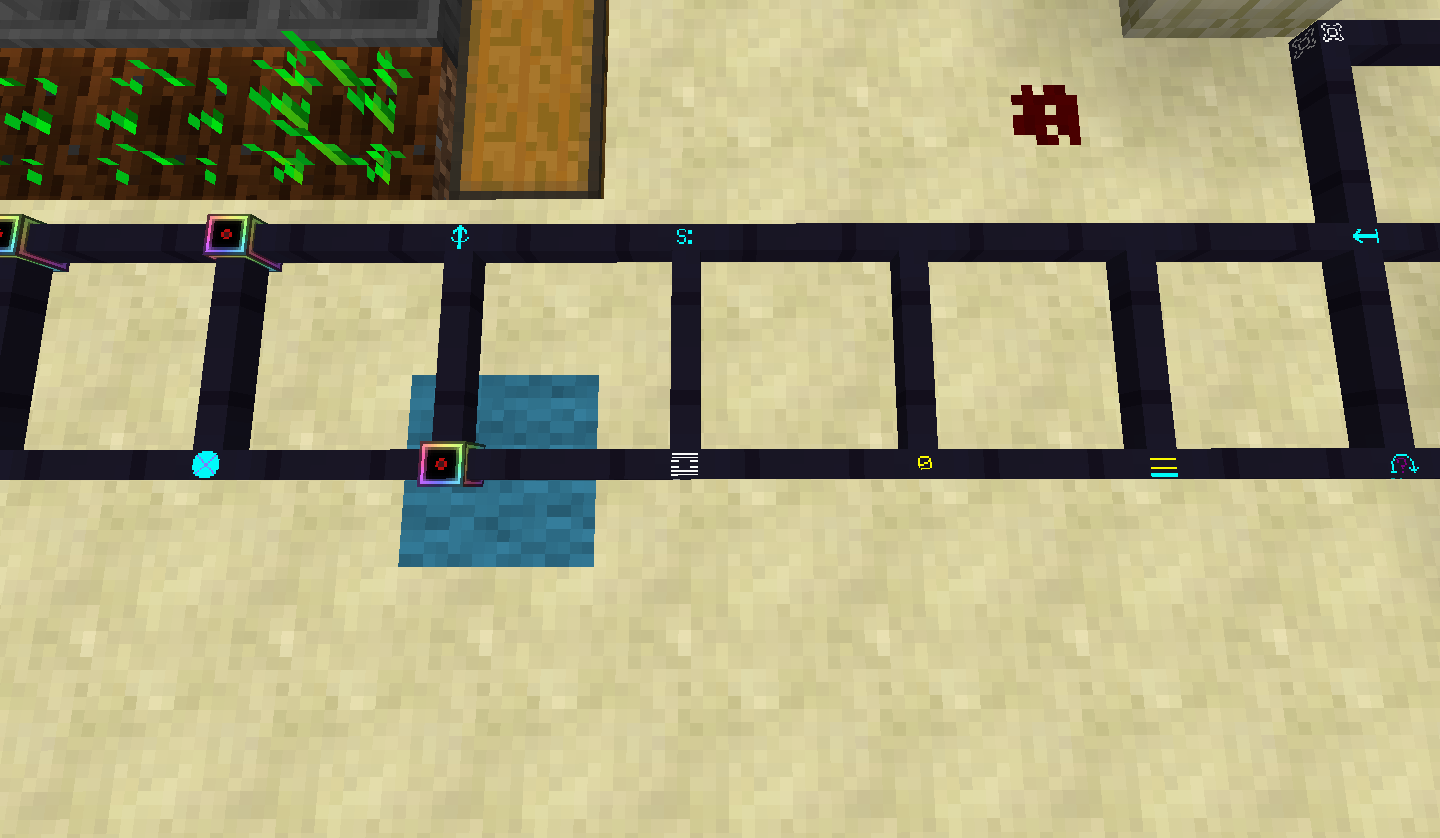
(in this picture: the chunks are loaded on the servo via the item shifter. Immedietly after starts the process of changing the slot where it put things.)
Let us say that this is the first run. The chunks will be loaded into the servo, compare will do nothing, jump - set to jump next - will make an error message, but that is only a message that says that there wasn't any information loaded on the servo that it could pull from for it to do its thing. It then will enter the set direction and go in that direction. From then on information will be loaded.
This should be a good time to explain that some instructions generate information and others use them. Generated information stays in a stack, which is made visible if you look at a servo with the logic matrix controller. A instruction that uses information will take the newest generated one for its purpose, and I mean literally take the information out of the stack.
So, continuing: "1" wil add a number 1 to the stack, sum will try to add the last two information and generate a new one, in this case add 1 to nothing and you get 1. last on the line you have a duplicate function, which will duplicate that the newest information and add it again to the stack.
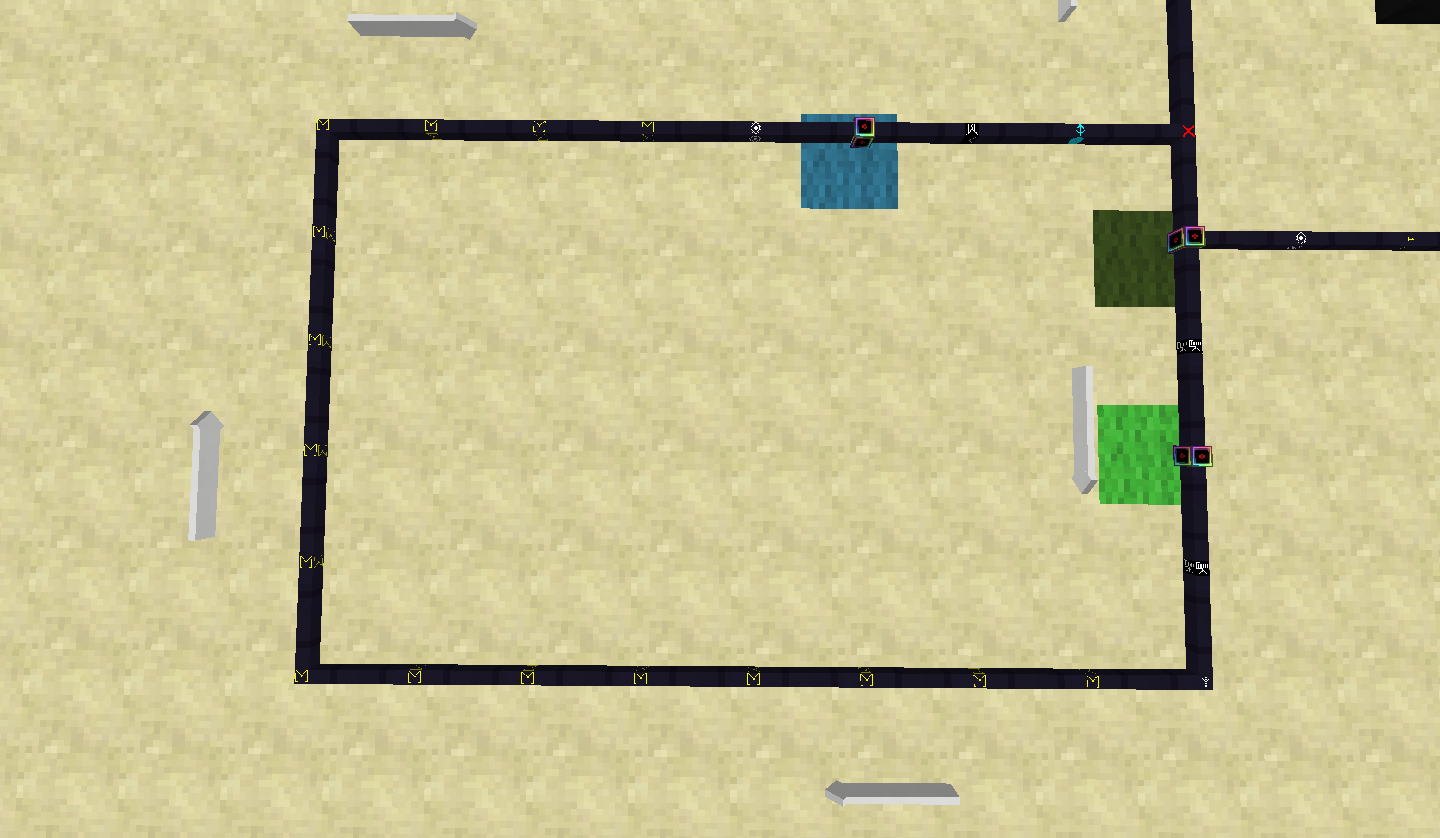
The entry control is there to make the servo prefer to go that way instead of the other. this instruction is on a diferent category which basically deals with movimentation of the servo.
This part is easier to explain, I believe. after passing by the entry control the servo will go up and the point up instruction will make the direction of the socketed item face that direction.
them you have the item shifter control (there is a picture of the gui of a item shifter below) set to change the targeted slot, it will pull one of the "1''s of the stack and make the item shifter target slot 1 of a inventory (I also cover how to set it up down below)
Last on this picture, the item shifter requires redstone pulse to work which is the job of all those socket controls (the red dots).
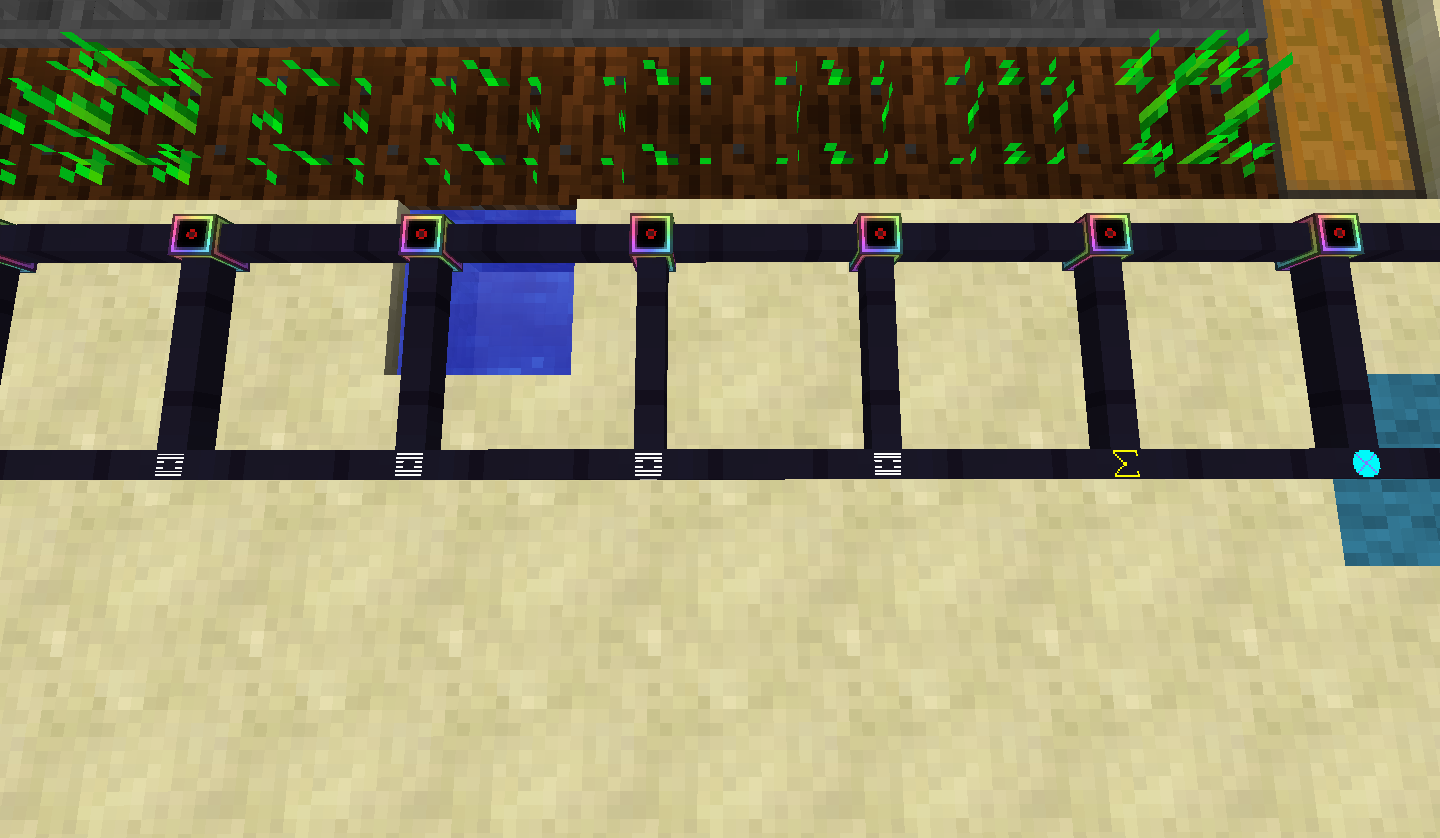
I also would like to take the oportunity to explain something. socket control will interact ONLY with the servo, as far as i'm aware, use a redstone pulse instruction for actual sockets ( like in the second picture).
So after inputing the chunks into the crystallizers, we need to change the targeted slot on the shifter. This part here is basically preparation for reseting the targeted slot. As the servo goes round and round it will put chunks on slot 1, 2, 3 and 4, slot 5 should have the aqua regia, which means that the only slot left is slot 0.
Maybe this is a little confusing but let me get on with the first run example.
Prior to this part you most likely have only a number 1 on your stack. This part here will duplicate that number and right after, it will generate a number "4" on your stack.
As it continues its path it will start the loop.
The chunks will be loaded into the servo, compare as it is, will pull the last two information on the stack, and see if they are equal. After that it will generate a new type of information that is called boolean. There are two types of booleans: true or false. On the first run it will compare if 4 is equal to 1 and obviously will generate false.
Jump - set to jump next - will try to get a boolean from the stack. Note that instructions, as far as I know, will always check the last generated information on the stack, they will not look through the stack for the last inputed information they can use. If the boolean is true the servo will skip the next instruction, if not, it won't jump the next instruction.
In our first run example the boolean jump got was "false" which means it will NOT "jump" the direction set instruction, which is the next one, so it will go in that direction,"1" wil add a number 1 to the stack, sum will add the last two information, so 1+1=2, so 2 will be generated on the stack and go forth to be set as the target slot.
When compare generates the boolean "true", the direction set instruction will be skiped and the servo will take the longest route around. It will pass over the drop instruction, which drops the latest information from the stack, at this point there should have only be one information on the stack, and now that you dropped it, the stack should be clean. "0" will generate the number 0 on the stack, duplicate will duplicate it and then the slot 0 will be filled.
(For this build to work the best, please remember so set "Amount" to 8.)
("Transfer Mode - stream single item" will make the amount unchangeable)
I will post pictures for how I am doing things, if you have any questions please post it here and I will do my best to answer then for you!
I will be posting some other builds with servos.
And finally, If you say I'm a giant noob and am doing it wrong, well... I am very interested on how you're doing it please post it down below.
Last edited: